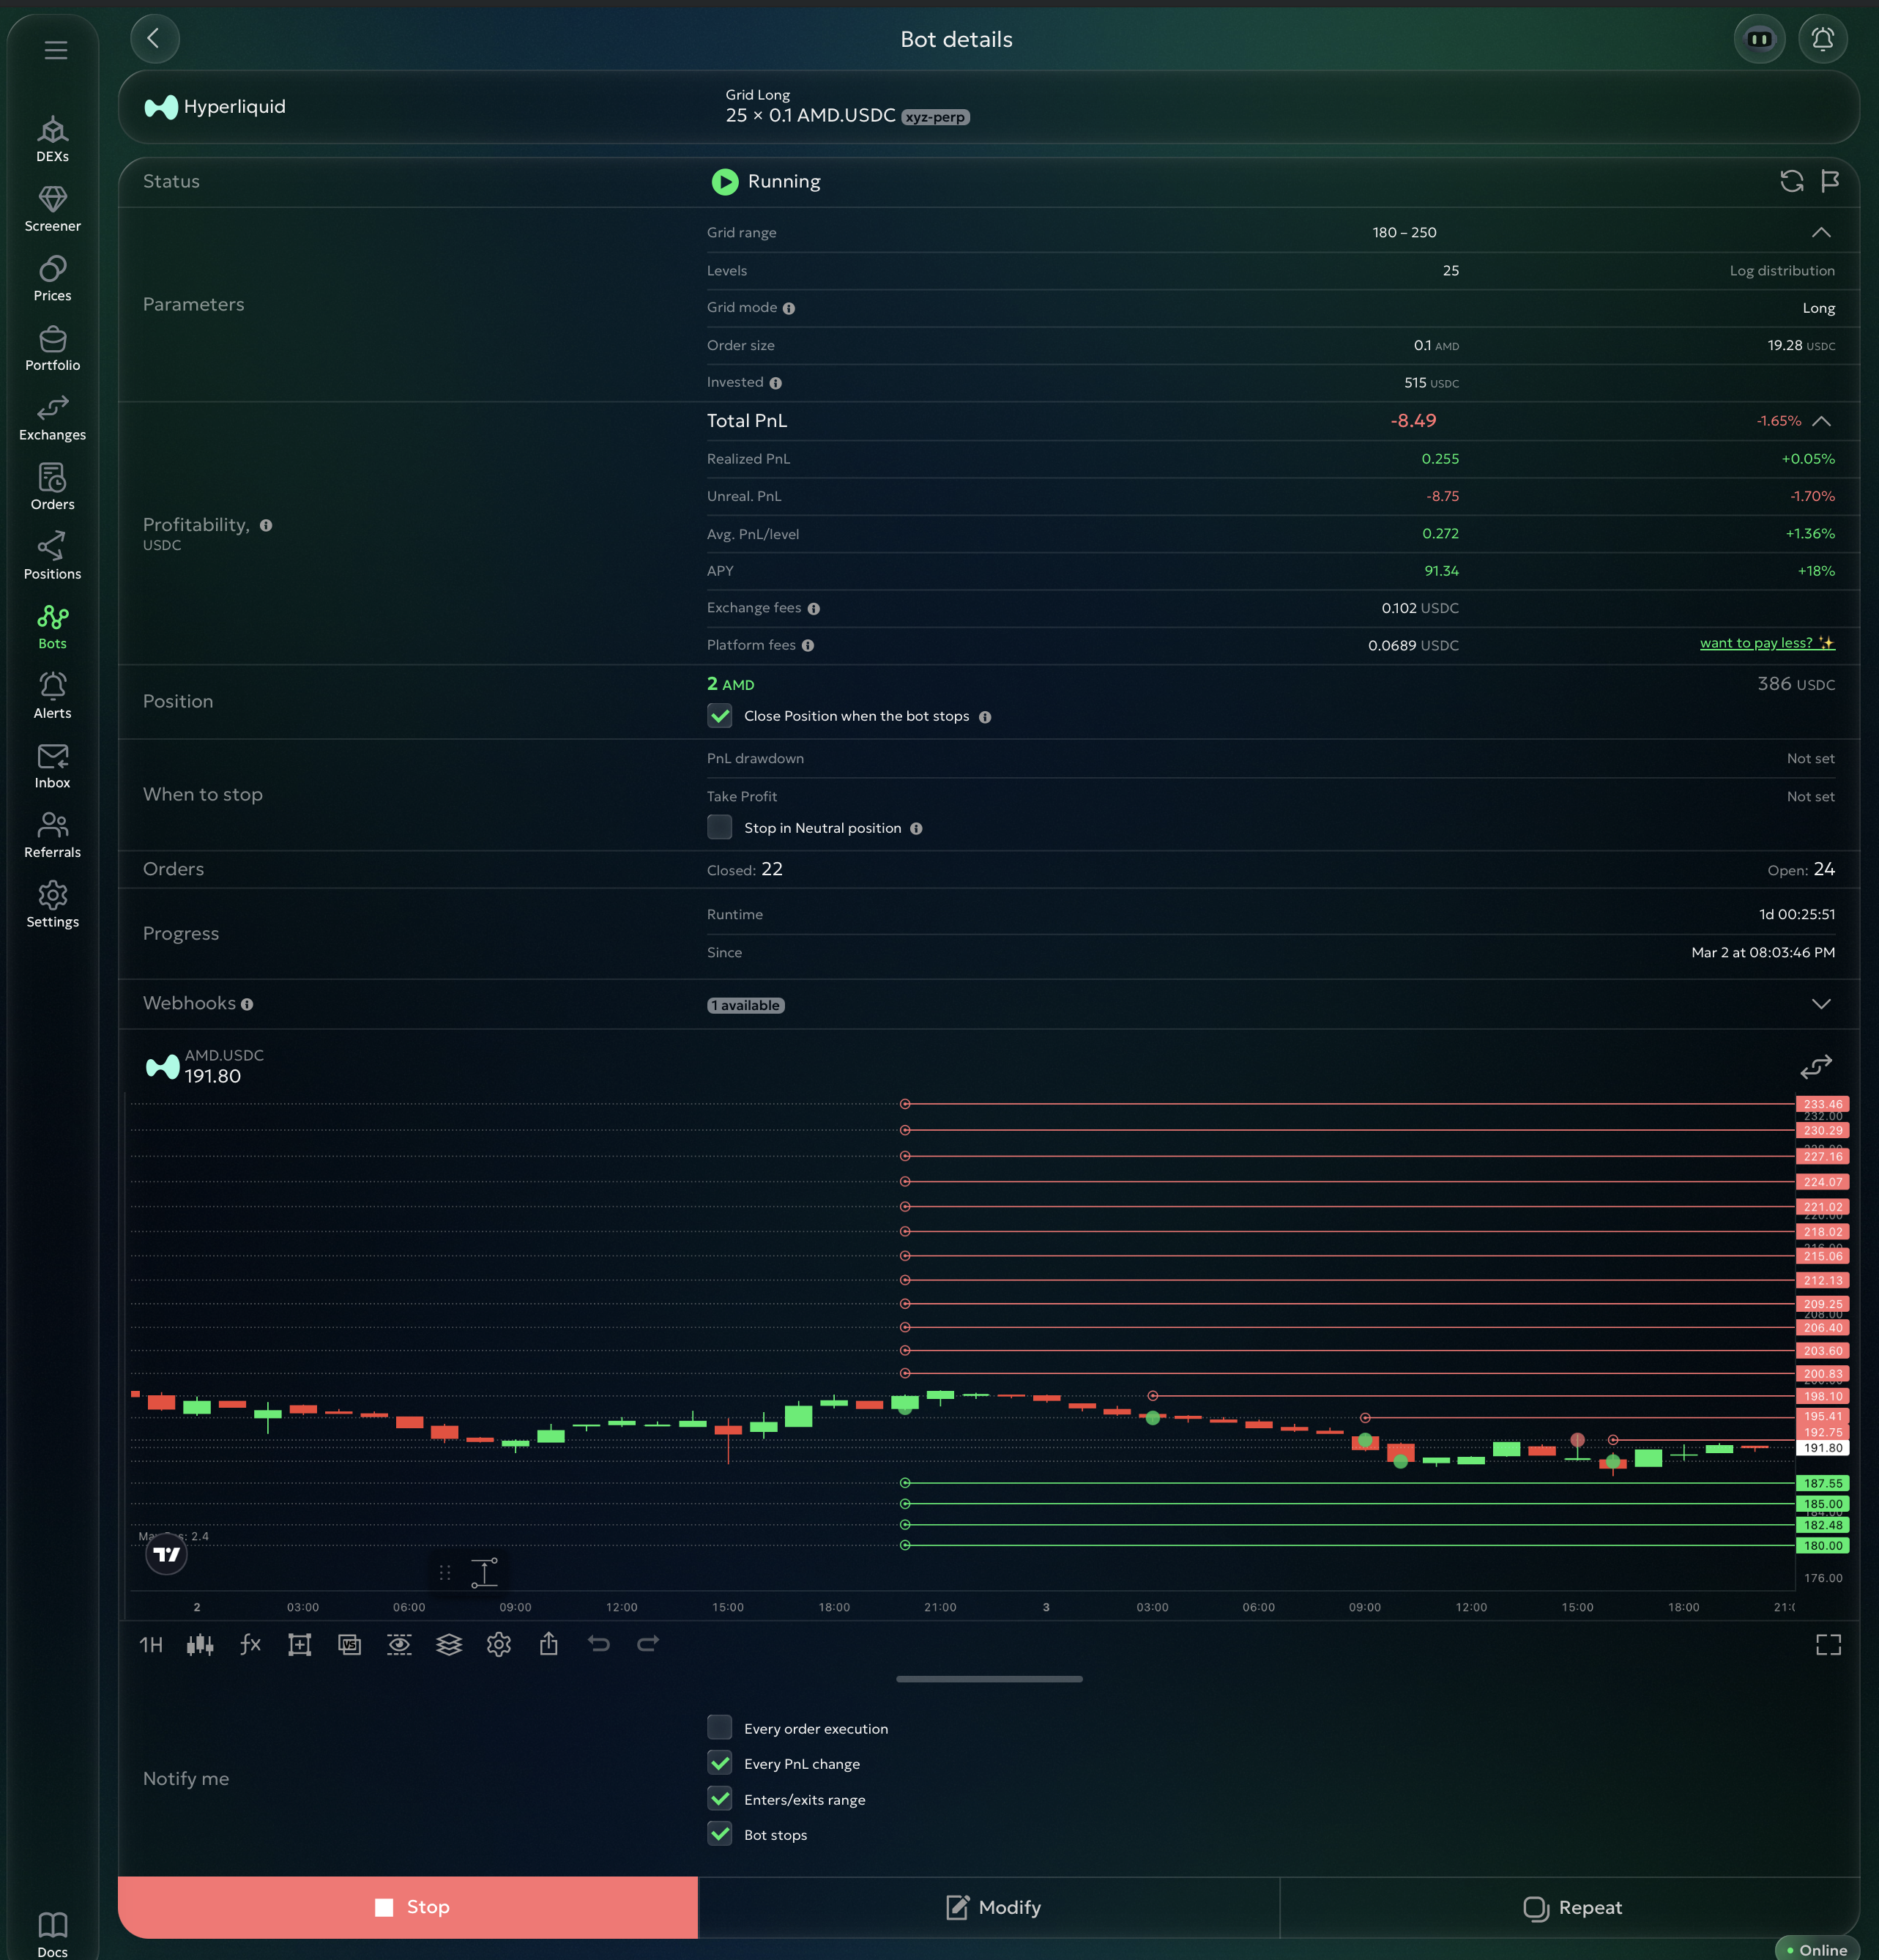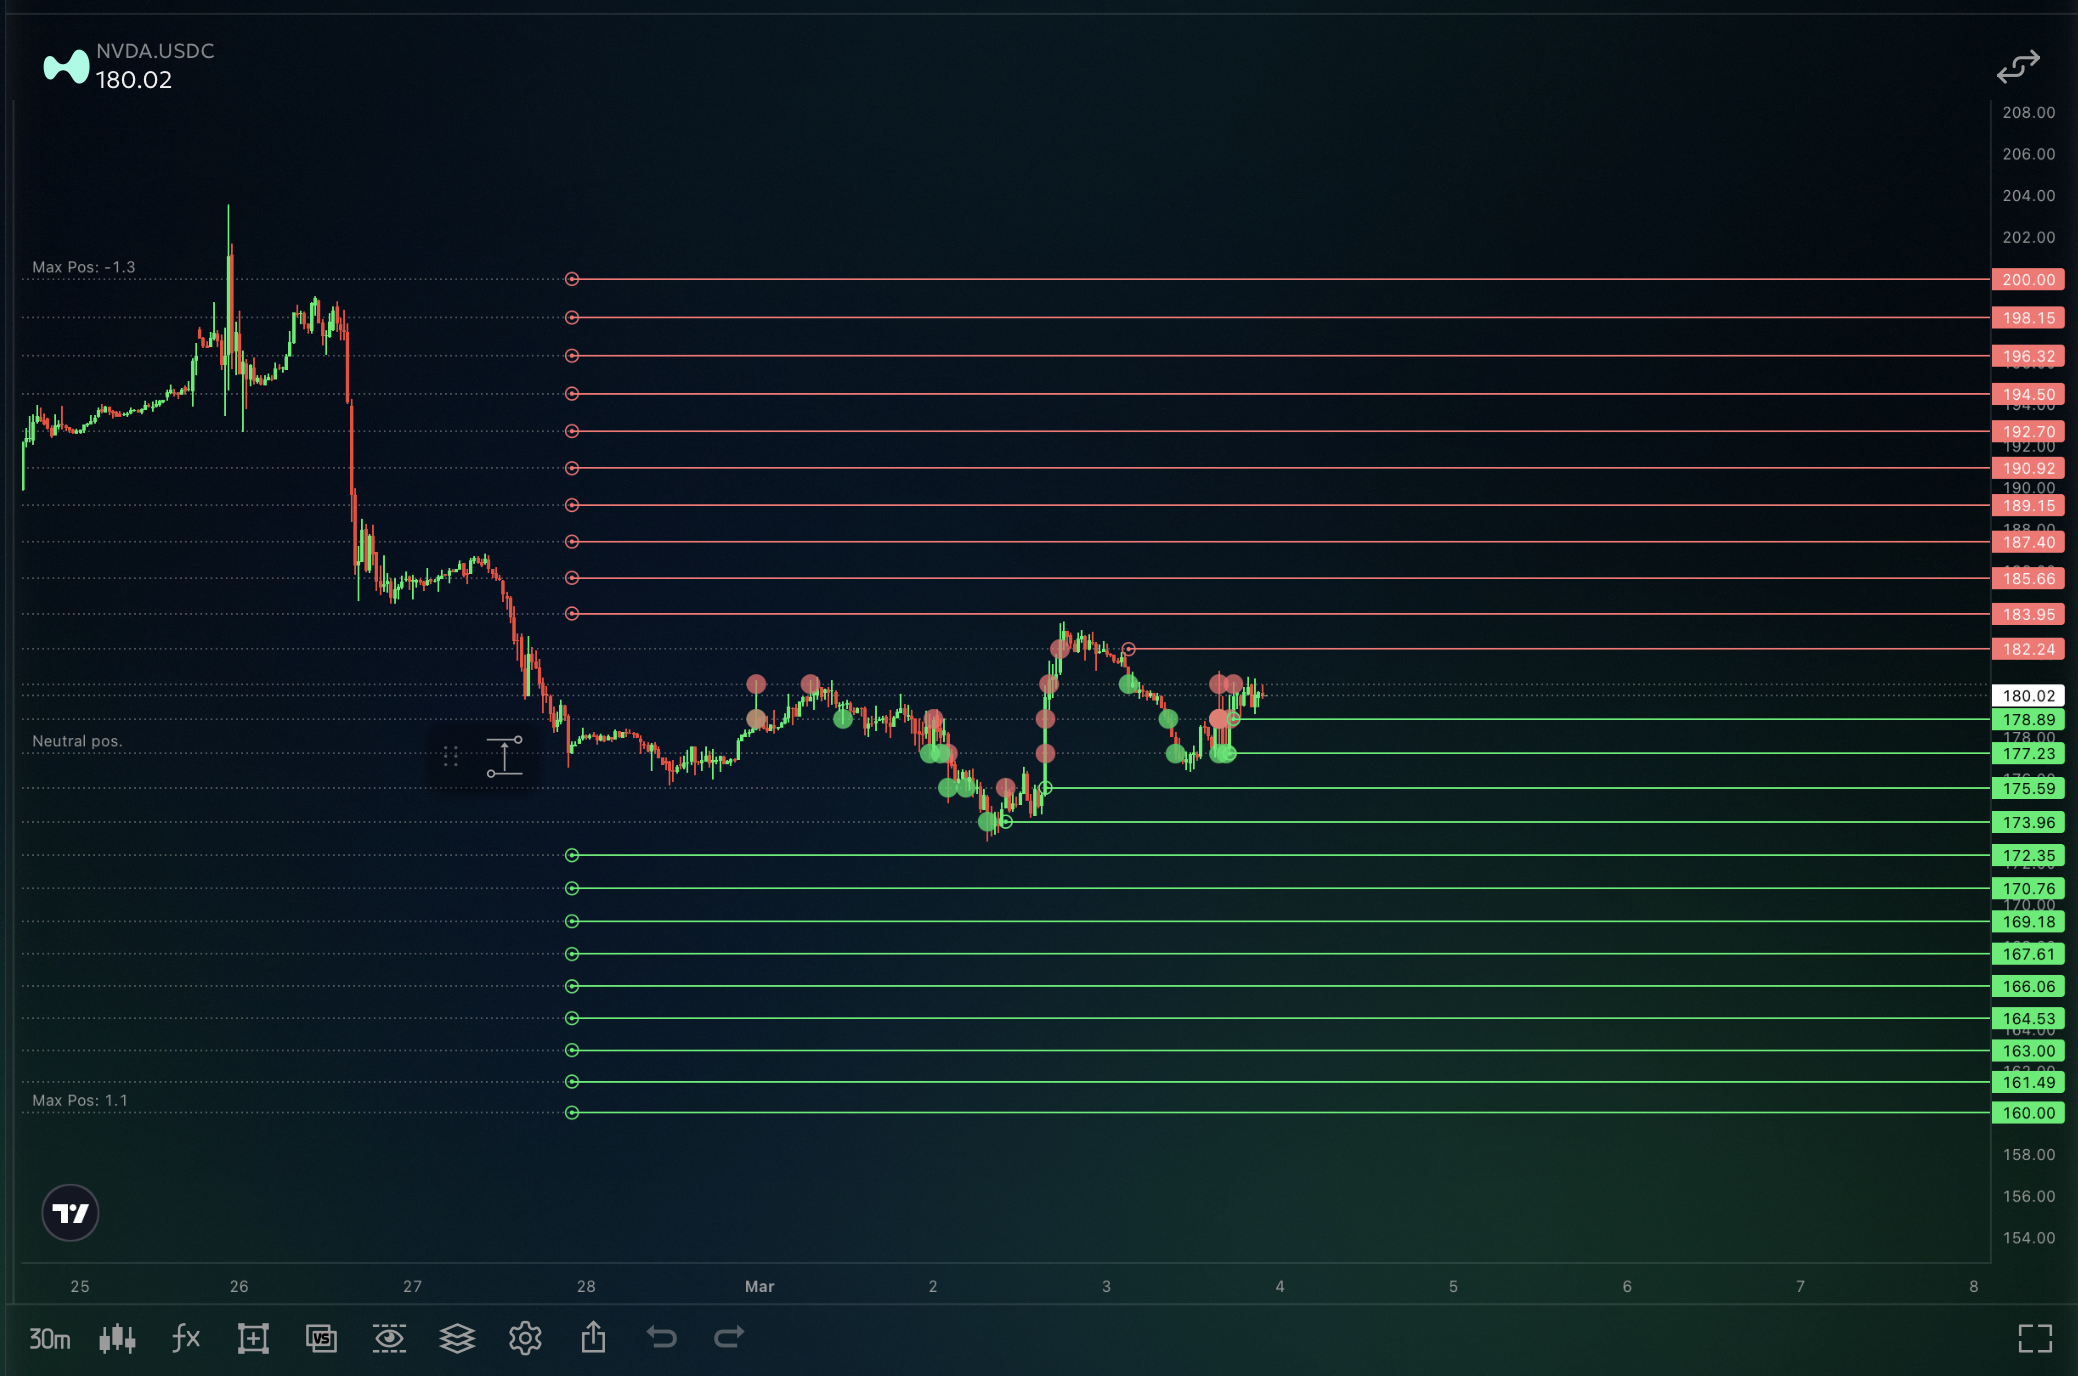

# Intro

goodcryptoX is a multi-exchange terminal for **CEXs** and **DEXs**, offering advanced orders, fully automated trading bots, portfolio tracking, alerts, and market research tools — everything you need to manage your crypto portfolio in one place.

Launched in 2019 as GoodCrypto, the platform started as a terminal for centralized exchanges. Since then, over $5 billion has been traded through the app, with over 400,000 users onboarded.

In 2024, we added *decentralized trading* and rebranded to goodcryptoX to reflect our expanded mission. You may still see GoodCrypto in some places — rest assured, GoodCrypto and goodcryptoX are the same platform at different stages of evolution.

***

#### :chart\_with\_upwards\_trend: **Centralized exchange trading**

goodcryptoX supports over 30 major CEXs (spot and derivatives) through a unified interface with advanced orders and fully automated trading bots — including DCA, Grid, and Infinity Trailing strategies.

All CEX integrations are non-custodial: connect your exchange accounts via API keys and keep full control of your funds.

#### :repeat:  **Decentralized exchange trading (Spot)**

DEX trading in goodcryptoX is live on Solana and leading [EVM chains](/supported-blockchains), offering tools typically available only on centralized platforms. You can place [limit](/dex-trading-spot/manual-orders/limit) and [trailing](/dex-trading-spot/manual-orders/trailing) orders, run [DCA](/dex-trading-spot/bots/dca-bot) and [Grid](/dex-trading-spot/upcoming-functionality/grid-bot) bots, use [screeners](/dex-trading-spot/dex-screener) with [auto-buying](/dex-trading-spot/bots/sniper-bot), and [more](/dex-trading-spot/upcoming-functionality).

Built-in wallets are secured with enterprise-grade MPC technology across all supported chains. On EVM networks, we leverage account abstraction and smart contract wallets to enable fully non-custodial trading.

On-chain futures trading is coming soon to goodcryptoX through integrations with platforms like Hyperliquid and dYdX. These integrations will unlock the same bots and advanced order types already available for centralized exchanges — bringing the full power of goodcryptoX to on-chain perpetuals from day one.

#### :zap: Perp DEXs

goodcryptoX supports [Hyperliquid](/perp-dexs/hyperliquid) with more Perp DEXs coming soon.&#x20;

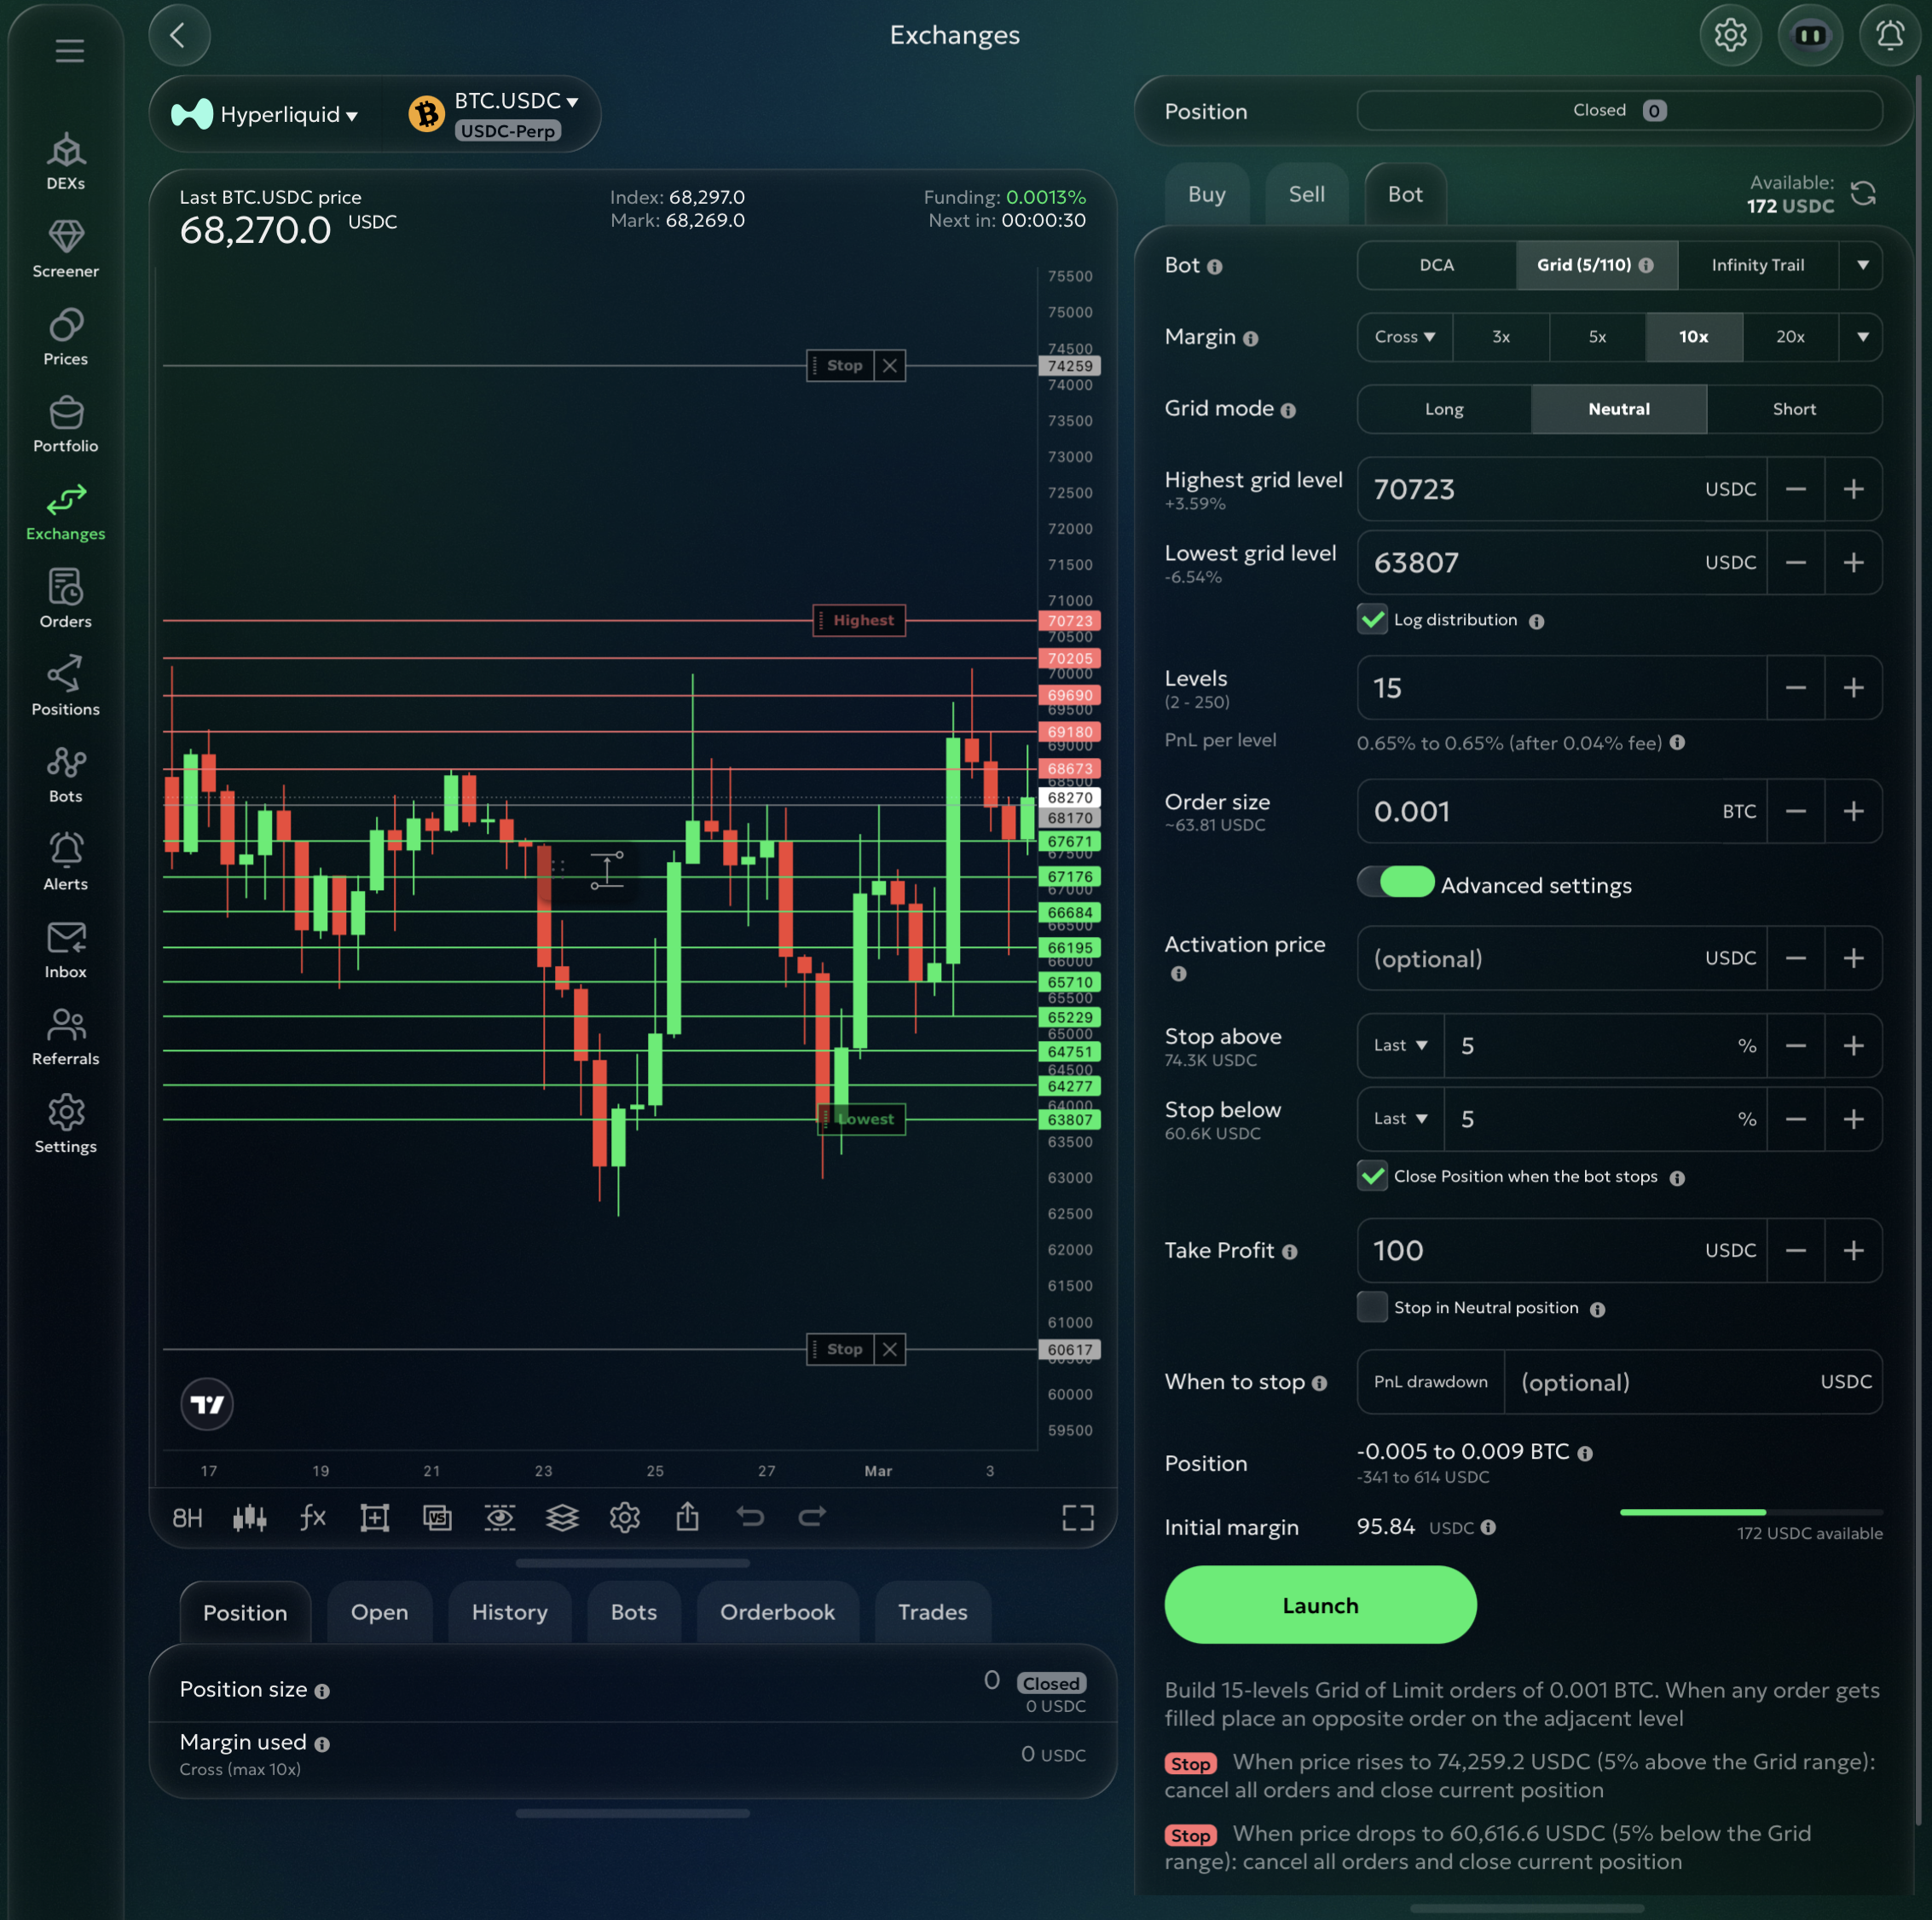
On Hyperliquid, goodcryptoX provides the same advanced toolset available on CEXs — from [trailing stops](/sex-trading/manual-orders/trailing-stops) and multi-target [take-profits](/perp-dexs/manual-orders/tp+sl-combo) to automated [bots](/perp-dexs/bots) (Grid, DCA, Infinity Trailing), TradingView [webhooks](/perp-dexs/webhooks), and more.

Our Hyperliquid integration is non-custodial: you [connect an API wallet ](/perp-dexs/hyperliquid/how-to-connect)that enables order placement through goodcryptoX but does not permit withdrawals.

***

#### 💳 **Subscription & fees**

We don’t charge trading fees on centralized exchanges, and basic functionality is free. A [subscription](/ecosystem/subscription-plans) is required to unlock advanced features — including higher limits on bots, alerts, and other tools.

On decentralized exchanges (both Spot and Perp DEXs), trading is available without a subscription, but a [swap fee](/ecosystem/dex-swap-fee) applies. This fee can be reduced through increased [trading volume](/ecosystem/loyalty-program), [holding the GOOD token](/good-token/holding-benefits), getting a higher [subscription plan](/ecosystem/subscription-plans),  or owning our [Ultimate NFT](/ecosystem/nfts).

***

#### 🪙 **GOOD token**

The [GOOD token](/good-token/summary) powers the goodcryptoX ecosystem. Holding $GOOD unlocks [revenue sharing](/ecosystem/revenue-sharing), swap fee [discounts](/good-token/holding-benefits), and other exclusive benefits.

GOOD is long-term deflationary, with a fixed supply of 1 billion, and ongoing [burns](/good-token/burn) to reduce the supply over time.

You can [buy](/good-token/how-to-buy-good) GOOD directly inside the goodcryptoX app or via Solana DEXs through Jupiter or Raydium.

{% embed url="<https://www.youtube.com/watch?v=73lb1_gBvCs>" %}

***

#### 👥 **Referral program**

We have one of the most profitable [referral programs](/ecosystem/referral-program) in crypto:\
Earn **up to 50%** of your referrals’ DEX swap fees (on Spot and Perp DEXs), plus a share of their subscription payments, and rebates on their CEX trading volume.

***

#### 🎁 **Airdrops**

GOOD token ecosystem includes ongoing airdrops that reward active traders and loyal holders. Airdrop One rewarded our earliest app adopters before TGE, while [Airdrop Two](/good-token/airdrops) is now live with **2M GOOD** to be allocated to the most active traders.&#x20;

***

#### **🚀 Getting started**

**CEX trading**

1. Connect your CEX account via API key
2. Choose an order type or bot and launch your first trade.

**Perp DEXs (Hyperliquid)**

1. Connect the wallet that controls your Hyperliquid account
2. Approve API wallet creation and builder fee
3. Choose an order type or bot and launch your first trade.

**DEX trading (Spot)**

1. [Create a wallet](/wallets/built-in-wallet/create-wallet) with one click
2. [Transfer](/wallets/built-in-wallet/receive-coins) coins from another wallet you control or [buy](/wallets/built-in-wallet/buy-coins-with) them with :credit\_card:
3. Choose an [order type](/dex-trading-spot/manual-orders) or [bot](/dex-trading-spot/bots/dca-bot) and send your first swap or launch your first DEX bot.

***

#### **📱 Platforms**

Full goodcryptoX functionality is available on [Web](https://app.goodcrypto.app/), [Android](https://play.google.com/store/apps/details?id=app.goodcrypto), and [iOS](https://apps.apple.com/app/id1462654566).

***

#### 🌐 **Investors**

Our investors include [Fenbushi Capital](https://www.fenbushicapital.vc/index_en.html) – a prominent crypto VC, [GSR](https://www.gsr.io/) – the largest crypto market maker, [Cointelegraph](https://cointelegraph.com/) – a leading crypto media outlet, and several hundred of our most active early adopters, whom we invited into our pre-seed round.


# App platforms

Full goodcryptoX functionality — centralized and decentralized — is available in our unified app on [Web](https://app.goodcrypto.app/x), [Android](https://play.google.com/store/apps/details?id=app.goodcrypto), and [iOS](https://apps.apple.com/app/id1462654566).

The latest Android APK is always available for direct download [here](https://goodcrypto.app/apk/latest).

You can connect your CEX account to goodcryptoX, or create your built-in DEX trading [wallet](/wallets/built-in-wallet), on any platform. Just sign in with the same goodcryptoX account to seamlessly access all your data across Web, Android, and iOS.

Your bots, orders, alerts, screeners, favorites, etc. are always in perfect sync across all platforms.

We also plan to develop Telegram and Discord companion bots that will notify you of order executions and offer quick shortcuts (e.g., "add 10% TP", "double position at -5%", etc.).


# Supported blockchains

#### 🔁 Trading

You can currently trade on the following chains via goodcryptoX:

* Solana
* Ethereum
* Base
* BNB Chain
* Arbitrum

If you’d like us to support additional chains, feel free to [reach out](mailto:support@goodcrypto.app).

***

#### 👛 Wallet tracking

You can also track your balances and transactions on a wide range of blockchains — simply by adding your wallet address tp goodcryptoX.

There’s no need to connect your external wallet to track it — we fetch on-chain data in read-only mode.

Supported chains for wallet tracking include:

* Arbitrum
* Avalanche
* Base
* Bitcoin
* Ethereum
* BNB Chain
* Bitcoin Cash
* Celo
* Dash
* Dogecoin
* Ethereum Classic
* Litecoin
* NEM
* Optimism
* Polygon
* Solana
* Symbol
* TRON
* XRP


# Supported AMM DEXs

#### Solana

On Solana, we route orders via the **Jupiter** aggregator, giving you access to liquidity across top Solana DEXs — from Raydium and Meteora to Orca and PumpSwap.

#### EVM chains

On Ethereum, Base, and Arbitrum trades are routed through **1inch**, providing coverage across major DEXs such as Uniswap, SushiSwap, Aerodrome, and more.

On BNB Chain trades are routed to **PancakeSwap** via its native router contract.


# Supported Perp DEXs

At the moment we fully support [Hyperliquid](/perp-dexs/hyperliquid) with other major decentralized futures exchanges coming soon.

Same as with CEXs, our goal is to eventually support all major on-chain Perp trading venues.


# Supported CEXs

goodcryptoX supports multiple centralized exchanges (CEXs) for both trading and portfolio tracking.

All integrations are non-custodial — you connect your own exchange accounts via API keys and retain full control over your funds at all times.

We support **spot trading** on all exchanges listed below and **futures trading** on selected platforms, where available and supported via API. You can track balances, trade history, and launch advanced trading bots across your connected accounts.

We currently support the following exchanges:

| Exchange          | Spot | Futures | API setup guide                                                                                                        |
| ----------------- | :--: | :-----: | ---------------------------------------------------------------------------------------------------------------------- |
| Binance           |   ✅  |    ✅    | [Link](https://goodcrypto.app/binance-api-key/)                                                                        |
| Binance US        |   ✅  |    ❌    | -                                                                                                                      |
| Bitfinex          |   ✅  |    ❌    | [Link](https://goodcrypto.app/how-to-configure-bitfinex-api-keys-and-add-them-to-good-crypto/)                         |
| Bitget            |   ✅  |    ✅    | [Link](https://goodcrypto.app/how-to-configure-bitget-api-key-and-add-it-to-good-crypto/)                              |
| Bithumb Global    |   ✅  |    ❌    | -                                                                                                                      |
| BitMart           |   ✅  |    ❌    | [Link](https://goodcrypto.app/how-to-configure-bitmart-api-key-and-add-it-to-goodcrypto-app/)                          |
| BitMEX            |   ✅  |    ✅    | [Link](https://goodcrypto.app/how-to-configure-bitmex-api-key-and-add-it-to-good-crypto-app/)                          |
| Bitstamp          |   ✅  |    ❌    | -                                                                                                                      |
| Bybit             |   ✅  |    ✅    | [Link](https://goodcrypto.app/how-to-configure-bybit-api-keys-and-add-them-to-good-crypto/)                            |
| Coinbase Advanced |   ✅  |    ❌    | [Link](https://goodcrypto.app/how-to-configure-coinbase-api-key-and-add-it-to-good-crypto/)                            |
| Crypto.com        |   ✅  |    ❌    | -                                                                                                                      |
| EXMO              |   ✅  |    ❌    | -                                                                                                                      |
| Gate.io           |   ✅  |    ✅    | [Link](https://goodcrypto.app/how-to-configure-gate-io-api-key-and-add-it-to-good-crypto/)                             |
| Gemini            |   ✅  |    ❌    | -                                                                                                                      |
| HitBTC            |   ✅  |    ❌    | -                                                                                                                      |
| HTX (Huobi)       |   ✅  |    ✅    | [Link](https://goodcrypto.app/how-to-configure-huobi-api-keys-and-huobi-futures-api-keys-and-add-them-to-goodcrypto/?) |
| Indodax           |   ✅  |    ❌    | -                                                                                                                      |
| Kraken            |   ✅  |    ❌    | [Link](https://goodcrypto.app/kraken-api-key/)                                                                         |
| KuCoin            |   ✅  |    ✅    | [Link](https://goodcrypto.app/how-to-configure-kucoin-api-keys-and-add-them/)                                          |
| MEXC              |   ✅  |    ❌    | [Link](https://goodcrypto.app/how-to-configure-mexc-api-keys-and-add-them-to-goodcrypto/?)                             |
| OKX               |   ✅  |    ✅    | [Link](https://goodcrypto.app/how-to-configure-okx-api-key-and-okx-futures-api-key-and-add-it-to-good-crypto/)         |
| Phemex            |   ✅  |    ✅    | [Link](https://goodcrypto.app/how-to-configure-phemex-api-key-and-add-it-to-good-crypto/)                              |
| Poloniex          |   ✅  |    ❌    | -                                                                                                                      |
| Tokocrypto        |   ✅  |    ❌    | -                                                                                                                      |
| WhiteBIT          |   ✅  |    ✅    | [Link](https://goodcrypto.app/how-to-configure-whitebit-api-key-and-add-it-to-good-crypto/)                            |

Here is an overview on how to connect your exchange account to goodcryptoX via API keys:

{% embed url="<https://youtu.be/ut4X4GCkFuw?si=uREnB8G1NLR84DUA>" %}

If you want to try our CEX tools risk free, demo (paper) trading on goodcryptoX is possible via Bitget:

{% embed url="<https://youtu.be/_OXZtblnSgE?si=w5dbSQOmZ1GrwFrG>" %}


# Manual orders

goodcryptoX currently supports the following manual order types on decentralized AMM (Spot) exchanges:

* [Swap](/dex-trading-spot/manual-orders/swap) (market) - executed immediately at the best available price via an aggregator (Jupiter on Solana, 1inch on EVM chains);
* [Limit](/dex-trading-spot/manual-orders/limit) (stop market) - swap is submitted when the market price reaches your specified trigger price;
* [Trailing](/dex-trading-spot/manual-orders/trailing) (trailing stop market) - follows the market price as it moves in your favor. Executes when the price reverses by the trailing percentage you’ve set;

#### Attached orders:

* [Take Profit](/dex-trading-spot/manual-orders/tp-+-sl-combo) - triggers when the price moves in your favor by the specified percentage relative to the execution price of your main (base) swap. If a Stop Loss is also set, it is cancelled when the Take Profit triggers;
* [Stop Loss](/dex-trading-spot/manual-orders/tp-+-sl-combo) -  triggers when the price moves against you by the specified percentage relative to your main swap’s execution price. If a Take Profit is set, it is cancelled when the Stop Loss triggers;
* [Trailing Stop Loss](/dex-trading-spot/manual-orders/trailing-stop-loss) - follows the market price as it moves in your favor. If the price reverses by your trailing percentage, the order executes — locking in profit or minimizing losses.

More order types [coming soon](/dex-trading-spot/upcoming-functionality).


# Swap

Swap (or market order) executes immediately at the current market price.

To set up a swap choose the coin you want to 'Spend' and the one that you want to 'Get' as the result of the swap:

<figure><img src="/files/jOG6QPlY0NftMGN6izBz" alt="" width="375"><figcaption></figcaption></figure>

Now enter the amount. You can either set an exact amount of the coin to spend (in this case we will calculate how much of the other coin you will get), or an exact amount of the coin to get (in this case we will calculate how much of the other coin you need to spend).

Once you enter the amount, we will build the most optimal route to execute your swap across Uniswap or PancakeSwap pools, and calculate the amount of the coin you will get (if 'Spend' amount was set) or spend (if 'Get' amount was set).

We will also show you the expected execution price of the swap and the expected gas cost (in USD):

<figure><img src="/files/gATdGReSoYZWxvU0fDsr" alt="" width="375"><figcaption></figcaption></figure>

Note that the expected execution price can differ somewhat from the 'Last price' you see on chart. Expected execution price takes into account the potential price impact of your order and the pool fees.

If you want more details, you can expand the route section:

<figure><img src="/files/YR4T665kvGepmJXMQWHM" alt="" width="375"><figcaption></figcaption></figure>

**Price impact** - is by how much your order will move the price of the token. \
Larger orders on less liquid tokens will impact the price more.

**Max. slippage** - if the market moves so that the actual amount of tokens you'll receive will be less than your expected amount by this % or more, the swap will be reverted. It is set by default to 5% and can be changed manually if neede&#x64;*.*

**Swap fee** - goodcryptoX [fee](/ecosystem/dex-swap-fee) including all discounts.

**Network fee** - expected gas cost of this swap.

**Order routing** - which pools and in which proportion the swap will be routed to.

You can attach a [Stop Loss](/dex-trading-spot/manual-orders/stop-loss) and/or a [Take Profit](/dex-trading-spot/manual-orders/take-profit) to each swap:

<figure><img src="/files/8bAlcvF3Xue1a4pTi3w2" alt="" width="375"><figcaption></figcaption></figure>

Once you complete the setup, click 'confirm swap' to send your swap to the exchange. You'll see a loader on the 'confirm swap' button while the system waits for its execution. Once your swap gets confirmed, it will appear in the 'Orders' list under the chart, showing you how many tokens you've spent/received as the result of the swap and its actual execution price:

<figure><img src="/files/YYsoXTfwBgmj0XQfR31y" alt="" width="375"><figcaption></figcaption></figure>

You can click on it to expand the swap details:

<figure><img src="/files/ndu2iqqisMgKZ1FTadTd" alt="" width="375"><figcaption></figcaption></figure>

You can see here your actual [gas cost](/wallets/built-in-wallet/gas-fees), the [swap fee](/ecosystem/dex-swap-fee) that we charged, the actual route of your order and its price impact. If any transactions were [batched](/wallets/built-in-wallet/smart-contract-wallets/transaction-batching) with your swap (e.g. token spend approve) - they will also appear here.&#x20;

We also provide links to view your swap on blockchain explorers. jiffyscan is tailored to smart contract wallets transactions. If you want to dive under the hood to [understand](/wallets/built-in-wallet/smart-contract-wallets/decoding-scw-swaps) all the nitty-gritty details - it's the place to go.


# Limit

Limit (or stop market) order sends a swap to the exchange when the chosen limit price is reached.

Setting up a limit order has only one difference from setting up a [swap](/dex-trading-spot/manual-orders/swap) order - you have to set the price at which you want your swap to be sent to the exchange:

<figure><img src="/files/muLXiByn8qNeoVLyhaMd" alt="" width="375"><figcaption></figcaption></figure>

On this screenshot we are bying ETH ('Get') with USDT ('Spend'). Current market price is 3,370.11 USDT for 1 ETH as shown on chart. We set the limit price to 3,000 USDT for 1 ETH. Once the swap is confirmed, our system will wait for the market price to fall to 3,000 USDT and send the swap to the exchange once it does.&#x20;

Since goodcryptoX is a [non-custodial](broken://pages/L4Iv87EmMqUe8950OX0w) wallet, we will use the [session key](/wallets/built-in-wallet/smart-contract-wallets/session-keys) to execute (sign) the swap.

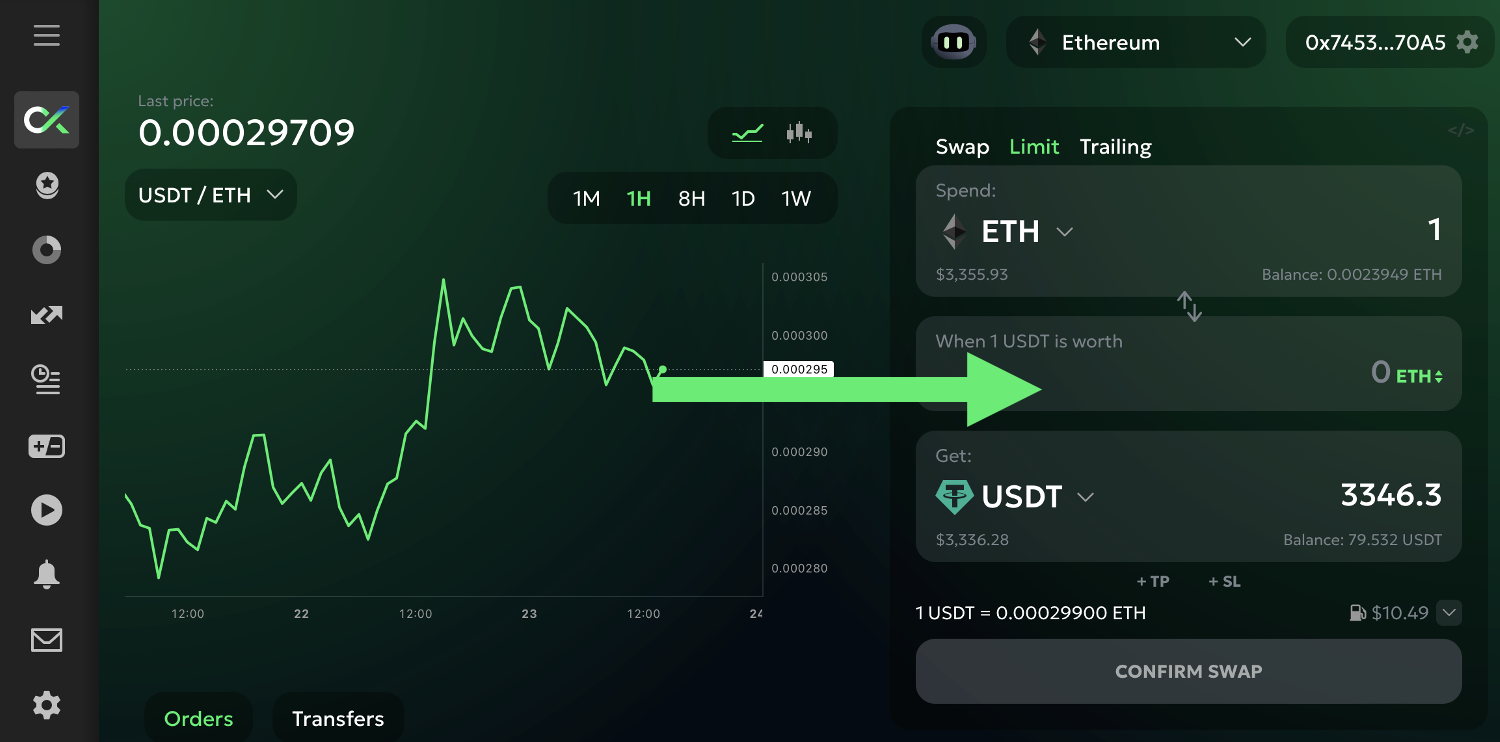
Note that if we want to sell ETH for USDT, the limit price will initially be denominated in ETH (the 'Spend' or quote currency):

<figure><img src="/files/qmmOoB0ijJ0Lc9XmmWnM" alt="" width="375"><figcaption></figcaption></figure>

The chart will show the USDT/ETH pair.

However, by clicking on 'ETH' in the limit price field, you can switch the price to USDT ('Get' or base currency). This way, it will be easier to set up an order that, say, will sell ETH when its price rises to, for example, 5,000 USDT or falls to 2,000 USDT.

Switching the limit price currency will automatically switch the chart as well.

Also note, that the route and its details, such as price impact and expected gas cost, are based on the current market. Your limit order, however, will execute at some point in the future. Thus, the route, the price impact, and the gas cost might be different at that point.

Before confirming the swap, choose whether to attach a [Stop Loss](/dex-trading-spot/manual-orders/stop-loss) and/or a [Take Profit](/dex-trading-spot/manual-orders/take-profit) to this order.

Once you confirm the swap, it will immediately appear in the 'Orders' list (at this point your order lives on our servers only) as 'Waiting':

<figure><img src="/files/m9yzJ78imUA2pde28xAY" alt="" width="375"><figcaption></figcaption></figure>

You can cancel an open ('Waiting') limit order at any point by clicking the 'cancel' button next to it.

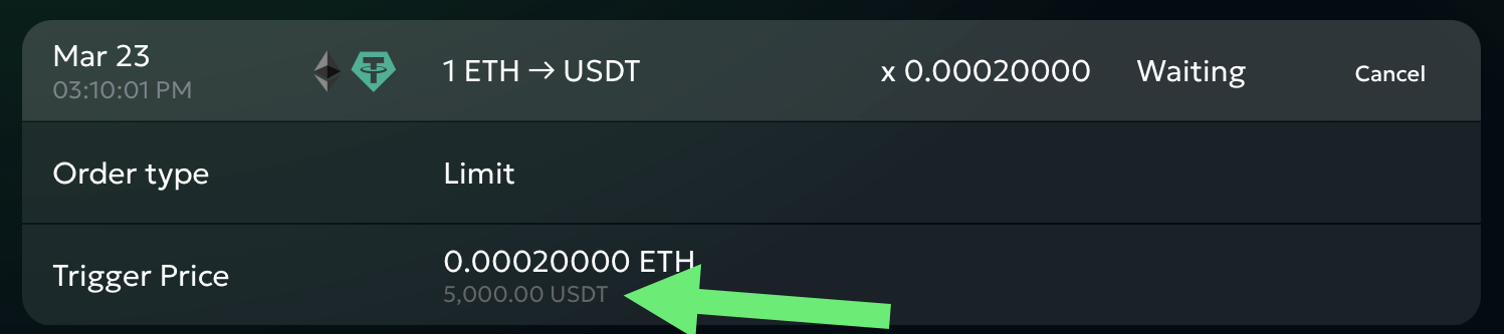
Note that despite setting the limit price in USDT ('Get') for this order, it will still be shown in ETH ('Spend') in the orders list. If you want to see its USDT ('Get') equivalent, click on the order to expand its details:

<figure><img src="/files/GtJZEI1EWaz8JbU9k7kx" alt="" width="375"><figcaption></figcaption></figure>

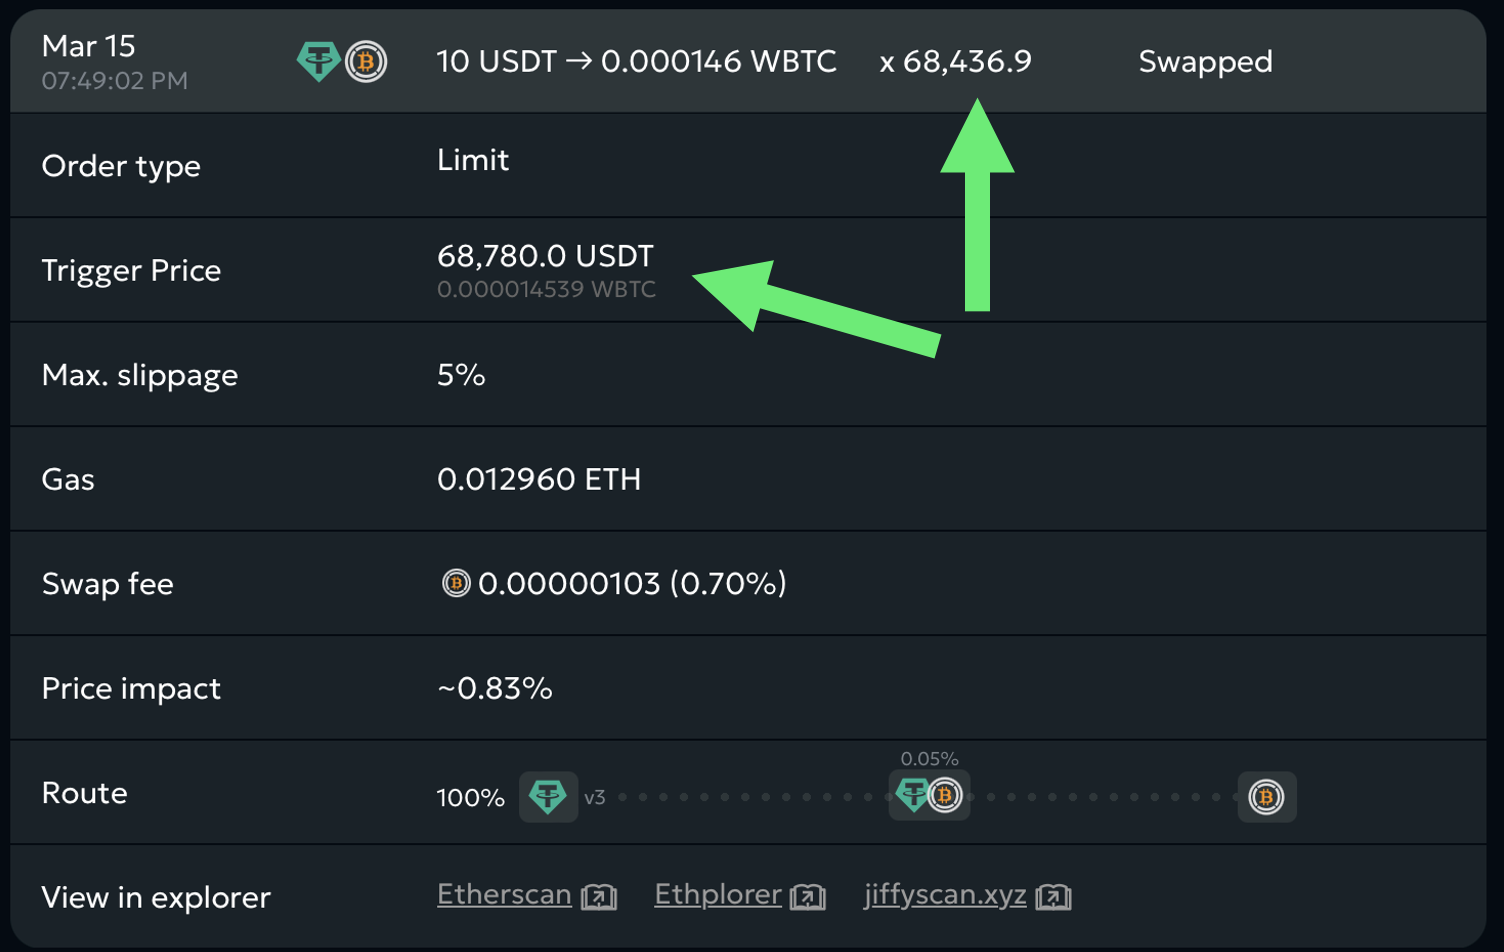
Once your target limit price is reached, the order will trigger and send the swap to the exchange. Once it executes, the order status will change to 'Swapped' and will show the actual execution price, actual amount of coins that you received or spent, actual price impact, and the gas cost.

Note that the limit price that you set ('Trigger Price' in order details) and the actual execution price of the swap will differ due to price impact, slippage, and pool fees:

<figure><img src="/files/HhYLf9ladiWjeqGQTMtf" alt="" width="375"><figcaption></figcaption></figure>

If you've enabled push notifications for GoodCrypto in your browser or have them set up in GoodCrypto iOS or Android apps, you will receive a [notification](broken://pages/EK7yY7NIySAZ1HhY8LZj) once your limit order executes.

If you attached TP and/or SL to your limit order, they will become active ('Waiting') at this point.


# Trailing

Trailing (or trailing stop) order follows the market price at the chosen distance when it moves in your favor, but stays in place when the price moves against you.&#x20;

When the market price touches the order, the swap is sent to the exchange.

Trailing order can be used to enter a position (buy coin) at a lower price at the exact moment the price stops falling and starts going up:

<figure><img src="/files/iUrW9ZH91Xty7zqKI0EM" alt="DEX trailing stop buy order" width="563"><figcaption><p>trailing buy moves lower each time the market price moves lower, but stays in place when it rises</p></figcaption></figure>

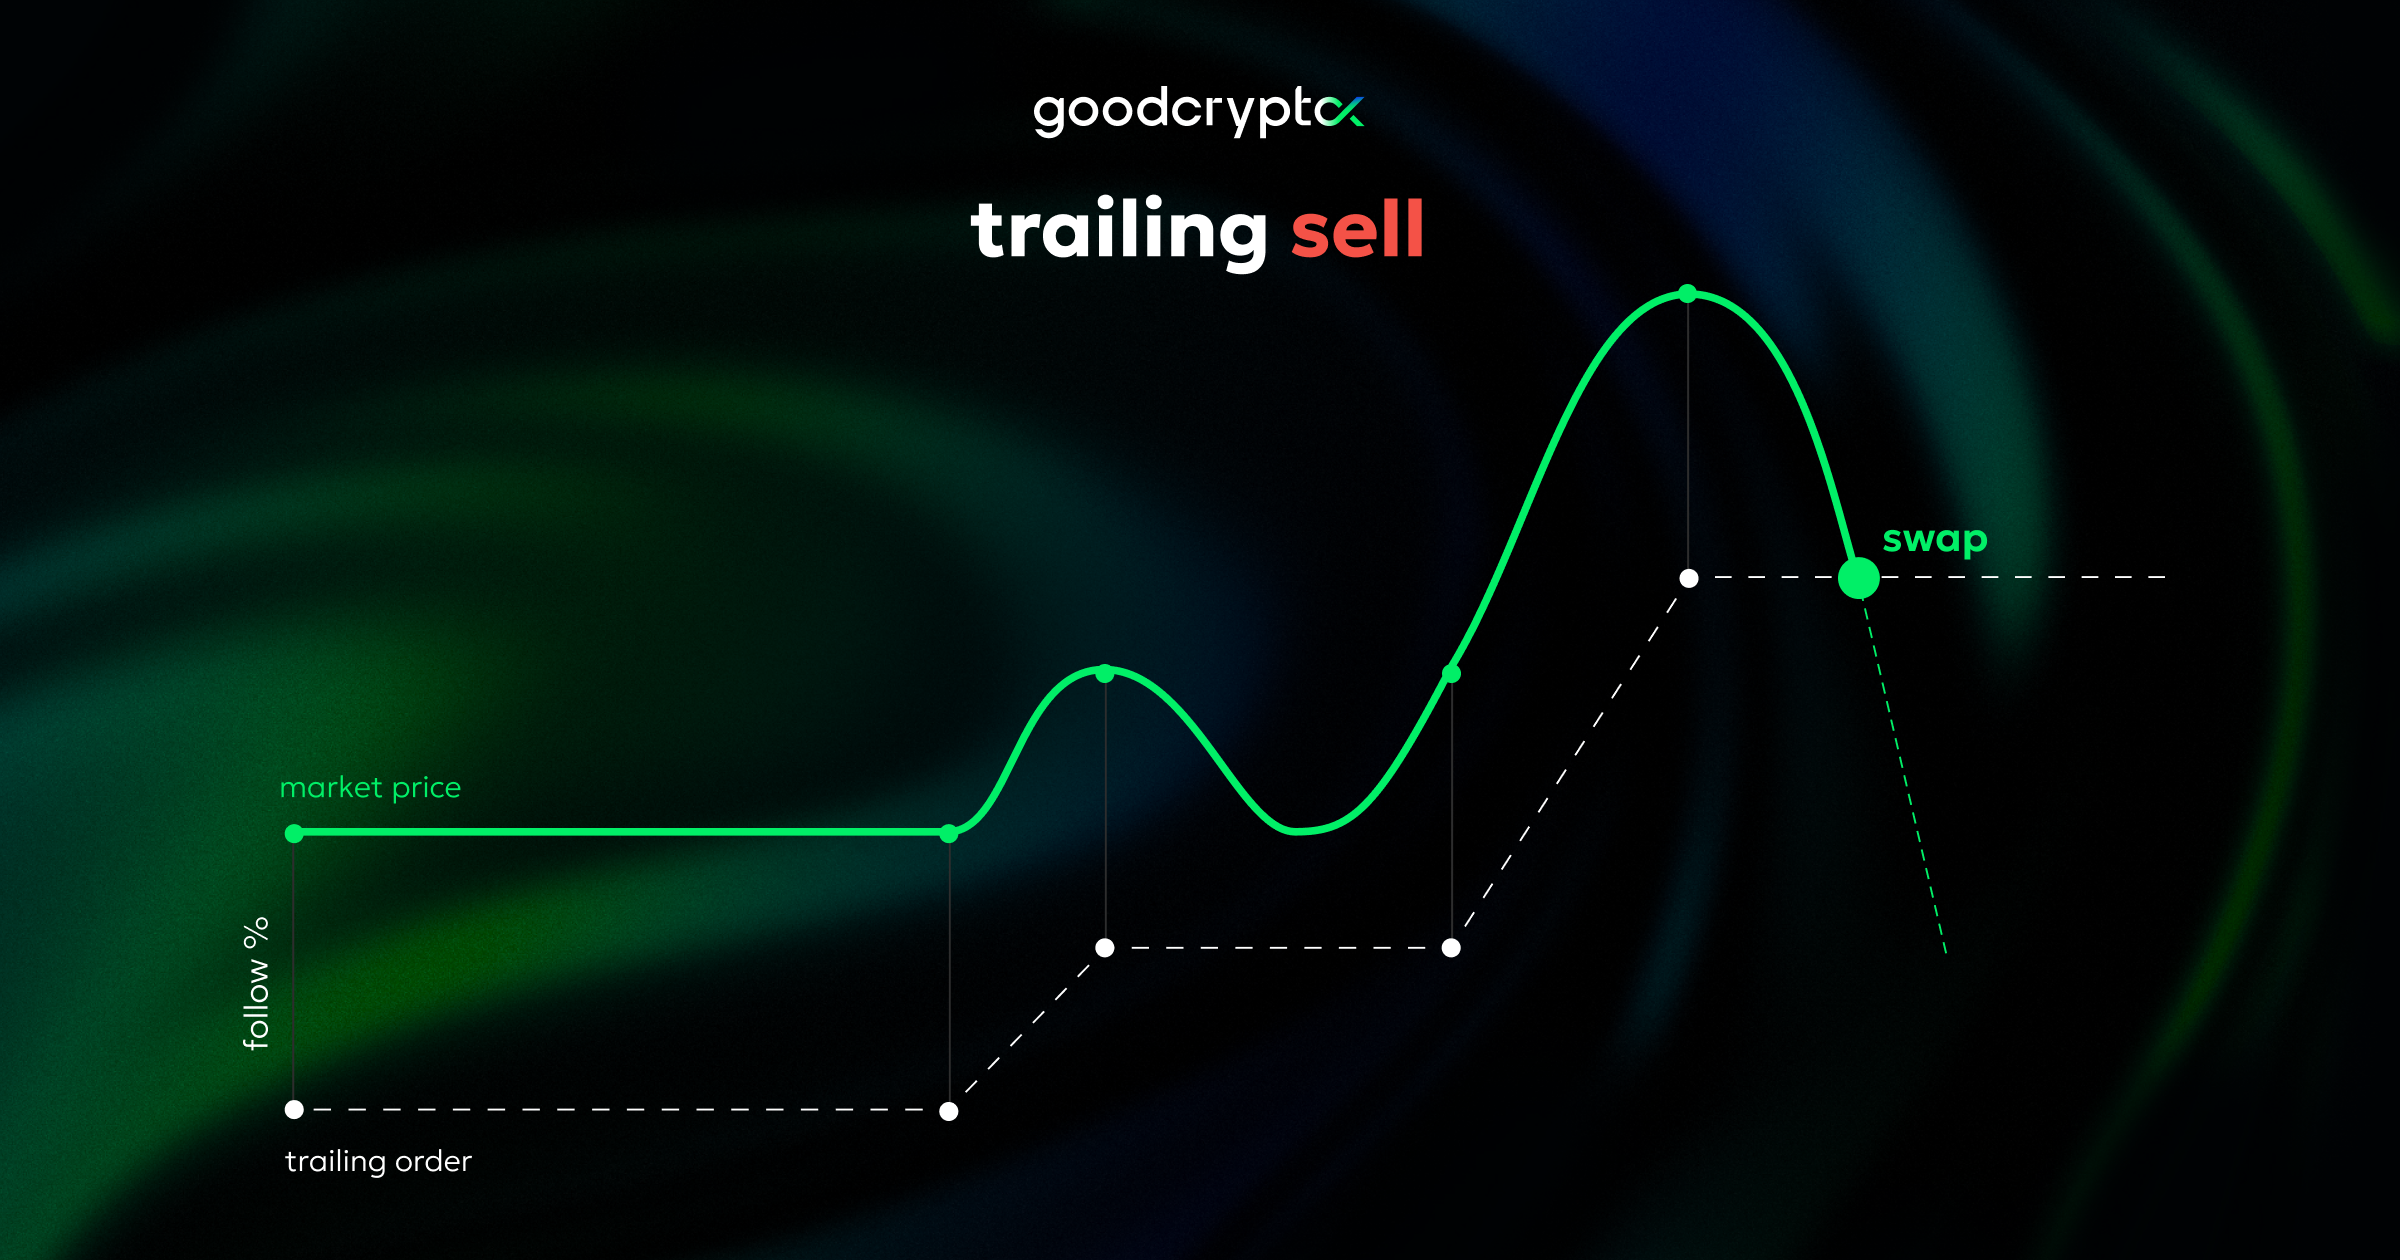
Trailing stop can also be used to exit a position (sell coin) at a higher price at the exact moment it stops growing and starts falling:

<figure><img src="/files/thZdezXb8KKv7wsMyGry" alt="DEX trailing stop sell order" width="563"><figcaption><p>trailing sell moves higher each time the market price moves higher, but stays in place when it falls</p></figcaption></figure>

### Setting up `trailing buy` order

To set up a trailing buy order, enter the coin you want to buy into the 'Get' field and choose the distance that you want your order to follow the market price at:

<figure><img src="/files/R28eCCtXbzYubEflzyLq" alt="" width="375"><figcaption></figcaption></figure>

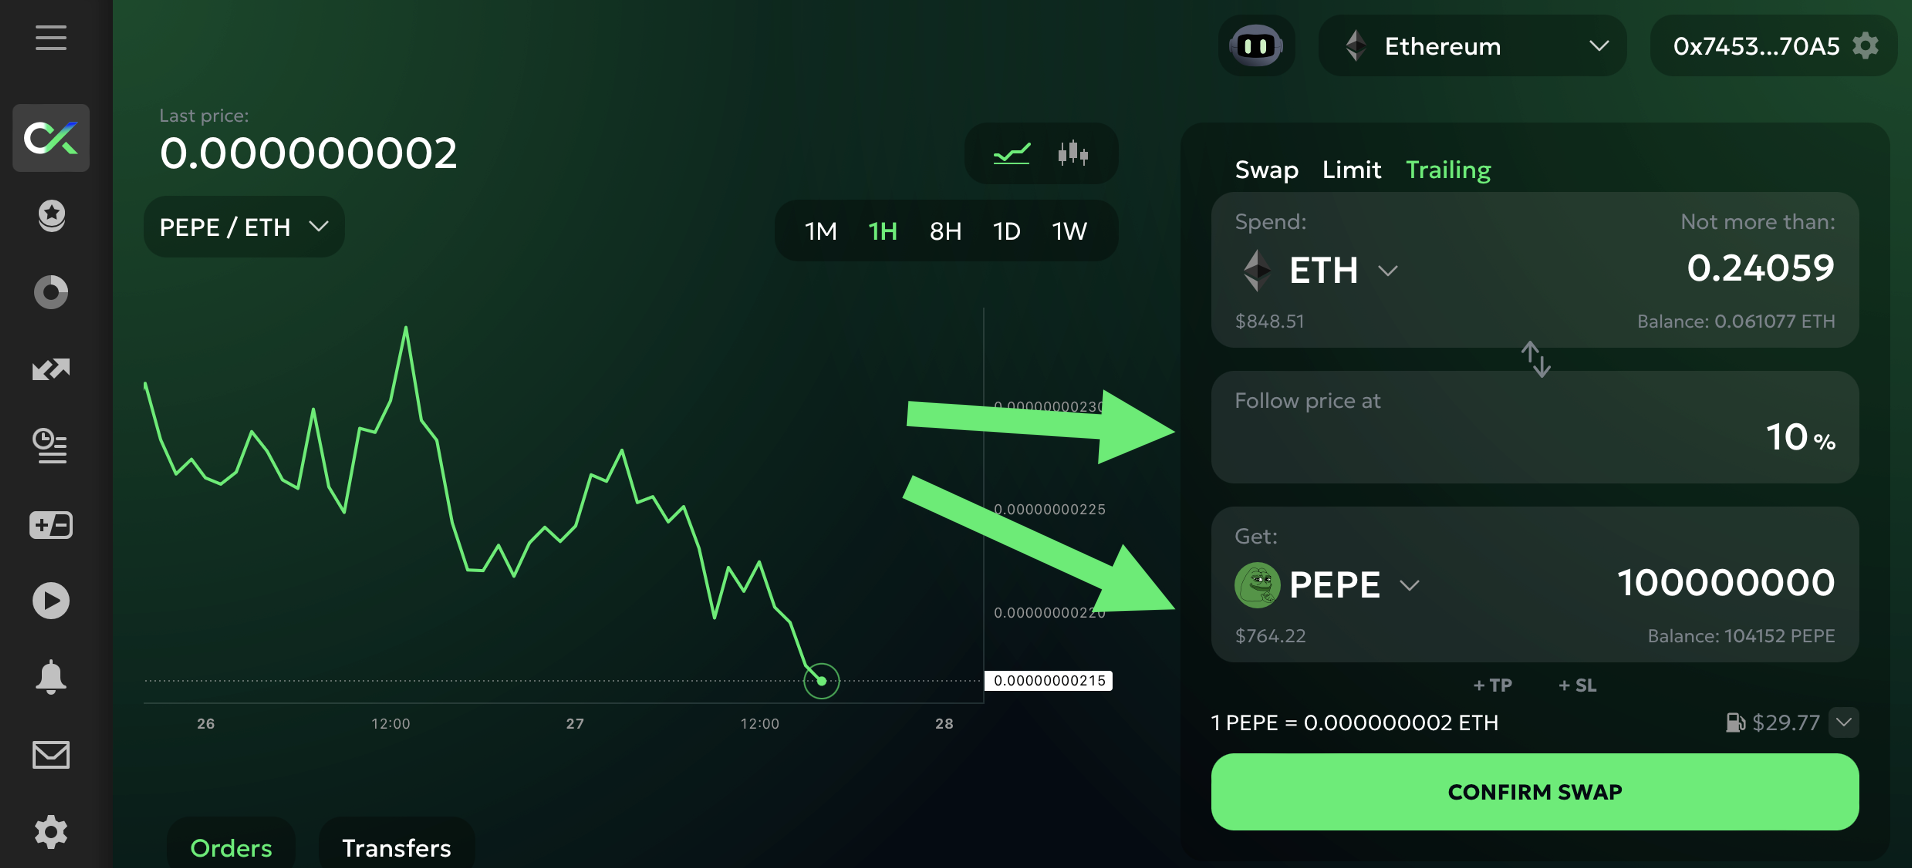
In this example I'm buying 100m PEPE with a 10% follow distance. This means that my order will initially be placed 10% above the current market price. If the price moves lower (PEPE becomes cheaper), the order will move lower automatically (to keep it at 10% from the new, lower market price).

If the price will rise, the order will not move. This means that it will be triggered when the price rises 10% from the lowest point it reaches after I create the order.

The worst case scenario in this example is that the price will rise 10% immediately after I create the order. In this case I will buy PEPE at 10% higher than I could have bought at if I sent a [swap](/dex-trading-spot/manual-orders/swap) order instead.

The amount in the 'Spend' field reflects this worst case scenario - that's why it says 'Not more than:'. That's the amount you'll spend if the price goes against you (rises) right away and never moves in your favor. If the price goes lower even a bit - you'll spend less.

To ensure that I will buy cheaper than the market price at the time of the order creation, I need the price to fall 10% or more.

Keep the above in mind when choosing your 'Follow price at' percentage: you need to set it high enough so that the order will not be triggered by the short-term market movements. But also not too high - since it will increase the probability that the price never moves in your favor enough.

The best 'Follow price at' distance will depend on the volatility of the coin you are buying and the general market volaitilty at that moment. More volatile coins and more volatile market generally require higher 'Follow price at' percentage.

### Setting up `trailing sell` order

To set up a trailing sell order enter the coin you want to sell into the 'Spend' field and choose the distance that you want your order to follow the market price at:

<figure><img src="/files/xmYnZnEVYha7MNhcw9AN" alt="" width="375"><figcaption></figcaption></figure>

Note, that the chart shows 'Get'/'Spend' (ETH/PEPE) price by default. Switch it manually to 'Spend'/'Get' (PEPE/ETH) for a more intuitive order setup (switching the chart does not affect the order, but makes it easier to understand the setup):

<figure><img src="/files/1StcDYUEGBN6nCZNoqWc" alt="" width="375"><figcaption></figcaption></figure>

In this example I'm selling 100m PEPE with a 10% follow distance. This means that my order will initially be placed 10% below the current market price. If the price moves higher (PEPE becomes more expensive), the order will move higher automatically (to keep it at 10% from the new, higher market price).

If the price will fall, the order will not move. This means that it will be triggered when the price falls 10% from the highest point it reaches after I create the order.

The worst case scenario in this example is that the price will fall 10% or more immediately after I create the order. In this case I will sell PEPE at 10% lower than I could have sold at if I sent a [swap](/dex-trading-spot/manual-orders/swap) order instead.

The amount in the 'Get' field reflects this worst case scenario - that's why it says 'At least:'. That's the amount you'll get if the price goes against you (falls) right away and never moves in your favor. If the price goes higher even a bit - you'll get more.

To ensure that I will sell higher than the market price at the time of the order creation, I need the price to rise 10% or more.

Keep the above in mind when choosing your 'Follow price at' percentage: you need to set it high enough so that the order will not be triggered by the short-term market movements. But also not too high - since it will increase the probability that the price never moves in your favor enough.

The best 'Follow price at' distance will depend on the volatility of the coin you are selling and the general market volaitilty at that moment. More volatile coins and more volatile market generally require higher 'Follow price at' percentage.

### Trailing Start (optional)

By default, trailing orders start following the market price immediately after you confirm them.

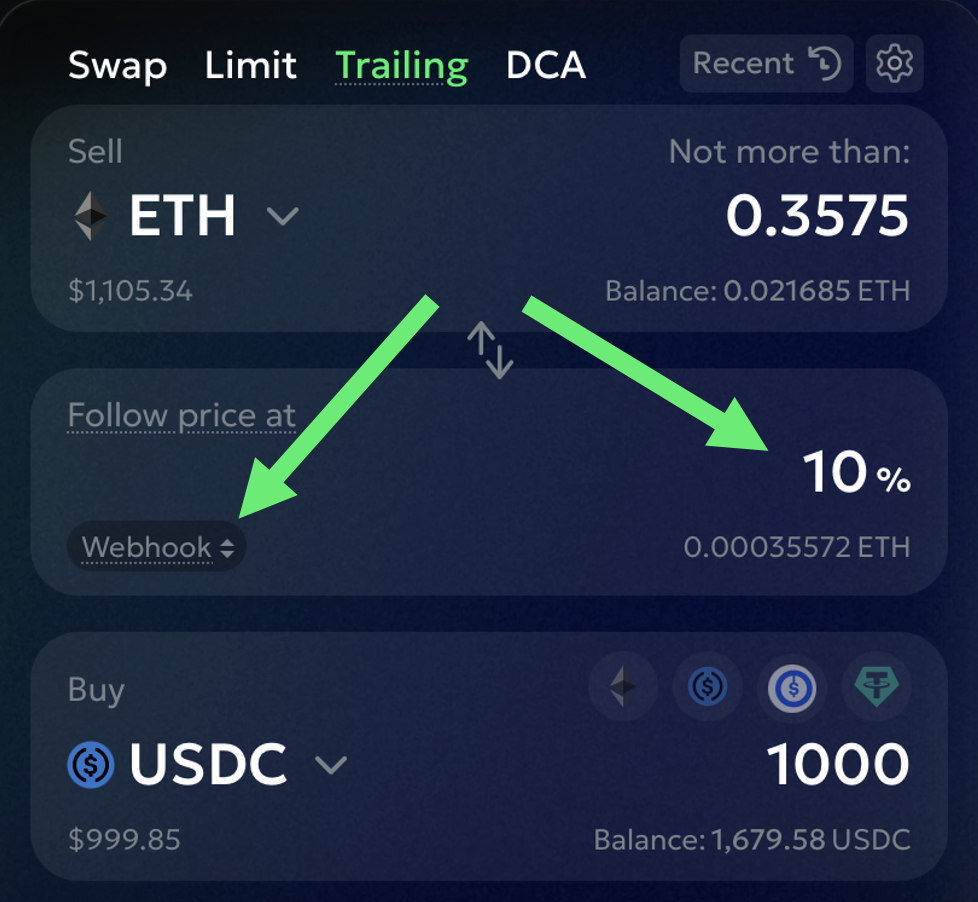
However, you can choose when your order starts trailing after you create it. In the trailing distance field, there is a toggle:

`Now` – start trailing immediately (default)

`At price` – start trailing only when the market hits a specific price

`Webhook` – start trailing only after a webhook alert is received

<figure><img src="/files/xaWb3HLp206IivkIvPIX" alt="" width="375"><figcaption></figcaption></figure>

⸻

**Example – Trailing Buy with Price Start**

Let’s say you want to start trailing only if ETH drops to $1,500.

You select Start at: Price → $1,500, and set a 5% trailing distance.

This means the trailing logic begins only if ETH hits $1,500 — then it will start trailing 5% above the falling market price.

If ETH bounces, you’ll buy on a 5% rebound. If it keeps falling, your entry price improves.

<figure><img src="/files/lHXmX5s2fUBwmCS0iMy4" alt="" width="375"><figcaption></figcaption></figure>

⸻

**Example – Trailing Sell with Webhook Start**

You want to start trailing only if a TradingView alert fires — for example, when ETH breaks a resistance line.

You select Start at: **Webhook**, and set a 10% trailing distance.

When the webhook is received, the order starts trailing 10% below the price — and will sell if ETH falls by that amount after the webhook trigger.

<figure><img src="/files/HL3zFGYD5N09sBvPwrek" alt="" width="375"><figcaption></figcaption></figure>

Once the order is created, go to its details to find the Webhook URL you need to point your TradingView alert to (more details in our [Webhooks](/dex-trading-spot/webhooks) section):

<figure><img src="/files/dtDiRyihBXQkvzRg1yjL" alt="" width="375"><figcaption></figcaption></figure>

⸻

Once the start condition is met, the trailing behaves exactly as usual: the trigger moves with the price as long as it’s going in your favor, and the order fires when the market reverses by the trailing distance.

***

Note that the route and its details, such as price impact and expected gas cost, are based on the current market. Your trailing order, however, will execute at some point in the future. Thus, the route, the price impact, and the gas cost might be different at that point.

Before confirming the order, choose whether to attach a [Stop Loss](/dex-trading-spot/manual-orders/stop-loss) and/or a [Take Profit](/dex-trading-spot/manual-orders/take-profit) to this order.

Once you confirm the swap, your trailing stop order will immediately appear in the 'Orders' list (at this point it lives on our servers only) as 'Trailing' - meaning it is active and is trailing (following) the market price:

<figure><img src="/files/TS66djGrGku0HC1CLFSZ" alt="" width="375"><figcaption></figcaption></figure>

Once the trigger conditions are met (the price moves against you by the follow percentage), the order will trigger and send the swap to the exchange. Once it executes, the order status will change to 'Swapped' and will show the actual execution price, actual amount of coins that you received or spent, actual price impact, and gas cost.


# Take Profit

When enterng a position (buying a coin), Take Profit order allows you to set up an exit (order to sell the coin) by simply inputting your desired profit %.

To add a Take Profit to your order, click '+TP' in the swap setup form:

<figure><img src="/files/cTFGGwtIwI6WXQoKTz3Q" alt="How to add Take Profit order on Uniswap DEX" width="563"><figcaption></figcaption></figure>

Input your desired profit level into the 'Take Profit' field - and you are good to go:

<figure><img src="/files/KwcGq5iovQqHPM8J1vgo" alt="" width="563"><figcaption></figcaption></figure>

Once your main order executes, we will automatically open a Take Profit order to sell the exact amount of coins you've received, and will calculate where to place its trigger based on the actual execution price of your main order and your desired profit percentage:

<figure><img src="/files/B7dRZmyvP4HxY6voTzli" alt="" width="563"><figcaption></figcaption></figure>

You can see that I bought 1 DEGEN on Base at 0.000010564 ETH, and the system placed a Take Profit order to sell 1 DEGEN at 10% higher (at 0.000011621 ETH).

Once my target price is reached, the Take Profit will be triggered and the swap will be sent to the exchange.

***

You can connect Take Profit to any order: Swap, Limit or Trailing.

You can set your desired profit between 0.1% and 999%.

You can choose to connect only Take Profit to your main order - if you are are willing to hold the coins until the price reaches your desired level no matter how low it might fall in the interim.

Or, you can protect your downsinde by connecting a [Stop Loss](/dex-trading-spot/manual-orders/stop-loss) order as well - making it a [TP + SL combo](/dex-trading-spot/manual-orders/tp-+-sl-combo).

***

Coming soon: Trailing Take Profit, Multiple Take Profit Targets, realized and unrealized PnL calculation for the main order.


# Multiple Take Profits

*documentation* *coming soon...*


# Stop Loss

When enterng a position (buying a coin), Stop Loss order allows you to protect your downside and limit your losses in case the market moves against you. Stop Loss order exits your position (sells the coins) at maximum loss % you are prepared to tolerate. All you need to do to set it up is input the %.

To add a Stop Loss to your order, click '+SL' in the swap setup form:

<figure><img src="/files/eQNZ0kr2mgBlN8jLmIKP" alt="" width="563"><figcaption></figcaption></figure>

Input the maximum loss % you are prepared to tolerate into the 'Stop Loss' field - and you are good to go:

<figure><img src="/files/2ddVWmfbBwetl7zOwhU5" alt="" width="563"><figcaption></figcaption></figure>

Once your main order executes, we will automatically open a Stop Loss order to sell the exact amount of coins you've received and will calculate where to place its trigger based on the actual execution price of your main order and your Stop Loss percentage:

<figure><img src="/files/kqMzzOGphaCahWpfvalK" alt="" width="563"><figcaption></figcaption></figure>

You can see that I bought 1 DEGEN on Base at 0.000010770 ETH and the system placed a Stop Loss order to sell 1 DEGEN at 5% lower (at 0.000010231 ETH).

If the market goes against me and the price falls to my stop loss target, the Stop Loss will be triggered and the swap will be sent to the exchange.

***

You can connect Stop Loss to any order: Swap, Limit or Trailing.

You can set your Stop Loss percentage between 0.1% and 99.9%.

You can choose to connect only Stop Loss to your main order - if you are willing to let the coin 'run' and have not decided when to take the profit yet, but want to protect your downside.

Or, if you know how much profit you are comfortable with, you can connect a [Take Profit](/dex-trading-spot/manual-orders/take-profit) order as well - making it a [TP + SL combo](/dex-trading-spot/manual-orders/tp-+-sl-combo).

***

Coming soon: Trailing Stop Loss, move to SL to breakeven, realized and unrealized PnL calculation for the main order.


# Trailing Stop Loss

*coming soon...*


# TP + SL combo

*coming soon...*


# Modify orders

{% embed url="<https://youtu.be/Dreeo0VYb2I?si=SmYVCmMIfhwCI3JK>" %}

*documentation* *coming soon...*


# Bots


# DCA bot

<figure><img src="/files/7T2OgwXki0ineq92I0SV" alt="DEX DCA bot"><figcaption></figcaption></figure>

DEX DCA bot is a versatile tool enabling multiple trading strategies previously only available on cetralized exchnages.

DCA stands for dollar-cost averaging, meaning that the bot enters a position and then places additional orders if the price moves against you, averaging down your cost basis.&#x20;

The bot automatically adjusts your Take Profit and Stop Loss as your position changes.

After Take Profit or Stop Loss are triggered the bot can either stop or repeat with the same settings.

This enables several use cases for the bot:

1. **SAFETY NET**\
   Enter positions knowing that should the market move against you, you'll buy more at a lower price and your TP will be adjusted to reflect that. All without you lifting a finger.
2. **VOLATILITY SCALPER**\
   Run the bot on volatile coins on repeat - rack up hundreds of profitable iterations by covering 50%+ price range with averaging orders and going martingale on orders size (each averaging order 2x of previous).
3. **SCALE ORDER**\
   If your entry strategy involves placing multiple orders on several levels - use the bot to do that for you. If you don't plan to use the bot's automated TP - set it at an unreasonable level (say, 999%) and stop the bot once it enters the required position.
4. **MULTIPLE TAKE PROFITS**\
   If you want to place multiple Take Profits to your existing position, select the position's coin in the bot's "Spend" field. The bot's entry and averaging orders will act as your Take Pofit levels. Set the bot's TP to an unreasonable level so it won't mess with your setup.
5. **BTFD**\
   Buy the f\*ing dip! Accumulate ETH, BTC, SOL and other top coins automatically taking advantage of the market dips. Trend is your friend - if you believe that the coin will ultimately go up, then the lower it goes the more you want to buy it. DCA bot is the perfect tool for it.

Here is our DCA bot's video overview:

{% embed url="<https://youtu.be/P5o1s9-YoYE>" %}
Part 1: Overview
{% endembed %}

We are also running a dedicated [TG channel](https://t.me/+EFAh0cdHrXw0OTNh) where we post our best-performing DCA setups - both for centralized and decentralized exchanges. Join to get new trading ideas and share your experience.


# Features & setup

Watch the features & setup video overview and/or read the step-by-step instructions below:

{% embed url="<https://youtu.be/e1jKrYwzsbU>" %}
Part 2: Features and setup
{% endembed %}

***

Choose the blockchain you want to run your DCA bot on and select "DCA" as the order type:

<figure><img src="/files/idP794g83TlXzcDj21fu" alt="Base DCA bot"><figcaption></figcaption></figure>

Next, select the coins your DCA will be spending and getting:

<figure><img src="/files/iczqOwDlQ66ieAp1Tzl8" alt=""><figcaption></figcaption></figure>

The bot's profit/PnL will be in "Spend" coin.

Next, you have the presets that you can use to pre-fill all the settings:

<figure><img src="/files/w0rVk0GgAptCFnhqBCC1" alt=""><figcaption></figcaption></figure>

We do not recommend using these setups blindly. Instead, view them as foundations for creating your own setups. Customize them according to token’s volatility, your risk tolerance, and the market regime.

* 🥇 **Prime** - use for established coins with relatively low volatility. Such coins are typically found within the top-300 by market cap;
* 🔥 **Degen** - aggressive setup for ~~shit~~ memecoins, covering a much larger price range and offering higher profit potential;
* 🛡️ **Vault** - conservative setup, best suited for relatively stable coins like BTC, ETH, or SOL.

After selecting the coins you want to trade, the next step is to define how the bot will open its initial position. For this you need to select the entry order size and choose the order type it will use:

<figure><img src="/files/lCusv6dNlz4util17upv" alt=""><figcaption></figcaption></figure>

The entry order by default is set in the "Spend" currency. It means that the bot is runnung in "Cost" mode where you set the amount of funds you want to at each level. You can switch it to "Get" currency to define the amount of coin you want to buy at each level. This switches the bot into "Size" mode. We suggest to stick with the default "Cost" mode. You can understand the modes better by watching this video:

{% embed url="<https://youtu.be/3ahAXp69uWk>" %}

There are three order types available to use here:

* [**Swap**](/dex-trading-spot/manual-orders/swap) - will enter the position right away;
* [**Limit**](/dex-trading-spot/manual-orders/limit) - will be placed at the chosen distance below the market price (limit distance). E.g., if you set it at 5%, the entry order will be placed 5% below the current market price. If the bot is set to repeat itself after taking profit, the next entry order will be placed 5% below the TP level;
* [**Trailing**](/dex-trading-spot/manual-orders/trailing) - will keep its trigger at the chosen distance (trailing distance) above the market price if it falls, but will stay in place if it rises. Will enter position when the price rises enough to touch the trigger. E.g., if you set the trailing distance at 10%, the bot will initially place the order trigger 10% above the current market price. If the price falls, the trigger will go down with it, maintaining the 10% distance. Whenever the price rises by 10% from its low, the order will trigger.

Next, you need to set the averaging orders that will be placed below the entry and will act as a "safety net". Here, you need to determine how many of those orders you want to place (`Orders #`), how far down the price range (`Price step` + `Price step multiple`), and what their size will be (`Size multiple`):

<figure><img src="/files/Ljw0L71L1AEQVy67oCrB" alt="DCA bot safety orders"><figcaption></figcaption></figure>

**Orders #** - choose how many additional orders you want to place below the entry order.

**Size multiple** - defines the size of each averaging order relative to the previous one. I.e., if you set the multiple at 1, the size of each order will be equal to the previous one. If you set the size multiple at 2, each subsequent order will be two times larger in size than the previous. Size of the first averaging order is defined relative to the entry order size.

**Price step** - basic distance between the averaging orders.

**Price step multiple** - if set to 1, the distance between all averaging orders will be equal to the price step. If to >1, the distance will increase with each order, if to <1, the distance will decrease.

I.e., if you set the price step at 2.5%, and the price step multiple to 1, all averaging orders will be placed at 2.5% from each other. If you increase the price step multiple to 2, the first averaging order will be placed 2.5% below the entry order, the second averaging order at `2.5% x 2` from the first, the third at `5% x 2` from the second and so on.

Next, you need to set your **Take Profit** and (optionally) Stop Loss:

<figure><img src="/files/uivyyFOPdFQwXFlttFPD" alt="" width="375"><figcaption></figcaption></figure>

There are two options for the Take Profit order type: [swap](/dex-trading-spot/manual-orders/swap) or [trailing](/dex-trading-spot/manual-orders/trailing). With the swap selected, once the target level is reached, the order will execute immediately.

The Trailing Take Profit, on the other hand, once the target level is reached, won't trigger but will start trailing (following) the market price at the set distance (trailing distance) below it. If the price continues rising, your Take Profit will move higher with the market, potentially capturing additional upside. Once the price falls by the trailing distance from its high, the Trailing Take Profit will execute.

**Stop Loss** percentage is the distance from the last averaging order, not from your entry price. I.e. if you set it at 5%, your Stop Loss will be placed 5% below the last averaging order. The Stop Loss is optional - you can run the bot without it, if you are comfortable holding the coin you buy even if the price falls below your bot's price range.

Next up are **Stop** and **Repeat** settings:

<figure><img src="/files/zYQBega6gh7U3lSQL6dA" alt="" width="375"><figcaption></figcaption></figure>

**Repeat on TP and SL** - if you turn them on, the bot will repeat itself with the same settings after hitting either Take Profit or Stop Loss. If you turn them off - it will simply stop. You can also choose to repeat the bot after Take Profit, but stop after reaching the Stop Loss.

**Cooldown** - defines the time period that the bot will wait after TP and/or SL before starting the new cycle.

**Close pos. on stop** - if turned on, the bot will try to close its position whenever stopped, - either manually or because of encountering an error, e.g. "insufficient funds" or "max. slippage" on TP/SL.

Funds needed:

<figure><img src="/files/ljzNyVwrpbQ3mQeiOH3e" alt="" width="375"><figcaption></figcaption></figure>

**Funds needed** - total value of entry and all averaging orders. Shows the amount of "Spend" coin you need to hold for all the bot's orders to execute. \
**NB:** If you are running the bot in Size mode 'on repeat', this amount will increase/decrease with the market price of the coin you trade.

**NB:** you also need to hold blockchain's native currency to pay for gas fees (ETH for Ethereum, Base, and Arbitrum, BNB for BSC, SOL for Solana. Once we add the support for gas in any ERC20 token you'll be able to select the currency you want to pay the gas fees in. If you are running the bot 'on repeat', make sure you have sufficient funds to pay for gas in all the planned bot's iterations.


# Running the bot

{% embed url="<https://youtu.be/R7NRtc7162M>" %}
Part 3: Running the bot
{% endembed %}


# Webhooks

{% embed url="<https://youtu.be/Mx-nD_p2Pgw>" %}

*documentation* *coming soon...*


# 💎 sniper bot

gems sniper is an advanced market screener that lets you discover and auto-buy up-and-coming coins based on plethora of predefined criteria.&#x20;

You can screen the token universe on price, volume, and liquidity changes, social followers growth, number of holders, buying or selling pressure, number of experienced buyers, and a lot more. You can filter your selection by coin age, market cap, security score, and other metrics.

Once you've established your criteria, you can either receive a notification each time a new coin fits your selection or automatically buy such coins with a market ([swap](/dex-trading-spot/manual-orders/swap)) or a [trailing](/dex-trading-spot/manual-orders/trailing) order and attach [Take Profit and Stop Loss](/dex-trading-spot/manual-orders/tp-+-sl-combo) to it.

With this tool even a simple strategy of automatically buying every coin that, for example, reaches $100k TVL and gains over 100k Twitter followers, can produce spectacular results, especially during the bull run.&#x20;

For instance, if you had this tool at your disposal during the previous bull run, you would have bought SHIB in March 2021 and gained over 3,000x two months later. That buy alone would have paid for 2,999 buys of other coins even if all of them went to zero afterwards and you did not sell any. And who knows how many other 100+ baggers you would have caught among those 2,999 coins.

:gem: Gem sniper bot is currently available in TEST MODE (paper trading) with full trading mode coming soon:

{% embed url="<https://youtu.be/Gp5IYj5zRFk?si=KyeOVJM1eF5cmfut>" %}


# DEX screener

The DEX screener is your tool for discovering up-and-coming tokens to trade. Set the criteria that define what an interesting token looks like to you — price action, volume, holders, age, launchpad, anything — and the screener gives you a live list of every actively-traded token across all [supported blockchains](/supported-blockchains) that matches.

Once you've found a combination that catches the kind of gems you're looking for, you can either keep using the screener as a discovery dashboard, or hand the same filters off to the [💎 sniper bot](/dex-trading-spot/bots/sniper-bot) to start buying matching tokens automatically.

{% hint style="info" %}
**A few things to know upfront**

* The screener refreshes every **\~10 minutes**. Time periods on filters and columns (**1H, 1D, 1W, 1M**) are **rolling** — "1D" means "the last 24 hours from now", not "yesterday".
* Spent time on a filter combination you like? **Save it as a preset** with one tap. Presets follow you everywhere — they're available here on the screener and inside the 💎 sniper bot setup.
* Click **Launch bot** at the top of the screener at any point to send your current filters straight into a sniper bot setup form, pre-filled and ready to launch.
  {% endhint %}

#### **Filters**

Tap **Add filter** to pick a criterion, set a value, and apply it. Stack as many as you like.

{% hint style="info" %}
**Filters combine with AND.** A token has to pass *every* active filter to show up. There's no OR option — if you want two different sets of criteria, save each one as a preset and switch between them. Multiple filters means "this AND this AND this", always.
{% endhint %}

Tap any filter below to see what it means and when it's useful.

<details>

<summary><strong>Coin age</strong> — how long the token has been actively trading</summary>

Days since the token first started trading on-chain. Useful for either side of the freshness coin — set a low value (like < 1 day) to find brand-new launches, or set a high value to filter out fresh tokens you don't trust yet.

Note that this tracks first *trading* activity, not contract creation. A token whose contract was deployed weeks ago but only became tradable yesterday will show 1 day old, not weeks.

</details>

<details>

<summary><strong>Market cap</strong> — current price × circulating supply</summary>

Standard market cap in USD. Lets you filter for micro-caps, mid-caps, or anything else. For most new meme launches with 100% of supply unlocked, market cap equals FDV — for projects with vesting or locked allocations, the two diverge.

</details>

<details>

<summary><strong>Fully diluted valuation</strong> — current price × total supply</summary>

What the market cap would be if all the token's total supply was in circulation, at the current price. Useful when combined with Market cap: when the two are roughly equal, supply is fully unlocked and there's no hidden dilution coming. When FDV is much higher than market cap, a lot of supply is still locked up and will hit the market over time — relevant if you're worried about future sell pressure from unlocks or vesting.

</details>

<details>

<summary><strong>Trading volume</strong> — total trading volume across all pools over the period</summary>

How much money has changed hands trading this token over the chosen period. Higher volume generally means more interest, more liquidity, and easier entry/exit. Low volume on a token you're considering is usually a red flag.&#x20;

On the other hand, volume can (and often is) manipulated. So do not rely solely on it when looking for potential opportunities.

</details>

<details>

<summary><strong>Price change</strong> — how much the price moved over the period</summary>

The classic momentum filter. "Price up 50% in the last hour" finds tokens having a moment; "Price down 30% in the last day" finds dips. Pair with a volume and/or liquidity, number of traders etc. floors so you're not catching artificial moves on tokens that nobody trades.

</details>

<details>

<summary><strong>Buying pressure</strong> — net buy vs sell volume in USD</summary>

Total buy volume minus total sell volume over the period. A positive number means more was bought than sold; a negative number means the reverse. The size tells you how strong the imbalance is.

When you see a rising price but buying pressure is weak it usually means the price is being moved by very thin orderflow — a few small trades pushing the price disproportionately because no one's there to absorb. That's the classic setup for **wash trading or manipulation on illiquid tokens**: a manipulator can buy a tiny amount to spike the price, paint the chart, attract retail buyers, then dump.

Whereas a rising price with **strong positive buying pressure** = likely lots of real money flowing in = harder to fake.

</details>

<details>

<summary><strong>Volume change %</strong> — how much volume has grown or shrunk over the period</summary>

Percentage change in trading volume compared to the previous period of the same length. Going from $10K to $100K in an hour shows a 900% volume change.

{% hint style="info" %}
**Combine this with an absolute volume floor.** A token going from $1,000/hour to $1,500/hour shows a 50% increase but is still a tiny market. Pair it with absolute volume floor to find tokens that already have real liquidity *and* are accelerating.
{% endhint %}

</details>

<details>

<summary><strong>Holders</strong> — unique wallets holding the token</summary>

The headline holder count. More holders generally means broader distribution and stronger community.

{% hint style="warning" %}
**Holders can be gamed.** Anyone can airdrop dust to thousands of wallets to inflate the number. On its own, a high holder count tells you very little. Combine with volume, unique traders and trade-count filters to lock out the spam.
{% endhint %}

</details>

<details>

<summary><strong>Liquidity</strong> — total USD in trading pools</summary>

How much money is sitting in pools with this token you can trade against. Higher liquidity means lower slippage on your orders and easier exits.

The screener already excludes tokens with less than $10K in liquidity from the universe by default, so a "Liquidity > $10K" filter doesn't do anything — useful values are above that.

</details>

<details>

<summary><strong>Trade count</strong> — number of individual trades over the period</summary>

How many trades have happened on this token over the period. High trade counts mean active markets with lots of participants. Combined with volume, it tells you whether the volume comes from a few whales or from many smaller participants.

On the other hand, on its own can be gamed by multiple bots doing tiny trades. Combine it with trading volume and ohter filters to weed out potential manipulations.

</details>

<details>

<summary><strong>Traders in the last 24h</strong> — unique trading wallets in the last day</summary>

How many different wallets actually traded this token in the last 24 hours. Different from holders (which counts everyone who's holding) and different from trades (which counts transactions). 100 traders making 10 trades each tells a very different story than 1 trader making 1,000 trades.

This filter is fixed to 24 hours — no period switcher at the moment here.

</details>

<details>

<summary><strong>Verified</strong> — token passed an external verification check</summary>

Whether the token has been verified by an external source — Jupiter's verified list on Solana, CoinMarketCap on Ethereum, Base, Arbitrum, BNB Chain. Tokens that pass get a green check on their row.

{% hint style="info" %}
Verified is a good "exclude blatant scams" filter — it doesn't mean a token is safe or going up, just that it's been around long enough and got listed somewhere reputable. Verified tokens can still rug, go to zero, or just underperform. Use it as a baseline, not a guarantee.
{% endhint %}

</details>

<details>

<summary><strong>Launchpad</strong> — token launched on a recognized launchpad</summary>

Filters for tokens that came out of a specific launchpad. Available launchpads depend on the chain:

* **Solana**: Pump.fun, Moonshot, Raydium, Meteora
* **BNB Chain**: Four.meme
* **Other chains**: not available yet

You can select one launchpad or several at once.

{% hint style="info" %}
The screener only shows tokens that are actively trading on public DEXs.That effectively means this filter only shows **graduated** tokens — the ones still in the bonding phase haven't made it to a DEX yet and aren't in the universe.
{% endhint %}

</details>

{% hint style="info" %}
**Looking up a specific token rather than discovering new ones?** The screener is built for discovery, so there's no token search bar in the filter row — but the exact same stats and time-period breakdowns are available in the **token info card**, which shows up below the order setup form whenever you select a token on the DEXs. Paste in a contract address, token name or ticker, and you'll see the full screener-grade breakdown for that specific token in the info card below the form.
{% endhint %}

#### **Mechanics**

**Where to find the screener**

On **web**, it's **Screener** in the left sidebar. On **mobile**, tap the 💎 in the top-left of the DEXs page — or set the screener as your bottom-menu shortcut in Settings, or turn your phone sideways to bring up the full side menu.

The screener always follows the chain you've selected at the top of the app. Switch chains, you see a different list.

**Sorting and customizing columns**

Click any column header to sort by it. Columns with time-based values have a small period badge next to the name (like `1D`) — tap to switch between 1H / 1D / 1W / 1M.

Drag the column headers around to reorder them.

Hit the ⚙️ inside the Token column header to enter edit mode. From there, add or remove columns.

**The token info popup**

Hover (web) or tap (mobile) any token name to bring up the info popup. You'll see a quick view of all its stats, plus two shortcuts: ⭐ to favorite the token, or ⇄ to jump straight to its trading page.

The same info card also appears below the order setup form on the DEX trading page whenever a token is selected — so if you want the screener's stats for a specific token rather than discovering new ones, just pick the token there.

**Presets and Favorites**

Got a filter combination you want to come back to? Three-dot menu next to the filter row → **Save** → give it a name. Your presets show up on the screener and inside the 💎 sniper bot setup, so the same combination works in both places.

One preset comes built in: **Favorites**. It's your personal watchlist, populated whenever you ⭐ a token from anywhere in the app.

**Sending filters to a 💎 sniper bot**

Once your filters are giving you a list of tokens you'd actually want to buy, hit **Launch bot** at the top of the screener. The 💎 sniper bot setup form opens with your filters pre-filled — adjust the order size and TP/SL, and you're a click away from automated buys.

This is the recommended workflow: build and refine your filters in the screener (where you can see what they match in real time), then hand them off to a bot once you're happy.

See the [💎 sniper bot](/dex-trading-spot/bots/sniper-bot) docs for everything about the bot itself.


# Webhooks

goodcryptoX allows you to automate DEX trading via TradingView webhooks — a powerful mechanism for triggering orders and bot actions directly from your signals.

Unlike some implementations that treat webhooks like a programmable API (where you send parameterized commands like "buy 3 BTC"), goodcryptoX currently supports a trigger-based model. Each webhook simply activates a predefined action on a specific order or bot — no parameters or commands are interpreted.

In the near future, we will launch a new TradingView Strategy bot that supports full strategy instructions via webhooks, including dynamic symbol selection, quantities, order types, and multi-symbol logic — effectively acting as an API layer. Stay tuned

> Webhooks are only accepted from TradingView servers for now — no custom IPs or external sources.\
> If you need to use a custom webhook source, contact us at <support@goodcrypto.app> to request access.

### How webhooks work in goodcryptoX

* Every order or bot **action** has its own dedicated webhook URL
* You must create the order or bot first to get the URL (they will appear in the **Webhooks** section of the order or bot's **Details**)
* Sending **any** webhook payload to that URL will trigger the action

Here is a video overview:

{% embed url="<https://youtu.be/Mx-nD_p2Pgw>" %}

> Webhook URLs are action-specific. You must create one webhook per action, e.g. one for entry, one for take profit, one for stop loss, etc. for every bot or order

### Supported order and bot actions

If you want your order or bot to be **triggered by a webhook**, you must select webhook as the **trigger condition during setup**. This applies to:

* Limit orders trigger
* Trailing order activation (trailing start)
* Take-profit and stop-loss triggers&#x20;
* DCA bot entry condition

> **Cancel** webhook — always available in all orders and bots
>
> **Close position** webhook — always available in DCA bot details

<figure><img src="/files/WYflbOak45S9OBECQZ7h" alt="" width="375"><figcaption></figcaption></figure>

After creation, you’ll find all available webhook URLs in the **Details** of your order or bot:

<figure><img src="/files/aF8DBJQ4eFTkyzn3b8I9" alt="" width="375"><figcaption></figcaption></figure>

To sum up:

| Action                          | Supported? | Notes                                             |
| ------------------------------- | ---------- | ------------------------------------------------- |
| Cancel order                    | ✅          | Always shown in details                           |
| Trigger Limit order             | ✅          | Must select webhook at setup                      |
| Activate Trailing order         | ✅          | Trailing start = webhook                          |
| Trigger take profit / stop loss | ✅          | Optionally webhook-triggered                      |
| DCA bot - entry                 | ✅          | Entry buy/sell via webhook (must be set at setup) |
| DCA bot - exit                  | ✅          | Close position via webhook (always available)     |

{% hint style="info" %}
**Multiple take-profit targets with webhooks**

If you set up a take-profit group using webhook as the trigger method, they will all share the same webhook URL. Each time the webhook is triggered, the next TP order in the sequence will execute — one by one.
{% endhint %}

### How to set up alerts in TradingView

Once you’ve created your order or bot in goodcryptoX and copied the webhook URL for a specific action, here’s how to link it to your TradingView alerts:

1. Go to your chart in TradingView
2. Create a new alert based on your strategy, indicator, or condition
3. In the **alert settings**, enable the checkbox **“Webhook URL”**
4. Paste in the specific webhook URL from the goodcryptoX **Available webhooks** section
5. Leave the **message field** as-is (any content is fine — goodcryptoX ignores the payload for now)
6. Save the alert

### Repeating strategies (via DCA bot)

A webhook-triggered order (e.g. limit with TP and SL) is a **one-time setup**. Once the order executes and the linked TP or SL fires, the entire trade is complete. If you want this structure to **repeat automatically**, that’s not possible with orders — but it is achievable now using the DCA bot.

We will soon introduce a dedicated TradingView strategy bot to support repeating multi-action trades, but in the meantime, DCA bot provides a flexible way to repeat your webhook-driven strategy.

#### Pure webhook loop

To set up a bot that enters a position on a webhook, exits on a webhook, and then repeats:

1. Set **entry condition** = webhook
2. Set **averaging orders** = 0 (disable averaging)
3. Disable both **take**-**profit** and **stop-loss**
4. Enable **"Repeat on close position"**

<figure><img src="/files/qTt8BqzYmAIWt6d3sJNE" alt="" width="375"><figcaption></figcaption></figure>

Once the bot is launched, you’ll see the following webhook URLs under the bot's **Details → Webhooks** section:

* **Enter Buy** — opens a Long position
* **Close position** — closes the active position (long or short)
* **Cancel** — stops the bot

**Execution logic**

* When the bot receives **Enter Buy**, it opens a long position.
* The bot will **only respond to the first entry webhook** it receives while idle.
* While a position is open:
  * Any further entry signals are **ignored**
  * The only accepted signals are **close position** or a triggered TP/SL (if configured)
* Once the position is closed (manually, by webhook, or by SL/TP), the bot resets and waits for the next Entry webhook.

This loop continues as long as the bot remains active, allowing you to repeat a complete entry → exit → reset cycle indefinitely.

#### Pure webhook mode vs hybrid setups

The DCA bot supports multiple control layers that can be combined to build flexible strategies:

* **Entry**: via webhook, signal, or instant
* **Exit**: via webhook, or built-in price-based TP/SL
* **Averaging**: optional; can be disabled

You can:

* Run a bot entirely via webhook signals (entry and exit)
* Add price-based TP/SL as fallbacks, even if you use webhook exits
* Add averaging orders for additional protection

This makes it possible to design:

* Fully automated loop strategies (pure webhook)
* Signal-driven bots with manual failovers
* Hybrid setups with multi-layer exits

### Practical webhook strategy examples

#### Example 1: One-off order + multiple take profits (Bollinger Band bounce)

**Goal:** Buy when price breaches lower Bollinger Band, sell progressively as it climbs.

**Setup in goodcryptoX**

* Create a limit order with trigger condition = webhook
* Add three take-profit targets. TP trigger = webhook

<figure><img src="/files/N5CfoE1m3k3Gpwkk0PYO" alt="" width="375"><figcaption></figcaption></figure>

**Setup in TradingView**

Create four alerts:

1. Price breaches lower band → send to main order's **Trigger** webhook URL
2. Price returns inside band → send to **Take Profit Trigger** webhook URL
3. Price crosses mid-band → send to **Take Profit Trigger** webhook URL
4. Price breaches upper band → send to **Take Profit Trigger** webhook URL

<figure><img src="/files/EzowspbHuhEMSBcwG7od" alt="" width="375"><figcaption></figcaption></figure>

In the **alert settings**, enable the checkbox **“Webhook URL”**

Paste in the specific webhook URL from the goodcryptoX **Available webhooks** section. Leave Message field as is — it is not used.

#### Example 2: Repeating strategy with DCA bot (Golden/Death Cross)

**Goal:** Enter long on Golden Cross, enter short on Death Cross. Exit with a 10% profit or when RSI > 70 and repeat forever.

**Setup in goodcryptoX**

Create DCA bot

* Entry condition = webhook
* Averaging = off (set to 0)
* Take Profit = 10%
* Stop loss = off
* Enable: "Repeat on TP"

**Setup in TradingView**

* Create three alerts on the same chart:
  1. SMA50 crosses above SMA200 → send to **Enter Buy** webhook
  2. SMA50 crosses below SMA200 → send to **Enter Sell** webhook
  3. RSI > 70 → send to **Close position** webhook

### Summary

| Concept            | Description                                                    |
| ------------------ | -------------------------------------------------------------- |
| Trigger model      | Each action has its own webhook URL                            |
| Setup flow         | Create order → copy webhook URL → paste into TradingView alert |
| Repeating strategy | Use DCA bot with repeat enabled                                |


# Orders mechanics

*documentation* *coming soon...*


# Errors

*documentation* *coming soon...*

While we are writing a comprehensive documentation for this, if your swap failed on an EMV chain (Ethereum, Base, BNB chain, Arbitrum) — check out our [Decoding Smart Contract Wallet swaps](/wallets/built-in-wallet/smart-contract-wallets/decoding-scw-swaps) chapter - it will help you understand what's going on.&#x20;


# Routing

*documentation* *coming soon...*


# Gas fees

*documentation* *coming soon...*


# Max. slippage

*documentation* *coming soon...*


# MEV protection

When you trade on a decentralized exchange, your transaction is briefly visible to network participants before it's confirmed on-chain. Specialized bots — known as **MEV searchers** — can exploit that visibility to profit at your expense, most commonly by sandwiching your trade between their own buy and sell orders to push the price against you.

goodcryptoX routes every swap through transaction paths that protect against this kind of harmful MEV. The exact mechanism depends on the chain you're trading on.

<details>

<summary><strong>What is MEV, exactly?</strong></summary>

**MEV** stands for **Maximal Extractable Value** — the profit that block producers and searchers can extract by reordering, inserting, or omitting transactions in a block. On AMM DEXs, the three forms that matter most for traders are:

* **Sandwich attacks** — a searcher spots your pending swap, places a buy order in front of it (pushing the price up), lets your order execute at the worse price, then sells back at the new higher price. You pay the difference, the searcher pockets it.
* **Frontrunning** — a searcher copies your transaction with a higher fee to execute first, capturing an opportunity you would have captured yourself.
* **Backrunning** — a searcher places a transaction *immediately after* yours to capture arbitrage opportunities your trade creates (e.g. a price imbalance between two DEXs). Unlike sandwiching, backrunning doesn't worsen your execution price — it's generally considered "productive" MEV.

Sandwich attacks are the form that costs traders the most, and they're the main thing MEV protection is designed to prevent.

</details>

### **EVM chains: Ethereum, Base, Arbitrum, BNB Chain**

On EVM chains, goodcryptoX submits every swap through **ERC-4337 bundlers** with private transaction routing — **Alchemy** on Ethereum, Base, and Arbitrum, and **Pimlico** on BNB Chain.

When you sign a swap, your transaction is sent to the bundler through a private channel — not the public mempool. The bundler packages it and forwards it directly to validators or block builders for inclusion. Because no searcher ever sees the transaction before it lands on-chain, there's no window during which a sandwich or frontrun can be inserted around it.

This protection is automatic and applies to every order routed through goodcryptoX on these four chains — manual swaps, bot trades, and triggered orders alike. You don't need to enable anything.

### **Solana**

Solana works differently from EVM chains: there's no traditional public mempool. Transactions are streamed directly to the current block leader. This eliminates classic Ethereum-style frontrunning, but a different MEV surface still exists — searchers run their own infrastructure to observe pending transactions through RPC nodes and submit competing transactions via Jito bundles.

By default, goodcryptoX broadcasts Solana transactions using **priority fees** — fast and inexpensive, but not MEV-protected. For larger swaps where MEV exposure matters, you can switch the broadcast mode to **Jito**:

1. Open DEX order form
2. Click the ⚙️ settings cogwheel
3. Under **Broadcast mode**, switch from **Priority fees** to **Jito**

<figure><img src="/files/rVQBsGsmH2onKnQlC6nz" alt="" width="375"><figcaption></figcaption></figure>

When you broadcast via Jito, your transaction is included in a **Jito bundle** — a group of transactions that validators must execute atomically, in the exact order specified, or not at all. Because the bundle locks transaction ordering on-chain, no searcher can insert their own swaps around yours to sandwich you.

> **When does MEV protection actually matter?**
>
> Sandwich attacks are only profitable on trades large enough to move the price meaningfully — the searcher needs slippage to extract value from. For small, frequent orders (like the individual trades placed by a DCA bot or a grid bot), the economics don't work for attackers, and these orders are rarely targeted. The default priority-fee mode is usually fine for them.
>
> Consider switching to Jito when you're sending **large one-off swaps** on Solana — especially on volatile or low-liquidity tokens where slippage is wider and the attack surface bigger.

#### **A note on "productive MEV" on Solana**

Some MEV is actually beneficial — particularly **backrunning arbitrage**, where a searcher rebalances prices across DEXs immediately after your trade executes. This doesn't worsen your execution (your trade already filled); it just captures the small price imbalance your swap creates.

On Solana, goodcryptoX uses **Helius Sender** to route transactions, and we've opted into the Helius backrun rebate program. Here's what that means for you:

* Your swap always executes first — searchers can only act *after* it lands on-chain, and only post-trade backruns are permitted.
* The searchers participating in the auction are vetted and KYC'd by Helius; no frontrunning or sandwiching is allowed.
* When your trade creates an arbitrage opportunity, the captured value is split 50/50 between Helius and goodcryptoX.

The goodcryptoX share is added to the same pool we use for our DEX swap fee [revenue sharing](/ecosystem/revenue-sharing) and [GOOD token](/good-token/summary) buyback & [burn](/good-token/burn) programs — so it flows back to the ecosystem rather than going to external extractors.


# Upcoming functionality

The features described below are on our immediate development roadmap. The only reason they are not live yet is the team's finite throughput. Rest assured, we are doing our best to deliver them asap.


# copy trading bot

copy trading bot lets you automatically copy the trades of a chosen wallet.

You can choose to copy any wallet by simply entering its address or selecting from a curated list of the most profitable DEX trader wallets. You will be able to sort all wallets that traded on Uniswap within a certain period by profitability (realized and/or unrealized) and filter them by the number and/or size of the trades.

Once you select a wallet to copy, you can choose the size scale of your copy orders relative to the original wallet. The default setting is 1:1 or 100%, but you can go as low as 10% or as high as 200%. At 10%, if the original wallet makes a swap of 1 ETH worth, your copy swap will be sized as 0.1 ETH, at 200% - as 2 ETH.

You will also be able to select safeguards that will protect you from malicious behavior of the wallet you will be copying: from max. number/frequency/size of the trades to honeypot checks and PnL-based Stop Loss / Take Profit.

Needless to say, the bot will only copy actual swaps on Uniswap and ignore transactions of other types.

***

The owners of the wallet that is being copied by goodcryptoX users can claim a 25% revshare of the swap fees we collect from the copy trades. All they need to do is to 'claim' that wallet on goodcryptoX. There will be a 2 years lookback - meaning you can claim your copy trading revshare for up to 2 years after the trades happen.

Our copy trading bot can be used by individual traders, trading group leads, and KOLs looking to monetize their insight or by the fund managers looking to automate buying and selling across multiple client wallets.


# grid bot

*coming soon...*


# infinity bot

*coming soon...*


# SOS bot

*coming soon...*


# rebalancer bot

*coming soon...*


# gas in any ERC20/SPL token

*coming soon...*


# auto-bridging

*coming soon...*


# batch orders

*coming soon...*


# batch transfers

*coming soon...*


# VWAP & TWAP orders

*coming soon...*


# iceberg orders

*coming soon...*


# Telegram shortcuts

*coming soon...*


# conversational trading

*coming soon...*


# recurring buys

*coming soon...*


# Hyperliquid

Though fully on-chain, Hyperliquid's trading experience is closer to a CEX than to an AMM DEX.

Similarly, in goodcryptoX it behaves almost exactly like a CEX integration — but with DEX-style pricing and token economics.

You trade Hyperliquid inside our CEX interface, using the full CEX trading toolset: advanced orders, all CEX bots, TradingView webhooks, TA signals, price alerts, and more.

[Connection](/perp-dexs/hyperliquid/how-to-connect) works the same way as on CEXs: through an API wallet (their version of an API key), which lets goodcryptoX place orders but never withdraw funds.

Unlike centralized exchanges, no subscription is required to use any advanced tools or to increase bot limits.

Instead, Hyperliquid follows our DEX fee model: a [trading fee](/perp-dexs/hyperliquid/builder-fees) applies, which can be [reduced](/ecosystem/dex-swap-fee) through [trading volume](/ecosystem/loyalty-program), [GOOD holdings](/good-token/holding-benefits), a higher [subscription tier](/ecosystem/subscription-plans), or an [Ultimate NFT](/ecosystem/nfts).

Hyperliquid fees also integrate directly with GOOD token economics:\
`50%` goes to [Revenue sharing](/ecosystem/revenue-sharing), `10%` to daily GOOD [burns](/good-token/burn), and [referrers](/ecosystem/referral-program) receive `25%` of all trading fees paid by their invitees.

goodcryptoX significantly expands Hyperliquid’s native functionality.

You get conditional [stop orders](/perp-dexs/manual-orders/stop-market-limit) that don’t freeze your balance until triggered, along with a full suite of [trailing orders](/perp-dexs/manual-orders/trailing-stops) — including trailing entries, trailing exits, and reverse-trailing setups like “buy the dip” or “sell the pump.”&#x20;

Our [Take Profit + Stop Loss combos](/perp-dexs/manual-orders/tp+sl-combo) are in a different league: you can set multiple TP targets, have your SL follow filled TPs, or apply trailing logic to either leg.&#x20;

You can also run automated strategies with [Grid](/perp-dexs/bots/grid-bot), [DCA](/perp-dexs/bots/dca-bot), or [Infinity Trailing](/perp-dexs/bots/infinity-trailing) bots, and trigger or cancel any order or bot in goodcryptoX using [webhooks](/perp-dexs/webhooks) — powered by any TradingView strategy or alert.


# How to connect

{% embed url="<https://youtu.be/dCKlpi8v738>" %}

{% hint style="info" %}
For manual builder fees approval use our custom [tool](https://goodcrypto.app/hype/builder-fees) as described below. Hyperdash's tool as shown in the video had been sunsetted
{% endhint %}

### Connect with MetaMask automatically

If you control your Hyperliquid account with MetaMask, you can connect it to goodcryptoX in just 3 clicks.

If not - you can either follow the [manual setup](#manual-setup) route or add the wallet that controls your Hyperliquid account to MetaMask and proceed with the following.

{% stepper %}
{% step %}
In our [**web app**](https://app.goodcrypto.app) go to:

```
Settings -> Exchanges -> Hyperliquid
```

{% endstep %}

{% step %}
Click "Connect with MetaMask":

<figure><img src="/files/FsHHQSREKnMgiGPYGrVd" alt=""><figcaption></figcaption></figure>
{% endstep %}

{% step %}
Select the wallet that controls your Hyperliquid account and click "Connect":

<figure><img src="/files/0lBtUhcoGODyho5bQCAE" alt="" width="375"><figcaption></figcaption></figure>
{% endstep %}

{% step %}
We will now generate an API wallet and register it with Hyperliquid. "Confirm" in Metamask to sign the transaction (no gas required):

<figure><img src="/files/ichwdXjqtpvaZX3Jiq62" alt="" width="375"><figcaption></figcaption></figure>

In the unlikely case you already have a maximum number of registered API wallets on Hyperliquid (3), we will ask which one do you want to replace and register a new one in its place.
{% endstep %}

{% step %}
You will then be asked to sign the transaction to approve our [Builder fee](/perp-dexs/hyperliquid/builder-fees). Click "Confirm" to proceed (no gas required):

<figure><img src="/files/ZIZ5tlaovGyOnjaueiBn" alt="" width="375"><figcaption></figcaption></figure>
{% endstep %}
{% endstepper %}

Your API wallet will now be saved in our secure storage. Once the status of your connection turns to "**OK**" - you are all set!

You can now see your API wallet's address and name that you can use to identify it in the exchange's interface, as well as its expiration date:

<figure><img src="/files/d3nOuLz5Hm9CqHHAroW9" alt=""><figcaption></figcaption></figure>

Hyperliquid's API wallets expire every 6 months. Before it expires, we will warn you and you'll be able to seamlessly replace your current API wallet with a new one using your MetaMask wallet.

### Manual setup

If the wallet you use to control your Hyperliquid account is other than MetaMask, you can setup the connection with goodcryptoX manually.

{% stepper %}
{% step %}

#### Create API wallet

Connect your wallet to Hyperliquid. \
Go to `More -> API`. \
Pick a name for your API wallet (e.g. goodcryptoX), click "Generate" the API wallet address and then - "Authorize API Wallet":

<figure><img src="/files/ggp6bPkAxBAgIKfeJN9C" alt="" width="563"><figcaption></figcaption></figure>

You will then see a pop-up with your API wallet Private Key - copy it, you will need to add it to goodcryptoX later - you won't see this key again. Also click on the "MAX" in the "Days Valid" filed - it will set your wallet's expiry to 6 months (otherwise it will expire in 90 days):

<figure><img src="/files/XjmeLgqC6YfAAHEdXk07" alt="" width="375"><figcaption></figcaption></figure>

Once ready, click "Authorize" and sign the transaction with your wallet (no gas required).
{% endstep %}

{% step %}

### Approve Builder fee

To be able to trade with goodcryptoX on Hyperliquid you need to allow us to [charge fees](/perp-dexs/hyperliquid/builder-fees) on your trades. Hyperliquid does not expose this functionality in the interface, so we've built a dedicated [tool](https://goodcrypto.app/hype/builder-fees) for that.

Go to our [Builder fee management tool](https://goodcrypto.app/hype/builder-fees) and connect the wallet that controls your Hyperliquid account:

<figure><img src="/files/JnleiofMl3cMRWOpPDcA" alt="" width="563"><figcaption></figcaption></figure>

Once connected, click Approve goodcryptoX builder fee and sign the transaction with your wallet:&#x20;

<figure><img src="/files/wVJAKbTDXtbcUmk4uHJ4" alt="" width="563"><figcaption></figcaption></figure>

> While you approve a 1% max builder fee, this only approves a 0.1% futures fee (enforced by Hyperliquid). The unified 1% entry is a visual limitation in Hyperliquid’s implementation of this functinality

{% hint style="info" %}
If you created your Hyperliquid account using **email**, you’ll need to export your wallet to MetaMask (or another wallet) before you can approve builder fees.

Go to Settings in the Hyperliquid interface and select “Export email wallet”
{% endhint %}
{% endstep %}

{% step %}

### Add API wallet to goodcryptoX:

In our app (web or mobile), go to:

```
Settings -> Exchanges -> Hyperliquid -> Add API wallet manually
```

Add the address of the wallet that controls your Hyperliquid account (NOT your API wallet address) to "Hyperliquid account address".\
Add the private key of the API wallet you created (NOT the private key to your main wallet) to "API wallet private key" and click "Save and Validate":

<figure><img src="/files/P4y35gwUmipO1Z6RSRnv" alt="" width="563"><figcaption></figcaption></figure>
{% endstep %}
{% endstepper %}

Your API wallet will now be saved in our secure storage. Once the status of your connection turns to "**OK**" - you are all set!

You can now see your API wallet's address and name, as well as its expiration date:

<figure><img src="/files/d3nOuLz5Hm9CqHHAroW9" alt=""><figcaption></figcaption></figure>

Before it expires, we will warn you beforehand so that you'll have enough time to replace it with a new one.


# Builder fees

Hyperliquid refers to integrator-collected trading fees as **builder fees**. In this model, goodcryptoX acts as a builder—charging a trading fee on top of Hyperliquid's base fees in exchange for access to advanced orders and trading bots.

On centralized exchanges, goodcryptoX does **not** charge trading fees, but access to premium trading tools and increased bot limits requires a paid [subscription](/ecosystem/subscription-plans). In contrast, on Spot DEXs and Hyperliquid, **all features are available without a subscription**, and a [trading fee](/ecosystem/dex-swap-fee) is applied per order.

Hyperliquid sits between CEXs and DEXs in its architecture and UX - and our integration follows a similar model. You trade inside the CEX interface, using the same CEX-level toolset (advanced orders, full-featured bots like [Grid](/perp-dexs/bots/grid-bot) and [Infinity Trailing](/dex-trading-spot/upcoming-functionality/infinity-bot)), but without needing a subscription. Instead, we apply a builder fee to each trade, which helps power the [GOOD token](/good-token/summary) economy.

#### How builder fees work

To enable builder fees, Hyperliquid requires you to explicitly authorize goodcryptoX to charge them - by signing a transaction with your wallet. This approval is required to connect your Hyperliquid account to our app. If you connect your account [with MetaMask](/perp-dexs/hyperliquid/how-to-connect#connect-with-metamask-automatically) - it is done automatically. If you set up your connection [manually](/perp-dexs/hyperliquid/how-to-connect#manual-setup), you will need to [approve](/perp-dexs/hyperliquid/how-to-connect#approve-builder-fee) our builder fee via a third-party interface.

You approve the **maximum fee**, but the **actual fee charged** depends on the [DEX fee discount](/ecosystem/dex-swap-fee) you qualify for. These discounts are the same across all DEX integrations and stack together:

* Higher [trading volume](/ecosystem/loyalty-program) on goodcryptoX = higher discount (up to 50%)
* [Holding](/good-token/holding-benefits) more GOOD tokens = higher discount (up to 50%)
* Active [subscription](/ecosystem/subscription-plans) = additional discount (up to 30%)
* Holding the [Ultimate NFT](/ecosystem/nfts) = a 50% discount.

#### Fee rates

* **Futures trading** on Hyperliquid: base builder fee is **0.1%**
* **Spot trading** on Hyperliquid: base builder fee is **1%**, but it is only charged on **sell orders**. No fee is charged on buy orders.

{% hint style="info" %}
While the signed approval shows a max fee of **1%**, this only applies to spot trades. Futures are capped at **0.1%** on-chain by Hyperliquid’s design
{% endhint %}

You can always check your current fee tier and discount in the app by clicking the robot icon in the top right corner.

#### How builder fees power the GOOD token economy

Builder fees don’t just fund trading infrastructure and new features development - they also directly support [GOOD token](/good-token/summary) holders and long-term growth.

* **50%** of all builder fees collected from Hyperliquid trading are distributed to GOOD holders via the [Revenue sharing](/ecosystem/revenue-sharing) program
* **10%** of all fees go to daily GOOD [burns](/good-token/burn), reducing total supply over time
* **25%** of fees from referred users are paid out to their referrers through our [referral program](/ecosystem/referral-program)

This ensures that every trade on Hyperliquid not only unlocks powerful tools for the traders, but also strengthens the value and sustainability of the GOOD [token economy](/good-token/tokenomics).

By using builder fees this way, we align trader incentives, token utility, and platform growth into a single system.


# Referral discount

Register your Hyperliquid account with our referral link:

<https://app.hyperliquid.xyz/join/GOODCRYPTOX>

and receive a `4%` trading fees discount on the first $25M of trading volume.

What's more, we will get 10% of your fees as referral reward, share `50%` of them with our GOOD token holders as [revenue sharing](/ecosystem/revenue-sharing), and use `10%` to buy back and burn our token.<br>

If you already have Hyperliquid account, you can still benefit from the discount:&#x20;

go to <https://app.hyperliquid.xyz/referrals>

click "ENTER CODE"

and enter:

```
 GOODCRYPTOX
```


# Manual orders

Order types supported on Perp DEXs:

**Standalone orders:**

* [Market](/perp-dexs/manual-orders/market) - executes immediately at the best available market price;
* [Limit](/perp-dexs/manual-orders/limit) - placed in exchange's order book and executes when the specified price is reached;
* [Stop market/limit](/perp-dexs/manual-orders/stop-market-limit) - triggers when a specified stop price is reached, submitting a market or limit order to the exchange;
* [Trailing stop](/perp-dexs/manual-orders/trailing-stops) - follows the market price as it moves in your favor. Triggers when the market reverses by the trailing % you’ve set;

**Attached orders**

* [Take Profit](/perp-dexs/manual-orders/take-profit) - triggers when the market moves in your favor by the specified percentage from the execution price of your main (entry) order. If a Stop Loss is also set, it is automatically cancelled when Take Profit triggers;
* [Trailing Take Profit](/perp-dexs/manual-orders/trailing-tp-sl) - activates once your target profit % is reached, then follows the market price as it continues to improve in your favor. Triggers when the market reverses, helping you capture more upside;
* [Stop Loss](/perp-dexs/manual-orders/stop-loss) -  triggers when the market moves against you by the specified % from the execution price of your main order. It cancels any attached Take Profits if triggered;
* [Trailing Stop Loss](/perp-dexs/manual-orders/trailing-tp-sl) - follows the market price as it moves in your favor. If the price reverses by the trailing percentage, the order triggers — helping to reduce losses or lock in gains as the market pulls back.

⚙️ More advanced order types are [coming soon](/perp-dexs/upcoming-functionality).


# Market

A Market Order executes immediately at the best available price. It prioritizes speed over price precision and is the most direct way to enter or exit a position.

Where supported, goodcryptoX uses the exchange’s native Market Order.

However, Hyperliquid doesn’t support market orders natively. Instead, we approximate them using a Limit IOC (Immediate or Cancel) order placed deep into the orderbook — 10% above best ask (for buys) or 10% below best bid (for sells).

In normal conditions, this behaves like a Market Order. But in cases of high volatility or low liquidity, the order may be only partially filled — or not filled at all — unlike a native market order, which would execute fully.


# Limit

A Limit Order is an instruction to buy or sell at a specific price or better. Unlike conditional orders such as stop orders, trailing orders, or TP/SL combos — which are monitored on goodcryptoX servers until their trigger conditions are met — a Limit Order is sent immediately to the exchange and placed directly on the exchange’s orderbook.

Because it lives on the exchange rather than on our servers, a Limit Order’s execution, fill behavior, or rejection is determined entirely by the exchange. Once submitted, it behaves independently of goodcryptoX: even if our servers experience downtime, your limit order will remain on the book and continue to execute normally according to exchange’s matching engine.

Limit orders can be used to enter or exit positions directly, and they also serve as the execution leg in Stop Limit and Trailing Stop Limit orders triggered by goodcryptoX. Grid and DCA bots rely on native limit orders as well.


# Stop market/limit

Stop Market and Stop Limit orders are conditional order types used to automate trade execution once a specific trigger condition is met.

* A Stop Market order sends a market order to the exchange when the stop condition is triggered.
* A Stop Limit order sends a limit order to the exchange at a predefined price when the stop condition is triggered.

In goodcryptoX, the stop condition can be either:

* A price level reached by the market, or
* A TradingView [webhook](/perp-dexs/webhooks), allowing full control via custom TA alerts or strategy scripts.

Until triggered, both Stop Market and Stop Limit orders live entirely on goodcryptoX servers. The exchange has no knowledge of them, which provides two key benefits:

* Your exchange balance is not frozen until the order triggers, allowing for more efficient capital use.
* These orders don’t count toward your open order limits on the exchange.

However, because the trigger logic is server-side, there is a small dependency: if goodcryptoX servers are unavailable at the moment the condition is met, the order may not trigger or execute.

Unlike some exchanges that restrict stop conditions or limit prices based on current market direction, goodcryptoX lets you define both the stop price and the limit price freely — above, below, or equal to the current market price (or stop price for Stop Limit order).


# Trailing stops

A Trailing Stop order dynamically follows the market price at a fixed distance. As the price moves in your chosen direction, the trailing trigger moves with it. When the market reverses by the set distance, the order is triggered and submitted to the exchange.

* Trailing Buy follows the price downward and triggers when the market bounces up by the trailing distance. It’s typically used to enter a position at the lowest possible point.

<figure><img src="/files/rYtCzUog9h2gXZblqE2d" alt="" width="563"><figcaption></figcaption></figure>

* Trailing Sell follows the price upward and triggers when the market pulls back by the trailing distance. It’s commonly used to exit positions at the highest point before a reversal.

<figure><img src="/files/znke9IY1qdn1pl5LDtRy" alt="" width="563"><figcaption></figcaption></figure>

Trailing orders in goodcryptoX are handled on our server until triggered. The exchange doesn’t know about them until they fire, which provides two key advantages:

1. Your balance isn’t frozen until the order is triggered, so your capital remains fully usable.
2. They don’t count toward your exchange order limit.

However, this also means the order depends on our infrastructure: if our servers are temporarily unavailable when the trigger condition is met, the order may not be submitted.

Watch our video overview for a detailed walkthrough:

{% embed url="<https://youtu.be/jWtCSEvJykg?si=xy4CGVZiV99XTby9>" %}

#### Reverse Trailing Orders

Reverse trailing orders do the opposite:

* Reverse Trailing Buy follows the price upward and triggers when the market drops. It’s useful for “buy the dip” setups.
* Reverse Trailing Sell follows the price downward and triggers when the market rises. It’s designed to “sell the pump”.

#### Trailing Stop vs Trailing Stop Limit

* Trailing Stop (Market): when conditions are met a market order is sent to the exchange. Ensures execution but may suffer slippage in fast-moving markets.
* Trailing Stop Limit: places a limit order on the exchange at the trigger price. Protects against slippage but may fail to fill if the market moves past the limit price too quickly.

See our video “Trailing Stop vs Trailing Stop Limit” for a detailed breakdown:

{% embed url="<https://youtu.be/23D1khsYzn0?si=EPupR7l_Bcg77QUR>" %}

### Advanced Features

#### **Trailing Start**

Normally, Trailing Stop starts tracking the market as soon as the order is created. With Trailing Start, you can define a condition that must be met before trailing begins. The trigger can be either a price level or a TradingView [webhook](/perp-dexs/webhooks). This adds flexibility for advanced setups:

* *Example:* Start trailing buy only if Bitcoin drops to $90K
* *Example:* Start trailing sell when a TradingView alert is triggered (e.g., breaks above Bollinger Band)

#### **Improve Only**

The Improve Only option ensures that your entry price will never be worse than the current market price. Without it, a Trailing Buy with a 1% trailing distance at 100k would initially trigger at 101k; with Improve Only enabled, the order waits until the market dips enough so that the trigger can trail at 100k or lower.

Improve Only can be used on its own or together with Trailing Start. For example, you can set:

* Trailing Start: 90k
* Trailing Buy distance: 2%
* Improve Only: enabled

Without Improve Only, the worst-case fill would be at \~91.8k (90k + 2%). With Improve Only, the system shifts the effective start level so that the *worst-case* fill is around 90k instead: if price bounces immediately, you buy roughly at your start level; if it keeps dipping, you buy even lower.

#### Take Profit / Stop Loss Combos

Trailing orders can also be used as Trailing Take Profit or Trailing Stop Loss legs inside TP/SL combos. For more on that, see [Trailing TP/SL](/perp-dexs/manual-orders/trailing-tp-sl).

#### Learn More

Read our full guide:&#x20;

{% embed url="<https://goodcrypto.app/trailing-stop-order-a-definitive-guide/>" %}


# Take Profit

*documentation* *coming soon...*


# Multiple Take Profits

{% embed url="<https://youtu.be/4y-EnTLHjrY?si=BS0GeBjPZuEHT_Qr>" %}

*documentation* *coming soon...*


# Stop Loss

*documentation* *coming soon...*


# Stop Loss that follow TPs

{% embed url="<https://youtu.be/a52GBvtntPs?si=yI05dbC497cisjyz>" %}

*documentation* *coming soon...*


# Trailing TP/SL

{% embed url="<https://youtu.be/BIJvQBKZSvQ?si=4baD0L--xesnO-FC>" %}

{% embed url="<https://youtu.be/AB7pGtPPZYY?si=EUYECv43b6OmW-T4>" %}

{% embed url="<https://youtu.be/1T0dZN1KC0g?si=0hSUgZty3_DNLZ4c>" %}

{% embed url="<https://youtu.be/lXk7EeWXnrc?si=NCCjqfshDpya9H9O>" %}

*documentation* *coming soon...*


# TP+SL combo

*documentation* *coming soon...*


# Errors

*documentation* *coming soon...*


# Bots

<figure><img src="/files/7T2OgwXki0ineq92I0SV" alt="DEX DCA bot"><figcaption></figcaption></figure>

DEX DCA bot is a versatile tool enabling multiple trading strategies previously only available on cetralized exchnages.

DCA stands for dollar-cost averaging, meaning that the bot enters a position and then places additional orders if the price moves against you, averaging down your cost basis.&#x20;

The bot automatically adjusts your Take Profit and Stop Loss as your position changes.

After Take Profit or Stop Loss are triggered the bot can either stop or repeat with the same settings.

This enables several use cases for the bot:

1. **SAFETY NET**\
   Enter positions knowing that should the market move against you, you'll buy more at a lower price and your TP will be adjusted to reflect that. All without you lifting a finger.
2. **VOLATILITY SCALPER**\
   Run the bot on volatile coins on repeat - rack up hundreds of profitable iterations by covering 50%+ price range with averaging orders and going martingale on orders size (each averaging order 2x of previous).
3. **SCALE ORDER**\
   If your entry strategy involves placing multiple orders on several levels - use the bot to do that for you. If you don't plan to use the bot's automated TP - set it at an unreasonable level (say, 999%) and stop the bot once it enters the required position.
4. **MULTIPLE TAKE PROFITS**\
   If you want to place multiple Take Profits to your existing position, select the position's coin in the bot's "Spend" field. The bot's entry and averaging orders will act as your Take Pofit levels. Set the bot's TP to an unreasonable level so it won't mess with your setup.
5. **BTFD**\
   Buy the f\*ing dip! Accumulate ETH, BTC, SOL and other top coins automatically taking advantage of the market dips. Trend is your friend - if you believe that the coin will ultimately go up, then the lower it goes the more you want to buy it. DCA bot is the perfect tool for it.

Here is our DCA bot's video overview:

{% embed url="<https://youtu.be/P5o1s9-YoYE>" %}
Part 1: Overview
{% endembed %}

We are also running a dedicated [TG channel](https://t.me/+EFAh0cdHrXw0OTNh) where we post our best-performing DCA setups - both for centralized and decentralized exchanges. Join to get new trading ideas and share your experience.


# Grid bot

Hyperliquid grid bot in goodcryptoX is an automated trading strategy that monetizes price volatility by maintaining a structured grid of buy and sell orders across a defined price range.

{% embed url="<https://youtu.be/WeuiKvhMI00>" %}

### Why use Grid Bot on Hyperliquid?

Markets rarely move in straight lines. Even during strong trends, price constantly oscillates — moving up, pulling back, bouncing, consolidating, and repeating. A traditional "buy and hold" approach only profits from directional movement. Grid Bot profits from the movement *itself*.

Consider this example: BTC is at $80,000. Over the next month, it climbs to $95,000, drops back to $82,000, recovers to $91,000, dips to $85,000, and eventually settles back at $80,000.

If you simply held BTC through all of that, your net result is zero.

But inside that journey, price made dozens of oscillations — each one a potential trading opportunity. A grid of buy orders below the current price and sell orders above it would have captured profit from every single bounce, dip, and recovery along the way. Each buy–sell cycle locks in a small realized gain, and when price stays within your range, those gains compound into meaningful returns — even when the market goes nowhere.

This is what Grid Bot does. It behaves similarly to a structured market-making strategy: it places layered buy orders below the current price, layered sell orders above it, and repeatedly captures the spread between them as price moves back and forth.

It lets you effectively use your capital which would otherwise sit idle during the sideways markets and express your view on the market while also profiting from volatility along the way in the rising or falling markets.

#### Best market conditions for Grid trading

Grid trading is most effective when the **price trades within a defined range** (sideways markets). Standard or [neutral](#neutral-grid) grid bot is used for this. The more the price oscillates withing the range and the longer it stays within those levels, the higher is the Grid bot profit.&#x20;

For ranging markets - when the **price trends up or down** but remains volatile,  oscillating around the trend - goodcryptoX offers [long](#long-grid) and [short](#short-grid) grid bots respectively. With these bots you still profit from every price swing within the grid range, but also earn a return from the directional price movement.

#### **Common Grid bot use cases:**

The two most common Grid trading use cases are:

* **Profit from sideways markets.** When price consolidates and you don't have a strong directional view, a Neutral Grid captures the back-and-forth movement with the range you set.
* **Express a directional view with built-in volatility harvesting.** Long and Short Grids let you profit from both the direction and the price swings within it.

But that's not all. Grid bot is a versatile tool that can also be used for strategies like:

* **Exit a position gradually.** If you have an existing position, you can use the Short Grid bot placed above the market price to scale out of it in a controlled manner, while profiting from price bounces along the way.
* **Accumulate an asset over time.** A Long Grid on an asset you're bullish on lets you accumulate it gradually while earning from short-term volatility along the way.

### How Grid trading works on Hyperliquid

A grid is defined by four parameters: an **upper grid level**, a **lower grid level**, a **number of levels** within that range, and an **order size** for each level.

The bot divides the range between upper and lower bounds into evenly spaced levels and places limit orders at each one. Buy orders sit below the current market price, sell orders sit above it. The level closest to the current price remains empty - this ensures the grid has room to react to the next price movement in either direction.

**The core cycle works like this:**

When price drops and fills a buy order, the bot immediately places a sell order one level above it. When price rises and fills a sell order, the bot places a buy order one level below. Each buy–sell pair locks in a small realized profit equal to the distance between those two levels times the order size (minus trading fees). As price oscillates within the range, this cycle repeats over and over.

Think of it as a net stretched across your price range. Every time price moves through the net, it triggers trades — and each triggered trade generates a small profit. The more price oscillates, the more trades execute, and the more profit accumulates.

**What happens at the edges?** If price moves beyond the upper or lower grid boundary, no more orders exist beyond it. The bot holds its accumulated position and waits. If price returns to the range, the cycle resumes. If it doesn't, you're left with a directional position — this is the primary risk of grid trading, and why range selection matters.

**A simple illustration:** Imagine a grid with just two levels — one buy at $79,000 and one sell at $81,000. Every time BTC oscillates between those two levels, the bot buys low and sells high, capturing $2,000 `x` order size per cycle. Now expand that to 20 or 50 levels across a wider range, and you begin to see how a grid can generate hundreds of small profitable trades from normal market volatility.

### Grid modes: Neutral, Long, Short

goodcryptoX supports three grid modes. Each one changes the bot's initial position and risk profile. Choosing the right mode depends on your market outlook.

#### Neutral Grid

Neutral is the default and most balanced mode.

When you launch a Neutral Grid, the bot places buy orders at every level below the current market price and sell orders at every level above it. No initial position is taken — you start flat (or neutral).

Neutral Grid is ideal when you expect price to stay within a range and you don't have a strong directional view. The bot profits purely from volatility within the range.

**Risk profile:** If price breaks above the range, you end up with a short position (on perps) or have sold your base asset (on spot). If price breaks below, you accumulate a long position. In both cases, your exposure equals roughly half the grid's total size — because only the orders on one side of the range execute as price moves through. This is the most balanced risk profile of the three modes.

**When to use Neutral:**

* Ranging, consolidating markets
* When you have no strong directional conviction

#### Long Grid

In Long mode, *all* levels are initially set as buy orders.

The buy orders that are above the current market price execute immediately upon launch (since they can be filled at the current market price or better), and each is replaced by a sell order one level above. This builds an initial long position whose size equals the number of levels above the market price multiplied by the order size.

A Long Grid is essentially a Neutral Grid that starts with a built-in long position. After the initial fills, it behaves identically — buying lower, selling higher, cycling through levels.

**Risk profile:** If price rises through and eventually above the grid range, the bot gradually sells off the position, locking in directional profit on top of the grid trading profits. If price falls, you accumulate more — your long position grows, and your downside exposure is roughly double that of a comparable Neutral Grid (because you started with a position *and* you keep buying more as it drops).

**When to use Long grid:**

* When you're bullish with volatility expected
* When you want to accumulate an asset but also capture short-term swings
* On spot, when you only have quote currency (e.g. USDT) and no base currency to sell

#### Short Grid

Short mode is the mirror image of Long.

All levels are initially set as sell orders. The sell orders below the current market price execute immediately, building an initial short position. Each fill is replaced by a buy order one level below.

**Risk profile:** If price drops through and below the range, the bot gradually buys back, closing the short and locking in directional profit. If price rises, the short position grows, and your exposure is roughly double that of a Neutral Grid.

**When to use Short grid:**

* When you're bearish with volatility expected
* When you want to scale out of an existing long position
* On spot, when you hold a position and want to sell it gradually

> **Important note on Long/Short initialization:** Currently, the initial position in Long and Short modes is not opened as a single market order. Instead, all orders are placed as limit orders at each grid level, and the ones on the "wrong" side of the market price fill immediately. On some futures exchanges, limit orders placed deep into the order book may be rejected due to exchange-specific restrictions on how far from the current price a limit order can be placed. If you encounter errors launching a wide Long or Short Grid on certain exchanges, this is the likely cause. This is a known limitation that will be addressed in a future update.
>
> Hyperliquid does not have the deep-order-book limit restrictions that some centralized futures exchanges impose, so Wide Long and Short grids are less likely to encounter launch issues.

***

### Grid setup

This section walks through every field in the goodcryptoX Grid Bot setup form, from top to bottom — exactly as it appears in the interface. All settings apply identically whether you're trading on Hyperliquid, another perp DEX, or a centralized exchange.

<figure><img src="/files/J1bAVEikt4sworsOrBVi" alt=""><figcaption></figcaption></figure>

#### Grid mode

The first choice is the mode: **Neutral**, **Long**, or **Short**. If you're unsure, start with Neutral - it carries the most balanced risk and doesn't require a directional view.

#### Highest and lowest grid level

These two fields define the upper and lower bounds of your trading range. All grid levels will be placed between these two prices.

Choosing where to set them is one of the most important decisions in grid setup. A good approach is to look at historical support and resistance levels - zoom out on the chart, identify the range where price has been spending the most time, and set your bounds accordingly.

You don't need to capture every possible move. Setting the range too wide means your levels will be far apart (requiring more levels or resulting in fewer trades), while setting it too narrow risks price leaving the range quickly.

You can set these values numerically in the form, or you can drag the upper and lower bounds directly on the chart. As you adjust them, the grid levels update in real time on the chart, and you can immediately see which levels will be buy orders and which will be sell orders.

#### Levels

This field sets the number of levels (from 2 to 250) within your range.

There is a fundamental trade-off here. With a fixed amount of capital:

* **More levels** means tighter spacing between them. Each trade generates a smaller profit (PnL per level is smaller), but trades happen more frequently. Order sizes will be smaller because your capital is spread across more levels.
* **Fewer levels** means wider spacing. Each trade captures a larger price difference (higher PnL per level), but trades happen less often. You can use larger order sizes since capital is concentrated on fewer levels.

You need to strike a balance between frequency and profit-per-trade. Too tight and fees may eat into thin margins; too wide and the bot barely trades before price leaves the range.

The interface shows you the **PnL per level** (after exchange fees) in real time as you adjust this number. It also displays the estimated percentage gain per level, which helps you evaluate whether the spacing makes sense for the instrument and conditions you're trading.

> Note, that the PnL per level is calculated using the basic exchange fee tier. If you have a higher tier, your fee will be lower and PnL per level - higher. Also note that at the time of this writing PnL per level calculation does not take into account [builder fee](/perp-dexs/hyperliquid/builder-fees).

On the chart, you can watch the level lines adjust as you change this number — a very intuitive way to visualize the spacing.

#### Levels distribution: Arithmetic vs Log

Below the highest/lowest level fields, you'll see a **Log distribution** checkbox.

By default, the grid uses **arithmetic** (linear) distribution — levels are spaced with equal price intervals. If your range is $80,000 to $90,000 with 10 levels, each level is exactly $1,000 apart.

When you enable **Log distribution** (also called geometric), levels are spaced with equal *percentage* intervals instead. This means the dollar gap between levels is smaller at the bottom of the range and larger at the top.

**Why does this matter?** In crypto markets, price tends to move in percentage terms — a 5% drop from $90,000 ($4,500) covers a much wider absolute range than a 5% drop from $80,000 ($4,000). With arithmetic spacing, the percentage return per level varies: levels near the bottom give a larger percentage gain than levels near the top. Log distribution normalizes this, giving you a consistent percentage return on every level.

**Log is generally preferred for:**

* Wide trading ranges
* Volatile assets
* Perpetual futures
* Most grid configurations in practice

**Arithmetic can be useful for:**

* Very narrow ranges
* Stablecoin or low-volatility pairs
* When you specifically want equal dollar spacing

If you're unsure, enable Log — it's the recommended default for most setups.

#### Order size

Order size defines how much the bot trades on each level. It is always specified in **base currency** (or contracts, for futures).

For example, if you're running a grid on BTC.USDT and set order size to 0.01 BTC, the bot will buy or sell 0.01 BTC at every level.

The interface also shows you the approximate quote currency equivalent of each order at the current price. Keep in mind that this equivalent varies by level — higher price levels require more quote currency per order, and lower levels require less. So even though every level trades the same amount of BTC, the dollar value of each trade is different.

Your total capital commitment depends on the order size, the number of levels, and the current price. The interface calculates the **Funds needed** at the bottom of the form, so you can see exactly how much is required before you launch.

#### Activation price

This optional field lets you delay the grid launch until price reaches a specific level.

If you set an activation price, the grid will not place any orders until the market touches that price. Once activated, the grid begins as if it had just been launched at that moment.

**Use cases:**

* You want to launch a grid at a range that's currently above or below the market — set an activation price at the edge of your range to wait for price to arrive
* You expect a breakout and want to start the grid only after it happens
* You want to time the grid around a specific event or level without manually watching the market

#### Stop above / Stop below

These are price-based stop triggers. If price reaches either level, the bot stops: all open grid orders are cancelled, and (if the **Close position when the bot stops** checkbox is enabled) the current position is closed at market.

You can drag the stop levels directly on the chart, the same way you set grid bounds.

Stop levels are essential risk management. They protect you from runaway losses if price breaks far out of your range. Even if you expect price to stay in range, setting stops is good practice — especially on leveraged instruments.

#### Close position when the bot stops

When this checkbox is enabled, any remaining position is market-closed when a stop triggers (or when the grid stops for any other reason, such as an error). When disabled, the grid stops and cancels its orders, but your position remains open for you to manage manually. On perps, all close-position orders use the reduce-only flag, so the bot will never accidentally flip your position.

#### Take Profit (PnL target)

This field sets a **realized PnL target**. When the grid's total realized profit reaches this amount, the grid stops.

**Critical detail:** this is based purely on *realized* PnL — only the locked-in profits from completed buy–sell cycles. Unrealized PnL (the mark-to-market value of your open position) is *not* included. This means that if price moves far out of your grid range, your unrealized loss may be growing, but as long as no new grid trades complete, the PnL target is unaffected. To protect against that scenario, use Stop above / Stop below in addition to the PnL target.

#### Stop in Neutral position

When enabled, the grid will stop the next time it returns to a **neutral position** (zero net exposure from grid orders).

On its own, this is useful for Long and Short Grids: if price trends through your range in the desired direction, the grid gradually closes the position, and once it reaches neutral, it stops cleanly so that if price reverses afterwards, you won't be opening a new position.&#x20;

For a Neutral Grid, this checkbox has no effect at launch (since you start neutral), but it will activate the next time the grid cycles back to neutral. You can use it after your neutral grid ran for a while as a future take-profit level.

**Combining with Take Profit:** This is where it gets powerful. When both PnL target and Stop in Neutral position are enabled, the behavior changes: the bot first waits for the realized PnL target to be reached. Once that happens, it continues running but now watches for a neutral position. The grid stops only when *both* conditions have been satisfied — profit target hit, and position unwound to zero.

This ensures a clean exit: you've locked in your desired profit *and* you have no lingering position to manage (and negative unrealized PnL to realize).

#### PnL drawdown (When to stop)

This optional field sets a **trailing stop on realized PnL**.

It works like this: the bot continuously tracks the peak realized PnL since launch. If the realized PnL drops from that peak by the amount you specify, the grid stops.

For example, if you set PnL drawdown to $50, and the grid's realized PnL reaches a peak of $300 and then drops to $250, the grid stops to protect your gains.

**Important:** Like the PnL target, this is based only on *realized* PnL. If price moves out of the grid range and your unrealized PnL deteriorates, the drawdown stop won't trigger — only changes in realized profit matter. Use price-based stops (Stop above / Stop below) to manage unrealized exposure.

You can set the PnL drawdown when your grid bot is already running - so you don't have to decide on it in advance (unless you want to).

#### Position (perps only)

This field previews the theoretical maximum long and short positions that the grid bot can accumulate (if the price go to either extreme). It is a useful tool to assess your potential risk and exposure.

#### Initital margin / Funds needed

Shows exactly how much capital is required to launch the grid.

**For perpetual futures:**

Only margin in the settled currency (e.g. USDC) is needed, regardless of the grid mode. The exact amount depends on the number of levels, order size, and the prices of each level. Keep in mind that this is the *minimum* margin — you should maintain a buffer well above the calculated amount to avoid liquidation if price moves against you. Never allocate 100% of your available margin to a grid.

**For spot trading:**

Capital requirements depend on the grid mode:

* **Neutral** requires both base and quote currency — quote currency to fund the buy orders below market, and base currency to fund the sell orders above market.
* **Long** requires only quote currency (e.g. USDC), since all initial orders are buys.
* **Short** requires only base currency (e.g. BTC), since all initial orders are sells.

The interface clearly shows the required amounts for each currency, along with your available balance and a warning if you don't have enough.

**Base fee warning (spot):** On exchanges that charge trading fees in the base currency (including Hyperliquid spot), the grid does not automatically reserve or acquire base currency for fees. You must maintain extra base currency balance beyond what the grid needs. If you don't, the grid may stop when it can't cover fees on a trade. This warning is displayed prominently in the setup form when applicable.

As an example, you set your order size at 0.1 BTC. When a buy order executes, your actual received amount will be lower that 0.1 BTC by the amount fee witheld by the exchange. Your sell order will attempt to sell exactly 0.1 BTC and will fail unless you hold additional BTC in your account.

After reviewing your funds, click **Launch** to start the grid. The bot immediately places all grid orders and begins monitoring.

***

### Launching and monitoring the Grid bot

After you click **Launch**, the bot immediately places all grid orders on the exchange (unless activation price was specified) and starts monitoring. You can open the bot's details page at any time to see exactly what the grid is doing, review its performance, adjust its parameters, and manage it.

There are two ways to open the bot details page. You can click **Bots** in the main menu to see a list of all your running bots across all exchanges and pairs — find the grid and click on it. Alternatively, if you're already on the Exchanges page with the same trading pair selected, switch to the **Bots** tab below the chart to see all bots running on that specific instrument, and click the grid from there.

<figure><img src="/files/buAioATscfi6ipVSvnqQ" alt=""><figcaption></figcaption></figure>

At the top of the bot details page, you see the bot's identifying information: the exchange, trading pair, grid mode (Neutral / Long / Short), and the key parameters you set during setup. The current status is displayed here as well — whether the bot is actively running or has stopped (and if so, the reason it stopped).

You also see the **Invested amount**. This is the total amount of funds the bot uses to operate, expressed in quote currency. For spot trading, this represents the actual capital you committed to the grid - the sum of base and quote currency (converted to quote currency at launch price).

For leveraged futures trading, the invested amount reflects the full notional size the bot operates with, *not* your actual deposited margin. If your bot uses 1,000 USDC worth of positions with 10x leverage, your real capital at risk is approximately 100 USDC, but the invested amount shows 1,000 USDC. This is important because the profitability percentages displayed in the next section are calculated against this invested amount. To get your actual return on deposited margin with leverage, multiply the shown percentage by your leverage factor.

#### Profitability

This section shows the grid's financial performance.

**Realized PnL** is the total profit locked in from completed buy–sell cycles. Every time the bot buys at a lower level and sells at a higher level (or vice versa), the profit from that pair of trades is added to realized PnL. This number only goes up when grid cycles complete - it is not affected by the current market price of your open position.

**Unrealized PnL** is the mark-to-market value of the bot's current open position. If the bot is holding a long position and price is above the average entry of that position, unrealized PnL is positive; if price is below, it's negative. This number fluctuates with every price tick.

**Total PnL** is the sum of realized and unrealized - your complete profit or loss if you were to stop the bot and close its position right now.

> **Bot PnL vs exchange position PnL: why the numbers may differ**
>
> The grid bot calculates realized PnL on a per-level basis: each buy–sell cycle is treated as an independent round-trip trade. When the bot buys at level A and later sells one level above, the difference is recorded as realized profit for that pair.
>
> Your exchange, however, tracks the entire position as one - using a single average entry price. This means the exchange's realized PnL for any individual sell is calculated against the average cost of the *whole* position, not the specific buy that the grid paired it with.
>
> This can lead to significant discrepancies, especially when price has moved far in one direction. For example: the bot buys at $100, $95, $90, $85, and $80, building a 5-order long position with an average entry of $90. Price then bounces to $85 and the bot sells one level. The bot records a realized profit on that sell (bought at $80, sold at $85 = +$5). But the exchange sees a sell at $85 against an average entry of $90 - which it reports as a -$5 loss.
>
> Neither number is "wrong" - they represent different accounting methods. The bot's method reflects the actual grid strategy performance (each level is its own trade). The exchange's method reflects the blended position.
>
> As the grid runs and completes more cycles - especially as price oscillates back through the range - these two numbers converge. Over time, the cumulative PnL will align. But during periods of extended directional movement, the gap can be meaningful, and it's important not to be alarmed if your exchange shows a different (or even negative) realized PnL while the bot shows realized profit.

The section also displays **APY** (Annual Projected Yield) in two forms: as an absolute amount in quote currency, and as a percentage. This projection takes the bot's current rate of realized profitability and extrapolates what it would produce over a full year, based on the invested amount. It's a useful benchmark for comparing the grid's performance against other strategies, but keep in mind it's a projection - actual results depend on future market conditions.

**Exchange fees** shows the total trading fees the bot has paid to the exchange across all executed orders. In Hyperliquid bots, you'll also see a separate **Platform fees** line showing the cumulative [builder fees](/perp-dexs/hyperliquid/builder-fees) paid. Both of these fee amounts are already accounted for in the realized PnL — they are shown here separately so you're aware of how much the grid has spent on execution costs.

> **Funding fees are not included in PnL (perpetual futures)**
>
> On perpetual futures, funding payments are settled directly between the exchange and your account - typically every 8 hours - based on your position size and the prevailing funding rate. These payments are **not** reflected in the grid bot's realized or unrealized PnL.
>
> This means your actual profit or loss may be higher or lower than what the bot displays, depending on the cumulative funding you've paid or received. For long-running grids that maintain a persistent directional position, the difference can be substantial. Always check your exchange's funding history separately when evaluating the grid's true performance.

#### Position

This section displays the bot's current position - the number of contracts or amount of base currency the bot is holding at this moment. This is the position that would remain if the bot stopped right now.

For a **Neutral Grid**, the initial position is zero - the bot starts flat and only builds a position as price moves and orders fill. For **Long** and **Short Grids**, the bot starts with a position immediately: the orders on the "wrong" side of the market price execute at launch, building an initial long or short exposure. As the grid runs and price oscillates, this position grows and shrinks as buy and sell orders fill across the levels.

The position shown here is the bot's **total** position - including whatever was established at launch and everything that has changed since. The unrealized PnL from this position is included in the bot's total unrealized PnL, and any realized gains or losses from grid cycles are included in the bot's total realized PnL. There is no separation between "bot performance" and "position performance" — the bot's PnL is one unified number that reflects the complete picture, which is how it should be: this is the total performance of the strategy, nothing else.

The **Close position when the bot stops** checkbox from the setup form is also accessible here, and you can toggle it on or off at any time while the bot is running. When enabled, the bot will market-close the position whenever it stops (for any reason). When disabled, the position stays open for you to manage manually after the bot stops.

#### Stop conditions

The stop parameters you configured during setup - **Stop above** and **Stop below**, **Take Profit** (PnL target), **PnL drawdown** (When to stop), and **Stop in Neutral position** - are displayed here as well.

You can toggle **Stop in Neutral position** on or off at any time during the bot's runtime.

To modify the other stop parameters, click the **Modify** button at the bottom of the details page. From there you can add, remove, or adjust the **Take Profit PnL target**, **PnL drawdown**, as well as the **Stop above** and **Stop below** price levels. This lets you tighten or widen your risk management as the grid runs and conditions change - without stopping and relaunching the bot.

#### Orders

This section provides a count of how many limit orders the bot currently has open on the exchange and how many orders it has already closed (executed). It gives you a quick sense of the grid's activity level - a grid that has closed hundreds of orders has been actively trading, while one with few closed orders may be in a range where price isn't moving much.

#### Progress

Shows the bot's total runtime - when it started and how long it has been running. Useful for evaluating performance in the context of time (especially alongside the APY projection).

#### Webhooks

The webhook section displays the **Cancel webhook URL** for this grid bot. If you want to stop the bot on a TradingView alert, you can send a request to this URL and the bot will stop as if you had pressed the Stop button manually. Currently, only the cancel webhook is supported for grid bots.

#### Price chart

The bot details page includes a full price chart with all grid activity overlaid. This is one of the most informative views for understanding how your grid is performing.

<figure><img src="/files/xuOVem25pMDdU857aPtp" alt=""><figcaption></figcaption></figure>

On the chart you can see:

* **Grey horizontal lines** represent the grid levels - the fixed price points where the bot places orders
* **Green lines** on a grid level indicate an active buy order currently placed at that price with the line start indicating th exact moment the order had been placed on the exchange.
* **Red lines** indicate an active sell order currently placed at that price
* The **neutral position level** is marked - this is the price at which the bot's net position would be zero
* The **max position levels** are also marked - the prices

  &#x20;at which the bot would reach its maximum directional exposure
* **Green dots** and **red dots** on the chart mark every executed order. Green dots are buy fills, red dots are sell fills. You can trace the bot's entire trading history visually — seeing exactly when and at which levels each trade was executed

This chart gives you immediate visual feedback on how the grid is performing: are trades clustering in a productive range? Is price spending time near the edges? Have stops or range boundaries been approached? All of this is visible at a glance.

#### Alerts

Below the chart, you can configure notifications for this specific grid bot. There are four types of alerts, and you can enable any combination of them:

* **Every order** - notifies you each time any grid order executes
* **Every PnL change** - notifies you only when an order results in a change to realized PnL (i.e., orders that complete a buy–sell cycle), as well as any close-position orders. Orders that only open or increase a position without locking in profit are skipped
* **Price enters or exits range** - notifies you when price crosses above the highest grid level or below the lowest grid level, and when it returns back into the range
* **Bot stops** - notifies you when the bot stops for any reason

You can turn each alert on or off at any point during the bot's runtime.

#### Action buttons

At the bottom of the bot details page, you have three action buttons:

**Stop** - stops the bot immediately. All open grid orders are cancelled. If **Close position when the bot stops** is enabled, the remaining position is market-closed. If disabled, your position remains open for you to manage.

**Modify** - opens the parameter editor where you can adjust stop conditions while the bot is running. You can add, remove, or change **Stop above**, **Stop below**, **Take Profit** (PnL target), and **PnL drawdown**. You can also toggle **Close position when the bot stops** and **Stop in Neutral position** from here. You do not need to stop the bot to make these changes - they take effect immediately.

**Repeat** - pre-fills the bot setup form with the exact parameters of this bot. Useful when restarting the bots.

#### Order list

Below the action buttons, you see the full list of all orders associated with this grid bot. The list is divided into two sections: **open orders** (currently placed on the exchange and waiting to be filled) and **closed orders** (already executed).

<figure><img src="/files/EWYx7sJd4ACWcMiykcEF" alt=""><figcaption></figcaption></figure>

For each order, you can see the price, the time it was placed or executed, its current status, and - for orders that resulted in a realized PnL - the profit earned on that specific trade. You can click on any order to open its detailed order page, which includes additional information such as the exact fees paid on that execution.

This order list is especially useful for reviewing the grid's trading history in detail and understanding the PnL contribution of individual trades.

#### When does the grid stop?

The grid stops automatically under any of these conditions:

* **Price hits a stop level** (Stop above / Stop below)
* **Realized PnL target is reached** (if set)
* **PnL drawdown triggers** (if set)
* **Neutral position reached** (if Stop in Neutral position is enabled and conditions are met)
* **An error occurs** - if any order cannot be placed or is unexpectedly cancelled by the exchange (for example, due to liquidation), the grid detects the discrepancy and stops as a safety measure, cancelling all remaining orders

When the grid stops, all open grid orders are cancelled. If **Close position when the bot stops** is enabled, the remaining position is closed at market. If disabled, your position stays open for manual management.

***

### Grid Bot video playlist

For practical walkthrough examples, real trade cases, and strategy discussions, check out our Grid Bot video playlist:

{% embed url="<https://www.youtube.com/playlist?list=PLkscu1wG9E6WxhxMwwCtymU5pg_MRLMZr>" %}

Includes:

* Long-term BTC grid case with 60%+ returns over 5 months
* High-volatility event grid setups
* Detailed range selection and level tuning
* Long, Short, and Neutral Grid comparisons in practice

> **Note:** While these examples show setups on various exchanges, the goodcryptoX grid interface and mechanics work identically across all supported exchanges - including Hyperliquid, Binance, OKX, Bybit, Gate, and others.

We are also running a dedicated [TG channel](https://t.me/+DfNOhP8G86xmYTMx) where we post our best-performing DCA and (occasionally) Grid setups - both for centralized and decentralized exchanges. Join to get new trading ideas and share your experience.

***

### FAQ

<details>

<summary><strong>What is grid trading?</strong></summary>

Grid trading is an automated strategy that places a series of buy and sell limit orders at predetermined price levels within a defined range. As price oscillates within the range, the bot repeatedly buys low and sells high, capturing small profits from each cycle. It's a way to monetize volatility without needing to predict market direction.

</details>

<details>

<summary><strong>Is grid trading profitable?</strong></summary>

Grid trading is profitable when price stays within or near your selected range and there is enough volatility to trigger trades. In ranging markets, it can generate consistent returns. The primary risk is directional: if price breaks far out of your range, unrealized losses on your accumulated position may exceed your realized grid profits. Profitability depends on good range selection, appropriate level spacing, and proper risk management.

</details>

<details>

<summary><strong>What is the best grid mode - Neutral, Long, or Short?</strong></summary>

It depends on your market outlook. Neutral is the most balanced — no initial position, minimal directional risk. Long is best when you're bullish and want to accumulate while profiting from dips. Short is best when you're bearish or want to gradually exit a position. If you're unsure, Neutral is the safest starting point.

</details>

<details>

<summary><strong>What is the difference between arithmetic and log grid levels distribution?</strong></summary>

Arithmetic distribution spaces levels with equal dollar intervals (e.g. every $1,000). Log (geometric) distribution spaces them with equal percentage intervals (e.g. every 1.2%). Log gives a consistent percentage return per level and is generally preferred for crypto — where price moves in percentage terms — especially for wide ranges and volatile assets.

</details>

<details>

<summary><strong>How many grid levels should I use?</strong></summary>

There's no single correct answer — it depends on your range width, order size, and how frequently you want trades to execute. More levels mean more frequent but smaller trades; fewer levels mean less frequent but larger trades. Start with a moderate number and observe the PnL per level shown in the interface. If it's very thin after fees, consider fewer levels or a tighter range.

</details>

<details>

<summary><strong>Does funding affect grid PnL on perpetual futures?</strong></summary>

Yes, but it's not shown in the grid's PnL tracking. Funding payments are settled directly by the exchange and affect your actual account balance. For long-running grids with persistent positions, cumulative funding can meaningfully impact your real returns. Check your exchange's funding history separately.

</details>

<details>

<summary><strong>What happens if the price leaves my grid range?</strong></summary>

No new trades execute beyond the range. You hold whatever position has accumulated from the grid's trading activity, and the unrealized PnL on that position changes with price. If price returns to the range, the grid resumes trading. If it doesn't, you can either wait or stop the grid manually.

</details>

<details>

<summary><strong>Can I get liquidated while running a grid on perps?</strong></summary>

Yes. If your margin falls below the exchange's maintenance requirement — due to the grid's position moving against you, for example — you can be liquidated. The grid detects liquidation (because the exchange cancels its orders) and stops automatically. To minimize this risk, always allocate more margin than the minimum shown in "Initial margin"

</details>

<details>

<summary><strong>What does "Stop in Neutral position" do?</strong></summary>

When enabled, the grid waits until it has zero net position and then stops. This is useful for Long and Short Grids: if price moves through the range in your desired direction, the grid closes the position level by level, and once it's flat, it stops cleanly. When combined with a PnL target, the grid first waits for the profit target to be reached, then continues running until a neutral position is achieved.

</details>

<details>

<summary><strong>Can I run a grid bot on Hyperliquid?</strong></summary>

Yes. goodcryptoX supports grid trading on Hyperliquid for both perpetual futures and spot markets. [Connect](/perp-dexs/hyperliquid/how-to-connect) your Hyperliquid account via API wallet and you have access to the full grid bot functionality — including all three modes, custom stops, activation price, and real-time chart controls. No subscription is required to run grid bots on Hyperliquid through goodcryptoX.

</details>

<details>

<summary><strong>Does grid bot work on centralized exchanges too?</strong></summary>

Yes. The grid bot in goodcryptoX works identically across all supported exchanges — including Binance, OKX, Bybit, Gate, and many others. The interface, mechanics, and all features described here apply to both centralized and decentralized exchanges. The only differences are exchange-specific (fee structures, leverage limits, order placement restrictions).

</details>

<details>

<summary><strong>Does the grid bot work on spot exchanges?</strong></summary>

Yes. The goodcryptoX grid bot works on spot markets with the same interface and mechanics as on perpetual futures. The key differences are practical: there is no leverage or liquidation risk on spot, and capital requirements depend on the grid mode — Neutral requires both base and quote currency, Long requires only quote, and Short requires only base. On spot exchanges that charge fees in the base currency (including Hyperliquid spot), you'll need to maintain extra base balance to cover trading fees. The setup form shows you exactly what's needed and warns you if your balance is insufficient.

</details>

<details>

<summary>Is the goodcryptoX grid bot free?</summary>

On Hyperliquid (and other supported DEXs) you can run grid bots with full functionality with no subscription required. A standard [trading fee](/perp-dexs/hyperliquid/builder-fees) applies on each executed order, and you can reduce it through trading volume, GOOD token holdings, or subscription tier. On centralized exchanges, grid bots are available with a paid [subscription](/ecosystem/subscription-plans).

</details>


# DCA bot

{% embed url="<https://youtu.be/k8-VXhbVDs8?si=aCM_x97LrBu09qA2>" %}

{% embed url="<https://youtu.be/kHDo8WaUGbA?si=tnqIoFkpYXOBm_8Y>" %}

{% embed url="<https://youtu.be/LDQfzydl4J4?si=k4oWoLafrDbOAkgZ>" %}

{% embed url="<https://youtu.be/eTe4sv4IdtY?si=Z0gFJrriAOPX4Mpa>" %}

{% embed url="<https://youtu.be/3ahAXp69uWk>" %}

*detailed documentation* *coming soon...*

We are also running a dedicated [TG channel](https://t.me/+9ygCl78PbCUyMjZh) where we post our best-performing DCA setups - both for centralized and decentralized exchanges. Join to get new trading ideas and share your experience.


# Infinity Trailing

> *This is not a formal documentation — yet. These are our internal notes and best practices for using Infinity Trailing Algos effectively. Full docs coming soon*

### What is Infinity Trailing bot?

Infinity Trailing (InfTrail) is a powerful bot — deceptively simple, but surprisingly versatile.

At its core, it’s just this:

* A trailing order to enter a position
* Followed by a trailing order to exit that position

That’s it. But depending on how you configure the trailing distances, volatility exposure, and exit logic, you can use InfTrail to:

* Ride big uptrends and lock in profits on the way up
* Catch fast swings in either direction
* Accumulate spot tokens you want to HODL
* Create a pseudo-grid strategy with built-in profit protection

So here’s what we think you should know (besides getting a grip on [Trailing orders](/sex-trading/manual-orders/trailing-stops)) before you launch your first InfTrail:

### ⚠️ Quick start: what NOT to do

* Do NOT run it in falling markets — it will almost certainly lose money.
* Do NOT use it on illiquid tokens — slippage will eat your gains.
* Do NOT expect profits in flat markets — this is not a scalping bot.

This Algo is designed for trends — ideally sharp upswings or strong volatility.

***

### ✅ Quick start: what to do

* Run it in trending or volatile markets (think: breakouts, not chop).
* Pick liquid pairs — especially majors (BTC, ETH, SOL, etc.).
* Use larger trailing distances — this is *crucial*. A too-tight trail will churn and lose money.
* Tune your trailing distances based on the asset’s volatility. A good rule of thumb: blue chips (BTC etc.) – at least 1%+, high-vol meme coins: 3%–10% or even more.
* :exclamation: Be patient — InfTrail will often drip small losses before catching a big move and making it all back (and more).

***

### Choosing your strategy: two InfTrail modes

There are effectively two modes you can run your InfTrail in, based on whether you set the "Only exit position at a profit" toggle ON or OFF:

#### Exit at a loss: allowed (*“only exit at a profit” = OFF)*

This is the default InfTrail mode. It will:

* Enter a position with a trailing buy/sell
* Exit that position with a trailing sell/buy — even if that exit is at a loss

When does this work best?

* When markets are volatile and you expect big moves in either direction
* When you want to catch swings, not hold through them
* When you’re not afraid of small losses in exchange for catching the big ones

#### How to think about it and what to expect?

Let’s say you use 1% trailing for both entry and exit. Then:

* The bot will ignore all moves < 1%
* It will lose money on moves between 1–2%
* It will make money on any move >2%

This is just how trailing orders work. So, here is a key takeaway:

> You want to set trailing distances larger than the normal noise of your pair

**PRO tip:** initially launch multiple InfTrails with different trailing distances (0.5%, 1%, 3%, 5%, 10%) on the same pair. Run them for some, then stop the losers — and let the winners run.

#### Exit at a Loss: NOT allowed (*“only exit at a profit” = ON)*

> aka “HODL Mode”

In this mode:

* The bot will enter normally with a trailing buy/sell
* But it will only exit at a profit.\
  Specifically, it will only activate the exit order (it will start trailing) if price moves in your favor to at least: entry price + exit trailing distance.&#x20;

This ensures that in the worst case scenario (the price moving against you right after the exit order start trailing), the exit order will be sent to the excange at your entry price. This can actually result in small loss (consider trading fees + slippage) - but you'll exit around the entry price anyway.

:exclamation:You have to understand, that in this mode, if the price improves, the bot might be left holding the position forever. If you trade with leverage - it might lead to liquidation.

When does this make sense?

* When you’re trading spot, not derivatives
* When you’re comfortable holding the asset for longer

### ⚠️ Important caveats

* This mode does not have a Stop Loss yet — we plan to add one in a future update.
* Do NOT run “only exit at profit” ON with derivatives. You’ll get liquidated if price drops and the bot never exits.

***

### 🧪 InfTrail in practice: what worked for us

Here are some real setups our team has run when we first launched the bot:

* SHIB/USDT — May 2021 — top of the bull market & SHIB = main memecoin
  * Trailing Distance: 10%
  * Market was crazy — 20–30% daily swings
  * Huge profits
* BTC/USDT — 2021 bull run (May -> November)
  * Trailing Distance: 1%
  * Ran profitably for 6+ months
* BTC/ETH with “only exit at profit” ON (2023–2025)
  * As we have no opinion on whether BTC or ETH wins in the long run and HODL both
  * Treating InfTrail like a HODL bot that sells at highs and rebuys after pullbacks

***

### 💡 Pro Tips

* 🧠 Trail distance = your filter for market noise. Set it too low and the bot will get whipsawed.
* 🧪 Try different distances on the same asset — and stop the ones that underperform.
* ⛽ Account for fees and slippage — you still pay them even if the bot avoids closing at a loss.
* 🐌 Don’t expect instant results — it often loses small before it wins big.


# Webhooks

goodcryptoX allows you to automate trading actions via TradingView webhooks — a powerful mechanism for triggering orders and bot actions directly from your signals.

Unlike some implementations that treat webhooks like a programmable API (where you send parameterized commands like "buy 3 BTC"), goodcryptoX currently supports a trigger-based model. Each webhook simply activates a predefined action on a specific order or bot — no parameters or commands are interpreted.

In the near future, we will launch a new [TradingView Strategy bot](/perp-dexs/upcoming-functionality/tradingview-strategy-bot) that supports full strategy instructions via webhooks, including dynamic symbol selection, quantities, order types, and multi-symbol logic — effectively acting as an API layer. Stay tuned

> Webhooks are only accepted from TradingView servers for now — no custom IPs or external sources.\
> If you need to use a custom webhook source, contact us at <support@goodcrypto.app> to request access.

### How webhooks work in goodcryptoX

* Every order or bot **action** has its own dedicated webhook URL
* You must create the order or bot first to get the URL (they will appear in the **Webhooks** section of the order or bot's **Details**)
* Sending **any** webhook payload to that URL will trigger the action

> Webhook URLs are action-specific, not user-specific. You must create one webhook per action, e.g. one for entry, one for take profit, one for stop loss, etc. for every bot or order

### Supported order and bot actions

If you want your order or bot to be **triggered by a webhook**, you must select webhook as the **trigger condition during setup**. This applies to:

* Stop-market / stop-limit orders trigger
* Trailing orders activation (trailing start)
* Take-profit and stop-loss triggers&#x20;
* DCA bots entry condition

<figure><img src="/files/jObwqe4rCZIAf6piZqsQ" alt="" width="563"><figcaption></figcaption></figure>

<figure><img src="/files/ZcSJ8FZyq4aHUtD2IGgv" alt="" width="563"><figcaption></figcaption></figure>

After creation, you’ll find all available webhook URLs in the **Details** of your order or bot:

<figure><img src="/files/FmqLx0L0WSyFsRJU5hEk" alt="" width="563"><figcaption></figcaption></figure>

<figure><img src="/files/7UUyrPG8oY71Am7ICMKM" alt="" width="563"><figcaption></figcaption></figure>

> **Cancel** webhook — always available in all orders and bots
>
> **Close position** webhook — always available in DCA bot details

To sum up:

| Action                          | Supported? | Notes                                             |
| ------------------------------- | ---------- | ------------------------------------------------- |
| Cancel order                    | ✅          | Always shown in details                           |
| Trigger Stop order              | ✅          | Must select webhook at setup                      |
| Activate Trailing order         | ✅          | Trailing start = webhook                          |
| Trigger take profit / stop loss | ✅          | Optionally webhook-triggered                      |
| DCA bot - entry                 | ✅          | Entry buy/sell via webhook (must be set at setup) |
| DCA bot - exit                  | ✅          | Close position via webhook (always available)     |
| Grid bot - entry                | 🚫         | Not yet supported                                 |

{% hint style="info" %}
**Multiple take-profit targets with webhooks**

If you set up a take-profit group using webhook as the trigger method, they will all share the same webhook URL. Each time the webhook is triggered, the next TP order in the sequence will execute — one by one.
{% endhint %}

### How to set up alerts in TradingView

Once you’ve created your order or bot in goodcryptoX and copied the webhook URL for a specific action, here’s how to link it to your TradingView alerts:

1. Go to your chart in TradingView
2. Create a new alert based on your strategy, indicator, or condition
3. In the **alert settings**, enable the checkbox **“Webhook URL”**
4. Paste in the specific webhook URL from the goodcryptoX Webhooks section
5. Leave the **message field** as-is (any content is fine — goodcryptoX ignores the payload for now)
6. Save the alert

### Repeating strategies (via DCA bot)

A webhook-triggered order (e.g. stop-market with TP and SL) is a **one-time setup**. Once the order executes and the linked TP or SL fires, the entire trade is complete. If you want this structure to **repeat automatically**, that’s not possible with orders — but it is achievable now using the DCA bot.

We will soon introduce a dedicated [TradingView strategy bot](/perp-dexs/upcoming-functionality/tradingview-strategy-bot) to support repeating multi-action trades, but in the meantime, DCA bot provides a flexible way to repeat your webhook-driven strategy.

#### Pure webhook loop

To set up a bot that enters a position on a webhook, exits on a webhook, and then repeats:

1. Set **entry condition** = webhook
2. Set **averaging orders** = 0 (disable averaging)
3. Disable both **take**-**profit** and **stop-loss**
4. Enable **"Repeat on close position"**&#x20;

<figure><img src="/files/fPhyYX3S4imdApacvhUK" alt="" width="375"><figcaption></figcaption></figure>

Once the bot is launched, you’ll see the following webhook URLs under the bot's **Details → Webhooks** section:

* **Enter Buy** — opens a Long position
* **Enter Sell** — opens a Short position
* **Close position** — closes the active position (long or short)
* **Cancel** — stops the bot

**Execution logic**

* When the bot receives **Enter Buy**, it opens a long position.
* When it receives **Enter Sell**, it opens a short position.
* The bot will **only respond to the first entry webhook** it receives while idle.
* While a position is open:
  * Any further entry signals are **ignored**
  * The bot will not increase or reverse the current position on Entry signals
  * The only accepted signals are **close position** or a triggered TP/SL (if configured)
* Once the position is closed (manually, by webhook, or by SL/TP), the bot resets and waits for the next Entry webhook.

This loop continues as long as the bot remains active, allowing you to repeat a complete entry → exit → reset cycle indefinitely.

#### Pure webhook mode vs hybrid setups

The DCA bot supports multiple control layers that can be combined to build flexible strategies:

* **Entry**: via webhook, signal, or asap
* **Exit**: via webhook, or built-in price-based TP/SL
* **Averaging**: optional; can be disabled

You can:

* Run a bot entirely via webhook signals (entry and exit)
* Add price-based TP/SL as fallbacks, even if you use webhook exits
* Add averaging orders for additional protection

This makes it possible to design:

* Fully automated loop strategies (pure webhook)
* Signal-driven bots with manual failovers
* Hybrid setups with multi-layer exits

### Practical webhook strategy examples

#### Example 1: One-off order + multiple take profits (Bollinger Band bounce)

**Goal:** Buy when price breaches lower Bollinger Band, sell progressively as it climbs.

**Setup in goodcryptoX**

* Create a stop-market order with trigger condition = webhook
* Add three take-profit targets. TP trigger = webhook

<figure><img src="/files/X2jAuM8MVDwt9tMoFkIK" alt="" width="563"><figcaption></figcaption></figure>

**Setup in TradingView**

Create four alerts:

1. Price breaches lower band → send to main order's **Trigger** webhook URL
2. Price returns inside band → send to **Take Profit Trigger** webhook URL
3. Price crosses mid-band → send to **Take Profit Trigger** webhook URL
4. Price breaches upper band → send to **Take Profit Trigger** webhook URL

<figure><img src="/files/kwMzGpNxmpjWHCEswh4y" alt="" width="563"><figcaption></figcaption></figure>

In the **alert settings**, enable the checkbox **“Webhook URL”**

Paste in the specific webhook URL from the goodcryptoX Webhooks section. Leave Message field as is — it is not used.

#### Example 2: Repeating strategy with DCA bot (Golden/Death Cross)

**Goal:** Enter long on Golden Cross, enter short on Death Cross. Exit with a 10% profit or when RSI > 70 and repeat forever.

**Setup in goodcryptoX**

Create DCA bot

* Entry condition = webhook
* Averaging = off (set to 0)
* Take Profit = 10%
* Stop loss = off
* Enable: "Repeat on TP"

**Setup in TradingView**

* Create three alerts on the same chart:
  1. SMA50 crosses above SMA200 → send to **Enter Buy** webhook
  2. SMA50 crosses below SMA200 → send to **Enter Sell** webhook
  3. RSI > 70 → send to **Close position** webhook

{% hint style="info" %}
DCA bot holds only one position at a time. While in position, it ignores new entry webhooks until position is closed.

If you want to be able to enter Long and Short positions on the same instrument in parallel - create two separate bots and send Enter Buy to one and Enter Sell to the other
{% endhint %}

### Summary

| Concept            | Description                                                    |
| ------------------ | -------------------------------------------------------------- |
| Trigger model      | Each action has its own webhook URL                            |
| Setup flow         | Create order → copy webhook URL → paste into TradingView alert |
| Repeating strategy | Use DCA bot with repeat enabled                                |

### Video tutorials

#### **Intro to webhook trading**

{% embed url="<https://youtu.be/JDkJFOwjjzk?si=m0GBGwTt6GTau-9X>" %}

#### **Using DCA bot with webhooks**

{% embed url="<https://youtu.be/gHXB2S6qdXU?si=i9ZobjRsxFAe7zcJ>" %}

#### **Multiple take-profits with webhooks**

{% embed url="<https://youtu.be/xF-O7ZDoDtU?si=apfiF8uyTn-p4Vh4>" %}


# Alerts

*documentation* *coming soon...*


# Upcoming functionality

The features described below are on our immediate development roadmap. The only reason they are not live yet is the team's finite throughput. Rest assured, we are doing our best to deliver them asap.


# TradingView strategy bot

*coming soon...*


# copy trading

*coming soon...*


# SOS bot

*coming soon...*


# TP/SL for Positions

*coming soon...*


# rebalancer bot

*coming soon...*


# OCO order

*coming soon...*


# VWAP & TWAP orders

*coming soon...*


# iceberg orders

*coming soon...*


# Telegram shortcuts

*coming soon...*


# conversational trading

*coming soon...*


# recurring buys

*coming soon...*


# Manual orders

Supported order types on centralized exchanges:

**Standalone orders:**

* [Market](/sex-trading/manual-orders/market) - executes immediately at the best available market price;
* [Limit](/sex-trading/manual-orders/limit) - placed in exchange's order book and executes when the specified price is reached;
* [Stop market/limit](/sex-trading/manual-orders/stop-market-limit) - triggers when a specified stop price is reached, submitting a market or limit order to the exchange;
* [Trailing stop](/sex-trading/manual-orders/trailing-stops) - follows the market price as it moves in your favor. Triggers when the market reverses by the trailing % you’ve set;

**Attached orders**

* [Take Profit](/sex-trading/manual-orders/take-profit) - triggers when the market moves in your favor by the specified percentage from the execution price of your main (entry) order. If a Stop Loss is also set, it is automatically cancelled when Take Profit triggers;
* [Trailing Take Profit](/sex-trading/manual-orders/trailing-tp-sl) - activates once your target profit % is reached, then follows the market price as it continues to improve in your favor. Triggers when the market reverses, helping you capture more upside;
* [Stop Loss](/sex-trading/manual-orders/stop-loss) -  triggers when the market moves against you by the specified % from the execution price of your main order. It cancels any attached Take Profits if triggered;
* [Trailing Stop Loss](/sex-trading/manual-orders/trailing-tp-sl) - follows the market price as it moves in your favor. If the price reverses by the trailing percentage, the order triggers — helping to reduce losses or lock in gains as the market pulls back.

⚙️ More advanced order types are [coming soon](/sex-trading/upcoming-functionality).


# Market

A Market Order executes immediately at the best available price. It prioritizes speed over price precision and is the most direct way to enter or exit a position.

Where supported, goodcryptoX uses the exchange’s native Market Order.

On exchanges, that do not support market orders natively, we approximate them using a Limit IOC (Immediate or Cancel) order placed deep into the orderbook — 10% above best ask (for buys) or 10% below best bid (for sells).

In normal conditions, this behaves like a Market Order. But in cases of high volatility or low liquidity, the order may be only partially filled — or not filled at all — unlike a native market order, which would execute fully.


# Limit

A Limit Order is an instruction to buy or sell at a specific price or better. Unlike conditional orders such as stop orders, trailing orders, or TP/SL combos — which are monitored on goodcryptoX servers until their trigger conditions are met — a Limit Order is sent immediately to the exchange and placed directly on the exchange’s orderbook.

Because it lives on the exchange rather than on our servers, a Limit Order’s execution, fill behavior, or rejection is determined entirely by the exchange. Once submitted, it behaves independently of goodcryptoX: even if our servers experience downtime, your limit order will remain on the book and continue to execute normally according to exchange’s matching engine.

Limit orders can be used to enter or exit positions directly, and they also serve as the execution leg in Stop Limit and Trailing Stop Limit orders triggered by goodcryptoX. Grid and DCA bots rely on native limit orders as well.


# Stop market/limit

Stop Market and Stop Limit orders are conditional order types used to automate trade execution once a specific trigger condition is met.

* A Stop Market order sends a market order to the exchange when the stop condition is triggered.
* A Stop Limit order sends a limit order to the exchange at a predefined price when the stop condition is triggered.

In goodcryptoX, the stop condition can be either:

* A price level reached by the market, or
* A TradingView [webhook](/sex-trading/webhooks), allowing full control via custom TA alerts or strategy scripts.

Until triggered, both Stop Market and Stop Limit orders live entirely on goodcryptoX servers. The exchange has no knowledge of them, which provides two key benefits:

* Your exchange balance is not frozen until the order triggers, allowing for more efficient capital use.
* These orders don’t count toward your open order limits on the exchange.

However, because the trigger logic is server-side, there is a small dependency: if goodcryptoX servers are unavailable at the moment the condition is met, the order may not trigger or execute.

Unlike some exchanges that restrict stop conditions or limit prices based on current market direction, goodcryptoX lets you define both the stop price and the limit price freely — above, below, or equal to the current market price (or stop price for Stop Limit order).


# Trailing stops

A Trailing Stop order dynamically follows the market price at a fixed distance. As the price moves in your chosen direction, the trailing trigger moves with it. When the market reverses by the set distance, the order is triggered and submitted to the exchange.

* Trailing Buy follows the price downward and triggers when the market bounces up by the trailing distance. It’s typically used to enter a position at the lowest possible point.

<figure><img src="/files/TNCsxbAQGu6xkXMNQyuj" alt="" width="563"><figcaption></figcaption></figure>

* Trailing Sell follows the price upward and triggers when the market pulls back by the trailing distance. It’s commonly used to exit positions at the highest point before a reversal.

<figure><img src="/files/iMlJk2dWhFNA7RgF1eDe" alt="" width="563"><figcaption></figcaption></figure>

Trailing orders in goodcryptoX are handled on our server until triggered. The exchange doesn’t know about them until they fire, which provides two key advantages:

1. Your balance isn’t frozen until the order is triggered, so your capital remains fully usable.
2. They don’t count toward your exchange order limit.

However, this also means the order depends on our infrastructure: if our servers are temporarily unavailable when the trigger condition is met, the order may not be submitted.

Watch our video overview for a detailed walkthrough:

{% embed url="<https://youtu.be/jWtCSEvJykg?si=xy4CGVZiV99XTby9>" %}

#### Reverse Trailing Orders

Reverse trailing orders do the opposite:

* Reverse Trailing Buy follows the price upward and triggers when the market drops. It’s useful for “buy the dip” setups.
* Reverse Trailing Sell follows the price downward and triggers when the market rises. It’s designed to “sell the pump”.

#### Trailing Stop vs Trailing Stop Limit

* Trailing Stop (Market): when conditions are met a market order is sent to the exchange. Ensures execution but may suffer slippage in fast-moving markets.
* Trailing Stop Limit: places a limit order on the exchange at the trigger price. Protects against slippage but may fail to fill if the market moves past the limit price too quickly.

See our video “Trailing Stop vs Trailing Stop Limit” for a detailed breakdown:

{% embed url="<https://youtu.be/23D1khsYzn0?si=EPupR7l_Bcg77QUR>" %}

### Advanced Features

#### **Trailing Start**

Normally, Trailing Stop starts tracking the market as soon as the order is created. With Trailing Start, you can define a condition that must be met before trailing begins. The trigger can be either a price level or a TradingView [webhook](/sex-trading/webhooks). This adds flexibility for advanced setups:

* *Example:* Start trailing buy only if Bitcoin drops to $90K
* *Example:* Start trailing sell when a TradingView alert is triggered (e.g., breaks above Bollinger Band)

<figure><img src="/files/wYkDLdzUtanwKRBaj7Q3" alt=""><figcaption></figcaption></figure>

#### **Improve Only**

The Improve Only option ensures that your entry price will never be worse than the current market price. Without it, a Trailing Buy with a 1% trailing distance at 100k would initially trigger at 101k; with Improve Only enabled, the order waits until the market dips enough so that the trigger can trail at 100k or lower.

Improve Only can be used on its own or together with Trailing Start. For example, you can set:

* Trailing Start: 90k
* Trailing Buy distance: 2%
* Improve Only: enabled

Without Improve Only, the worst-case fill would be at \~91.8k (90k + 2%). With Improve Only, the system shifts the effective start level so that the *worst-case* fill is around 90k instead: if price bounces immediately, you buy roughly at your start level; if it keeps dipping, you buy even lower.

#### Take Profit / Stop Loss Combos

Trailing orders can also be used as Trailing Take Profit or Trailing Stop Loss legs inside TP/SL combos. For more on that, see [Trailing TP/SL](/sex-trading/manual-orders/trailing-tp-sl).

#### Learn More

Read our full guide:&#x20;

{% embed url="<https://goodcrypto.app/trailing-stop-order-a-definitive-guide/>" %}


# Take Profit

*documentation* *coming soon...*


# Multiple Take Profits

{% embed url="<https://youtu.be/4y-EnTLHjrY?si=BS0GeBjPZuEHT_Qr>" %}

*documentation* *coming soon...*


# Stop Loss

*documentation* *coming soon...*


# Stop Loss that follow TPs

{% embed url="<https://youtu.be/a52GBvtntPs?si=yI05dbC497cisjyz>" %}

*documentation* *coming soon...*


# Trailing TP/SL

{% embed url="<https://youtu.be/BIJvQBKZSvQ?si=4baD0L--xesnO-FC>" %}

{% embed url="<https://youtu.be/AB7pGtPPZYY?si=EUYECv43b6OmW-T4>" %}

{% embed url="<https://youtu.be/1T0dZN1KC0g?si=0hSUgZty3_DNLZ4c>" %}

{% embed url="<https://youtu.be/lXk7EeWXnrc?si=NCCjqfshDpya9H9O>" %}

*documentation* *coming soon...*


# TP+SL combo

*documentation* *coming soon...*


# Errors

*documentation* *coming soon...*


# Bots

<figure><img src="/files/7T2OgwXki0ineq92I0SV" alt="DEX DCA bot"><figcaption></figcaption></figure>

DEX DCA bot is a versatile tool enabling multiple trading strategies previously only available on cetralized exchnages.

DCA stands for dollar-cost averaging, meaning that the bot enters a position and then places additional orders if the price moves against you, averaging down your cost basis.&#x20;

The bot automatically adjusts your Take Profit and Stop Loss as your position changes.

After Take Profit or Stop Loss are triggered the bot can either stop or repeat with the same settings.

This enables several use cases for the bot:

1. **SAFETY NET**\
   Enter positions knowing that should the market move against you, you'll buy more at a lower price and your TP will be adjusted to reflect that. All without you lifting a finger.
2. **VOLATILITY SCALPER**\
   Run the bot on volatile coins on repeat - rack up hundreds of profitable iterations by covering 50%+ price range with averaging orders and going martingale on orders size (each averaging order 2x of previous).
3. **SCALE ORDER**\
   If your entry strategy involves placing multiple orders on several levels - use the bot to do that for you. If you don't plan to use the bot's automated TP - set it at an unreasonable level (say, 999%) and stop the bot once it enters the required position.
4. **MULTIPLE TAKE PROFITS**\
   If you want to place multiple Take Profits to your existing position, select the position's coin in the bot's "Spend" field. The bot's entry and averaging orders will act as your Take Pofit levels. Set the bot's TP to an unreasonable level so it won't mess with your setup.
5. **BTFD**\
   Buy the f\*ing dip! Accumulate ETH, BTC, SOL and other top coins automatically taking advantage of the market dips. Trend is your friend - if you believe that the coin will ultimately go up, then the lower it goes the more you want to buy it. DCA bot is the perfect tool for it.

Here is our DCA bot's video overview:

{% embed url="<https://youtu.be/P5o1s9-YoYE>" %}
Part 1: Overview
{% endembed %}

We are also running a dedicated [TG channel](https://t.me/+EFAh0cdHrXw0OTNh) where we post our best-performing DCA setups - both for centralized and decentralized exchanges. Join to get new trading ideas and share your experience.


# DCA bot

{% embed url="<https://youtu.be/k8-VXhbVDs8?si=aCM_x97LrBu09qA2>" %}

{% embed url="<https://youtu.be/kHDo8WaUGbA?si=tnqIoFkpYXOBm_8Y>" %}

{% embed url="<https://youtu.be/LDQfzydl4J4?si=k4oWoLafrDbOAkgZ>" %}

{% embed url="<https://youtu.be/eTe4sv4IdtY?si=Z0gFJrriAOPX4Mpa>" %}

{% embed url="<https://youtu.be/3ahAXp69uWk>" %}

*detailed documentation* *coming soon...*

We are also running a dedicated [TG channel](https://t.me/+9ygCl78PbCUyMjZh) where we post our best-performing DCA setups - both for centralized and decentralized exchanges. Join to get new trading ideas and share your experience.


# Grid bot

Grid bot is an automated trading strategy that monetizes price swings by placing grid of buy and sell orders in a certain price range.

{% embed url="<https://youtu.be/WeuiKvhMI00>" %}

### Why use Grid Bot?

Markets rarely move in straight lines. Even during strong trends, price constantly oscillates — moving up, pulling back, bouncing, consolidating, and repeating. A traditional "buy and hold" approach only profits from directional movement. Grid Bot profits from the movement *itself*.

Consider this example: BTC is at $80,000. Over the next month, it climbs to $95,000, drops back to $82,000, recovers to $91,000, dips to $85,000, and eventually settles back at $80,000.

If you simply held BTC through all of that, your net result is zero.

But inside that journey, price made dozens of oscillations — each one a potential trading opportunity. A grid of buy orders below the current price and sell orders above it would have captured profit from every single bounce, dip, and recovery along the way. Each buy–sell cycle locks in a small realized gain, and when price stays within your range, those gains compound into meaningful returns — even when the market goes nowhere.

This is what Grid Bot does. It behaves similarly to a structured market-making strategy: it places layered buy orders below the current price, layered sell orders above it, and repeatedly captures the spread between them as price moves back and forth.

It lets you effectively use your capital which would otherwise sit idle during the sideways markets and express your view on the market while also profiting from volatility along the way in the rising or falling markets.

#### Best market conditions for Grid trading

Grid trading is most effective when the **price trades within a defined range** (sideways markets). Standard or [neutral](#neutral-grid) grid bot is used for this. The more the price oscillates withing the range and the longer it stays within those levels, the higher is the Grid bot profit.&#x20;

For ranging markets - when the **price trends up or down** but remains volatile,  oscillating around the trend - goodcryptoX offers [long](#long-grid) and [short](#short-grid) grid bots respectively. With these bots you still profit from every price swing within the grid range, but also earn a return from the directional price movement.

#### **Common Grid bot use cases:**

The two most common Grid trading use cases are:

* **Profit from sideways markets.** When price consolidates and you don't have a strong directional view, a Neutral Grid captures the back-and-forth movement with the range you set.
* **Express a directional view with built-in volatility harvesting.** Long and Short Grids let you profit from both the direction and the price swings within it.

But that's not all. Grid bot is a versatile tool that can also be used for strategies like:

* **Exit a position gradually.** If you have an existing position, you can use the Short Grid bot placed above the market price to scale out of it in a controlled manner, while profiting from price bounces along the way.
* **Accumulate an asset over time.** A Long Grid on an asset you're bullish on lets you accumulate it gradually while earning from short-term volatility along the way.

### How Grid trading works

A grid is defined by four parameters: an **upper grid level**, a **lower grid level**, a **number of levels** within that range, and an **order size** for each level.

The bot divides the range between upper and lower bounds into evenly spaced levels and places limit orders at each one. Buy orders sit below the current market price, sell orders sit above it. The level closest to the current price remains empty - this ensures the grid has room to react to the next price movement in either direction.

**The core cycle works like this:**

When price drops and fills a buy order, the bot immediately places a sell order one level above it. When price rises and fills a sell order, the bot places a buy order one level below. Each buy–sell pair locks in a small realized profit equal to the distance between those two levels times the order size (minus trading fees). As price oscillates within the range, this cycle repeats over and over.

Think of it as a net stretched across your price range. Every time price moves through the net, it triggers trades — and each triggered trade generates a small profit. The more price oscillates, the more trades execute, and the more profit accumulates.

**What happens at the edges?** If price moves beyond the upper or lower grid boundary, no more orders exist beyond it. The bot holds its accumulated position and waits. If price returns to the range, the cycle resumes. If it doesn't, you're left with a directional position — this is the primary risk of grid trading, and why range selection matters.

**A simple illustration:** Imagine a grid with just two levels — one buy at $79,000 and one sell at $81,000. Every time BTC oscillates between those two levels, the bot buys low and sells high, capturing $2,000 `x` order size per cycle. Now expand that to 20 or 50 levels across a wider range, and you begin to see how a grid can generate hundreds of small profitable trades from normal market volatility.

### Grid modes: Neutral, Long, Short

goodcryptoX supports three grid modes. Each one changes the bot's initial position and risk profile. Choosing the right mode depends on your market outlook.

#### Neutral Grid

Neutral is the default and most balanced mode.

When you launch a Neutral Grid, the bot places buy orders at every level below the current market price and sell orders at every level above it. No initial position is taken — you start flat (or neutral).

Neutral Grid is ideal when you expect price to stay within a range and you don't have a strong directional view. The bot profits purely from volatility within the range.

**Risk profile:** If price breaks above the range, you end up with a short position (on perps) or have sold your base asset (on spot). If price breaks below, you accumulate a long position. In both cases, your exposure equals roughly half the grid's total size — because only the orders on one side of the range execute as price moves through. This is the most balanced risk profile of the three modes.

**When to use Neutral:**

* Ranging, consolidating markets
* When you have no strong directional conviction

#### Long Grid

In Long mode, *all* levels are initially set as buy orders.

The buy orders that are above the current market price execute immediately upon launch (since they can be filled at the current market price or better), and each is replaced by a sell order one level above. This builds an initial long position whose size equals the number of levels above the market price multiplied by the order size.

A Long Grid is essentially a Neutral Grid that starts with a built-in long position. After the initial fills, it behaves identically — buying lower, selling higher, cycling through levels.

**Risk profile:** If price rises through and eventually above the grid range, the bot gradually sells off the position, locking in directional profit on top of the grid trading profits. If price falls, you accumulate more — your long position grows, and your downside exposure is roughly double that of a comparable Neutral Grid (because you started with a position *and* you keep buying more as it drops).

**When to use Long grid:**

* When you're bullish with volatility expected
* When you want to accumulate an asset but also capture short-term swings
* On spot, when you only have quote currency (e.g. USDT) and no base currency to sell

#### Short Grid

Short mode is the mirror image of Long.

All levels are initially set as sell orders. The sell orders below the current market price execute immediately, building an initial short position. Each fill is replaced by a buy order one level below.

**Risk profile:** If price drops through and below the range, the bot gradually buys back, closing the short and locking in directional profit. If price rises, the short position grows, and your exposure is roughly double that of a Neutral Grid.

**When to use Short grid:**

* When you're bearish with volatility expected
* When you want to scale out of an existing long position
* On spot, when you hold a position and want to sell it gradually

> **Important note on Long/Short initialization:** Currently, the initial position in Long and Short modes is not opened as a single market order. Instead, all orders are placed as limit orders at each grid level, and the ones on the "wrong" side of the market price fill immediately. On some futures exchanges, limit orders placed deep into the order book may be rejected due to exchange-specific restrictions on how far from the current price a limit order can be placed. If you encounter errors launching a wide Long or Short Grid on certain exchanges, this is the likely cause. This is a known limitation that will be addressed in a future update.

***

### Grid setup

This section walks through every field in the goodcryptoX Grid Bot setup form, from top to bottom — exactly as it appears in the interface. All settings apply identically whether you're trading on any fo the centralized exchanges we support or on [Hyperliquid](/perp-dexs/hyperliquid).

<figure><img src="/files/J1bAVEikt4sworsOrBVi" alt=""><figcaption></figcaption></figure>

#### Grid mode

The first choice is the mode: **Neutral**, **Long**, or **Short**. If you're unsure, start with Neutral - it carries the most balanced risk and doesn't require a directional view.

#### Highest and lowest grid level

These two fields define the upper and lower bounds of your trading range. All grid levels will be placed between these two prices.

Choosing where to set them is one of the most important decisions in grid setup. A good approach is to look at historical support and resistance levels - zoom out on the chart, identify the range where price has been spending the most time, and set your bounds accordingly.

You don't need to capture every possible move. Setting the range too wide means your levels will be far apart (requiring more levels or resulting in fewer trades), while setting it too narrow risks price leaving the range quickly.

You can set these values numerically in the form, or you can drag the upper and lower bounds directly on the chart. As you adjust them, the grid levels update in real time on the chart, and you can immediately see which levels will be buy orders and which will be sell orders.

#### Levels

This field sets the number of levels (from 2 to 250) within your range.

There is a fundamental trade-off here. With a fixed amount of capital:

* **More levels** means tighter spacing between them. Each trade generates a smaller profit (PnL per level is smaller), but trades happen more frequently. Order sizes will be smaller because your capital is spread across more levels.
* **Fewer levels** means wider spacing. Each trade captures a larger price difference (higher PnL per level), but trades happen less often. You can use larger order sizes since capital is concentrated on fewer levels.

You need to strike a balance between frequency and profit-per-trade. Too tight and fees may eat into thin margins; too wide and the bot barely trades before price leaves the range.

The interface shows you the **PnL per level** (after exchange fees) in real time as you adjust this number. It also displays the estimated percentage gain per level, which helps you evaluate whether the spacing makes sense for the instrument and conditions you're trading.

> Note, that the PnL per level is calculated using the basic exchange fee tier. If you have a higher tier, your fee will be lower and PnL per level - higher.

On the chart, you can watch the level lines adjust as you change this number — a very intuitive way to visualize the spacing.

#### Levels distribution: Arithmetic vs Log

Below the highest/lowest level fields, you'll see a **Log distribution** checkbox.

By default, the grid uses **arithmetic** (linear) distribution — levels are spaced with equal price intervals. If your range is $80,000 to $90,000 with 10 levels, each level is exactly $1,000 apart.

When you enable **Log distribution** (also called geometric), levels are spaced with equal *percentage* intervals instead. This means the dollar gap between levels is smaller at the bottom of the range and larger at the top.

**Why does this matter?** In crypto markets, price tends to move in percentage terms — a 5% drop from $90,000 ($4,500) covers a much wider absolute range than a 5% drop from $80,000 ($4,000). With arithmetic spacing, the percentage return per level varies: levels near the bottom give a larger percentage gain than levels near the top. Log distribution normalizes this, giving you a consistent percentage return on every level.

**Log is generally preferred for:**

* Wide trading ranges
* Volatile assets
* Perpetual futures
* Most grid configurations in practice

**Arithmetic can be useful for:**

* Very narrow ranges
* Stablecoin or low-volatility pairs
* When you specifically want equal dollar spacing

If you're unsure, enable Log — it's the recommended default for most setups.

#### Order size

Order size defines how much the bot trades on each level. It is always specified in **base currency** (or contracts, for futures).

For example, if you're running a grid on BTC.USDT and set order size to 0.01 BTC, the bot will buy or sell 0.01 BTC at every level.

The interface also shows you the approximate quote currency equivalent of each order at the current price. Keep in mind that this equivalent varies by level — higher price levels require more quote currency per order, and lower levels require less. So even though every level trades the same amount of BTC, the dollar value of each trade is different.

Your total capital commitment depends on the order size, the number of levels, and the current price. The interface calculates the **Funds needed** at the bottom of the form, so you can see exactly how much is required before you launch.

#### Activation price

This optional field lets you delay the grid launch until price reaches a specific level.

If you set an activation price, the grid will not place any orders until the market touches that price. Once activated, the grid begins as if it had just been launched at that moment.

**Use cases:**

* You want to launch a grid at a range that's currently above or below the market — set an activation price at the edge of your range to wait for price to arrive
* You expect a breakout and want to start the grid only after it happens
* You want to time the grid around a specific event or level without manually watching the market

#### Stop above / Stop below

These are price-based stop triggers. If price reaches either level, the bot stops: all open grid orders are cancelled, and (if the **Close position when the bot stops** checkbox is enabled) the current position is closed at market.

You can drag the stop levels directly on the chart, the same way you set grid bounds.

Stop levels are essential risk management. They protect you from runaway losses if price breaks far out of your range. Even if you expect price to stay in range, setting stops is good practice — especially on leveraged instruments.

#### Close position when the bot stops

When this checkbox is enabled, any remaining position is market-closed when a stop triggers (or when the grid stops for any other reason, such as an error). When disabled, the grid stops and cancels its orders, but your position remains open for you to manage manually. On perps, all close-position orders use the reduce-only flag, so the bot will never accidentally flip your position.

#### Take Profit (PnL target)

This field sets a **realized PnL target**. When the grid's total realized profit reaches this amount, the grid stops.

**Critical detail:** this is based purely on *realized* PnL — only the locked-in profits from completed buy–sell cycles. Unrealized PnL (the mark-to-market value of your open position) is *not* included. This means that if price moves far out of your grid range, your unrealized loss may be growing, but as long as no new grid trades complete, the PnL target is unaffected. To protect against that scenario, use Stop above / Stop below in addition to the PnL target.

#### Stop in Neutral position

When enabled, the grid will stop the next time it returns to a **neutral position** (zero net exposure from grid orders).

On its own, this is useful for Long and Short Grids: if price trends through your range in the desired direction, the grid gradually closes the position, and once it reaches neutral, it stops cleanly so that if price reverses afterwards, you won't be opening a new position.&#x20;

For a Neutral Grid, this checkbox has no effect at launch (since you start neutral), but it will activate the next time the grid cycles back to neutral. You can use it after your neutral grid ran for a while as a future take-profit level.

**Combining with Take Profit:** This is where it gets powerful. When both PnL target and Stop in Neutral position are enabled, the behavior changes: the bot first waits for the realized PnL target to be reached. Once that happens, it continues running but now watches for a neutral position. The grid stops only when *both* conditions have been satisfied — profit target hit, and position unwound to zero.

This ensures a clean exit: you've locked in your desired profit *and* you have no lingering position to manage (and negative unrealized PnL to realize).

#### PnL drawdown (When to stop)

This optional field sets a **trailing stop on realized PnL**.

It works like this: the bot continuously tracks the peak realized PnL since launch. If the realized PnL drops from that peak by the amount you specify, the grid stops.

For example, if you set PnL drawdown to $50, and the grid's realized PnL reaches a peak of $300 and then drops to $250, the grid stops to protect your gains.

**Important:** Like the PnL target, this is based only on *realized* PnL. If price moves out of the grid range and your unrealized PnL deteriorates, the drawdown stop won't trigger — only changes in realized profit matter. Use price-based stops (Stop above / Stop below) to manage unrealized exposure.

You can set the PnL drawdown when your grid bot is already running - so you don't have to decide on it in advance (unless you want to).

#### Position (perps only)

This field previews the theoretical maximum long and short positions that the grid bot can accumulate (if the price go to either extreme). It is a useful tool to assess your potential risk and exposure.

#### Initital margin / Funds needed

Shows exactly how much capital is required to launch the grid.

**For perpetual futures:**

Only margin in the settled currency (e.g. USDT) is needed, regardless of the grid mode. The exact amount depends on the number of levels, order size, and the prices of each level. Keep in mind that this is the *minimum* margin — you should maintain a buffer well above the calculated amount to avoid liquidation if price moves against you. Never allocate 100% of your available margin to a grid.

**For spot trading:**

Capital requirements depend on the grid mode:

* **Neutral** requires both base and quote currency — quote currency to fund the buy orders below market, and base currency to fund the sell orders above market.
* **Long** requires only quote currency (e.g. USDT), since all initial orders are buys.
* **Short** requires only base currency (e.g. BTC), since all initial orders are sells.

The interface clearly shows the required amounts for each currency, along with your available balance and a warning if you don't have enough.

**Base currency fees on spot**

> **⚠️ Spot trading: watch out for trading fees taken in the base coin**
>
> On most spot exchanges (e.g. Binance by default), the trading fee is taken directly out of the coin you just bought. So if your bot's order size is 1 BTC, a buy fills you with \~0.999 BTC — the missing 0.001 BTC is the fee. When the bot later tries to sell exactly 1 BTC, it fails: you only have 0.999, and the order is rejected as "insufficient funds."
>
> Two ways to handle it:
>
> * **Keep a small extra balance of the base coin** in your account, above what the bot strictly needs.
> * **Or enable native-token fee payment** on your exchange (e.g. hold some BNB on Binance and turn on "Pay fees in BNB"). Fees then come out of that token, leaving your traded coins whole. Note: confirm your exchange supports this for API orders specifically — for example, Bybit currently allows it only for orders placed via the exchange's own interface.
>
> This only applies to **spot**. On perpetual futures, fees are paid in the settlement currency (e.g. USDT) and don't affect order sizes.

After reviewing your funds, click **Launch** to start the grid. The bot immediately places all grid orders and begins monitoring.

***

### Launching and monitoring the Grid bot

After you click **Launch**, the bot immediately places all grid orders on the exchange (unless activation price was specified) and starts monitoring. You can open the bot's details page at any time to see exactly what the grid is doing, review its performance, adjust its parameters, and manage it.

There are two ways to open the bot details page. You can click **Bots** in the main menu to see a list of all your running bots across all exchanges and pairs — find the grid and click on it. Alternatively, if you're already on the Exchanges page with the same trading pair selected, switch to the **Bots** tab below the chart to see all bots running on that specific instrument, and click the grid from there.

<figure><img src="/files/buAioATscfi6ipVSvnqQ" alt=""><figcaption></figcaption></figure>

At the top of the bot details page, you see the bot's identifying information: the exchange, trading pair, grid mode (Neutral / Long / Short), and the key parameters you set during setup. The current status is displayed here as well — whether the bot is actively running or has stopped (and if so, the reason it stopped).

You also see the **Invested amount**. This is the total amount of funds the bot uses to operate, expressed in quote currency. For spot trading, this represents the actual capital you committed to the grid - the sum of base and quote currency (converted to quote currency at launch price).

For leveraged futures trading, the invested amount reflects the full notional size the bot operates with, *not* your actual deposited margin. If your bot uses 1,000 USDT worth of positions with 10x leverage, your real capital at risk is approximately 100 USDT, but the invested amount shows 1,000 USDT. This is important because the profitability percentages displayed in the next section are calculated against this invested amount. To get your actual return on deposited margin with leverage, multiply the shown percentage by your leverage factor.

#### Profitability

This section shows the grid's financial performance.

**Realized PnL** is the total profit locked in from completed buy–sell cycles. Every time the bot buys at a lower level and sells at a higher level (or vice versa), the profit from that pair of trades is added to realized PnL. This number only goes up when grid cycles complete - it is not affected by the current market price of your open position.

**Unrealized PnL** is the mark-to-market value of the bot's current open position. If the bot is holding a long position and price is above the average entry of that position, unrealized PnL is positive; if price is below, it's negative. This number fluctuates with every price tick.

**Total PnL** is the sum of realized and unrealized - your complete profit or loss if you were to stop the bot and close its position right now.

> **Bot PnL vs exchange position PnL: why the numbers may differ**
>
> The grid bot calculates realized PnL on a per-level basis: each buy–sell cycle is treated as an independent round-trip trade. When the bot buys at level A and later sells one level above, the difference is recorded as realized profit for that pair.
>
> Your exchange, however, tracks the entire position as one - using a single average entry price. This means the exchange's realized PnL for any individual sell is calculated against the average cost of the *whole* position, not the specific buy that the grid paired it with.
>
> This can lead to significant discrepancies, especially when price has moved far in one direction. For example: the bot buys at $100, $95, $90, $85, and $80, building a 5-order long position with an average entry of $90. Price then bounces to $85 and the bot sells one level. The bot records a realized profit on that sell (bought at $80, sold at $85 = +$5). But the exchange sees a sell at $85 against an average entry of $90 - which it reports as a -$5 loss.
>
> Neither number is "wrong" - they represent different accounting methods. The bot's method reflects the actual grid strategy performance (each level is its own trade). The exchange's method reflects the blended position.
>
> As the grid runs and completes more cycles - especially as price oscillates back through the range - these two numbers converge. Over time, the cumulative PnL will align. But during periods of extended directional movement, the gap can be meaningful, and it's important not to be alarmed if your exchange shows a different (or even negative) realized PnL while the bot shows realized profit.

The section also displays **APY** (Annual Projected Yield) in two forms: as an absolute amount in quote currency, and as a percentage. This projection takes the bot's current rate of realized profitability and extrapolates what it would produce over a full year, based on the invested amount. It's a useful benchmark for comparing the grid's performance against other strategies, but keep in mind it's a projection - actual results depend on future market conditions.

**Exchange fees** shows the total trading fees the bot has paid to the exchange across all executed orders. This amount is already accounted for in the realized PnL — it is shown here separately so you're aware of how much the grid has spent on execution costs.

> **Funding fees are not included in PnL (perpetual futures)**
>
> On perpetual futures, funding payments are settled directly between the exchange and your account - typically every 8 hours - based on your position size and the prevailing funding rate. These payments are **not** reflected in the grid bot's realized or unrealized PnL.
>
> This means your actual profit or loss may be higher or lower than what the bot displays, depending on the cumulative funding you've paid or received. For long-running grids that maintain a persistent directional position, the difference can be substantial. Always check your exchange's funding history separately when evaluating the grid's true performance.

#### Position

This section displays the bot's current position - the number of contracts or amount of base currency the bot is holding at this moment. This is the position that would remain if the bot stopped right now.

For a **Neutral Grid**, the initial position is zero - the bot starts flat and only builds a position as price moves and orders fill. For **Long** and **Short Grids**, the bot starts with a position immediately: the orders on the "wrong" side of the market price execute at launch, building an initial long or short exposure. As the grid runs and price oscillates, this position grows and shrinks as buy and sell orders fill across the levels.

The position shown here is the bot's **total** position - including whatever was established at launch and everything that has changed since. The unrealized PnL from this position is included in the bot's total unrealized PnL, and any realized gains or losses from grid cycles are included in the bot's total realized PnL. There is no separation between "bot performance" and "position performance" — the bot's PnL is one unified number that reflects the complete picture, which is how it should be: this is the total performance of the strategy, nothing else.

The **Close position when the bot stops** checkbox from the setup form is also accessible here, and you can toggle it on or off at any time while the bot is running. When enabled, the bot will market-close the position whenever it stops (for any reason). When disabled, the position stays open for you to manage manually after the bot stops.

#### Stop conditions

The stop parameters you configured during setup - **Stop above** and **Stop below**, **Take Profit** (PnL target), **PnL drawdown** (When to stop), and **Stop in Neutral position** - are displayed here as well.

You can toggle **Stop in Neutral position** on or off at any time during the bot's runtime.

To modify the other stop parameters, click the **Modify** button at the bottom of the details page. From there you can add, remove, or adjust the **Take Profit PnL target**, **PnL drawdown**, as well as the **Stop above** and **Stop below** price levels. This lets you tighten or widen your risk management as the grid runs and conditions change - without stopping and relaunching the bot.

#### Orders

This section provides a count of how many limit orders the bot currently has open on the exchange and how many orders it has already closed (executed). It gives you a quick sense of the grid's activity level - a grid that has closed hundreds of orders has been actively trading, while one with few closed orders may be in a range where price isn't moving much.

#### Progress

Shows the bot's total runtime - when it started and how long it has been running. Useful for evaluating performance in the context of time (especially alongside the APY projection).

#### Webhooks

The webhook section displays the **Cancel webhook URL** for this grid bot. If you want to stop the bot on a TradingView alert, you can send a request to this URL and the bot will stop as if you had pressed the Stop button manually. Currently, only the cancel webhook is supported for grid bots.

#### Price chart

The bot details page includes a full price chart with all grid activity overlaid. This is one of the most informative views for understanding how your grid is performing.

<figure><img src="/files/xuOVem25pMDdU857aPtp" alt=""><figcaption></figcaption></figure>

On the chart you can see:

* **Grey horizontal lines** represent the grid levels - the fixed price points where the bot places orders
* **Green lines** on a grid level indicate an active buy order currently placed at that price with the line start indicating th exact moment the order had been placed on the exchange.
* **Red lines** indicate an active sell order currently placed at that price
* The **neutral position level** is marked - this is the price at which the bot's net position would be zero
* The **max position levels** are also marked - the prices

  &#x20;at which the bot would reach its maximum directional exposure
* **Green dots** and **red dots** on the chart mark every executed order. Green dots are buy fills, red dots are sell fills. You can trace the bot's entire trading history visually — seeing exactly when and at which levels each trade was executed

This chart gives you immediate visual feedback on how the grid is performing: are trades clustering in a productive range? Is price spending time near the edges? Have stops or range boundaries been approached? All of this is visible at a glance.

#### Alerts

Below the chart, you can configure notifications for this specific grid bot. There are four types of alerts, and you can enable any combination of them:

* **Every order** - notifies you each time any grid order executes
* **Every PnL change** - notifies you only when an order results in a change to realized PnL (i.e., orders that complete a buy–sell cycle), as well as any close-position orders. Orders that only open or increase a position without locking in profit are skipped
* **Price enters or exits range** - notifies you when price crosses above the highest grid level or below the lowest grid level, and when it returns back into the range
* **Bot stops** - notifies you when the bot stops for any reason

You can turn each alert on or off at any point during the bot's runtime.

#### Action buttons

At the bottom of the bot details page, you have three action buttons:

**Stop** - stops the bot immediately. All open grid orders are cancelled. If **Close position when the bot stops** is enabled, the remaining position is market-closed. If disabled, your position remains open for you to manage.

**Modify** - opens the parameter editor where you can adjust stop conditions while the bot is running. You can add, remove, or change **Stop above**, **Stop below**, **Take Profit** (PnL target), and **PnL drawdown**. You can also toggle **Close position when the bot stops** and **Stop in Neutral position** from here. You do not need to stop the bot to make these changes - they take effect immediately.

**Repeat** - pre-fills the bot setup form with the exact parameters of this bot. Useful when restarting the bots.

#### Order list

Below the action buttons, you see the full list of all orders associated with this grid bot. The list is divided into two sections: **open orders** (currently placed on the exchange and waiting to be filled) and **closed orders** (already executed).

<figure><img src="/files/EWYx7sJd4ACWcMiykcEF" alt=""><figcaption></figcaption></figure>

For each order, you can see the price, the time it was placed or executed, its current status, and - for orders that resulted in a realized PnL - the profit earned on that specific trade. You can click on any order to open its detailed order page, which includes additional information such as the exact fees paid on that execution.

This order list is especially useful for reviewing the grid's trading history in detail and understanding the PnL contribution of individual trades.

#### When does the grid stop?

The grid stops automatically under any of these conditions:

* **Price hits a stop level** (Stop above / Stop below)
* **Realized PnL target is reached** (if set)
* **PnL drawdown triggers** (if set)
* **Neutral position reached** (if Stop in Neutral position is enabled and conditions are met)
* **An error occurs** - if any order cannot be placed or is unexpectedly cancelled by the exchange (for example, due to liquidation), the grid detects the discrepancy and stops as a safety measure, cancelling all remaining orders

When the grid stops, all open grid orders are cancelled. If **Close position when the bot stops** is enabled, the remaining position is closed at market. If disabled, your position stays open for manual management.

***

### Grid Bot video playlist

For practical walkthrough examples, real trade cases, and strategy discussions, check out our Grid Bot video playlist:

{% embed url="<https://www.youtube.com/playlist?list=PLkscu1wG9E6WxhxMwwCtymU5pg_MRLMZr>" %}

Includes:

* Long-term BTC grid case with 60%+ returns over 5 months
* High-volatility event grid setups
* Detailed range selection and level tuning
* Long, Short, and Neutral Grid comparisons in practice

> **Note:** While these examples show setups on various exchanges, the goodcryptoX grid interface and mechanics work identically across all supported exchanges - including Hyperliquid, Binance, OKX, Bybit, Gate, and others.

We are also running a dedicated [TG channel](https://t.me/+DfNOhP8G86xmYTMx) where we post our best-performing DCA and (occasionally) Grid setups - both for centralized and decentralized exchanges. Join to get new trading ideas and share your experience.

***

### FAQ

<details>

<summary><strong>What is grid trading?</strong></summary>

Grid trading is an automated strategy that places a series of buy and sell limit orders at predetermined price levels within a defined range. As price oscillates within the range, the bot repeatedly buys low and sells high, capturing small profits from each cycle. It's a way to monetize volatility without needing to predict market direction.

</details>

<details>

<summary><strong>Is grid trading profitable?</strong></summary>

Grid trading is profitable when price stays within or near your selected range and there is enough volatility to trigger trades. In ranging markets, it can generate consistent returns. The primary risk is directional: if price breaks far out of your range, unrealized losses on your accumulated position may exceed your realized grid profits. Profitability depends on good range selection, appropriate level spacing, and proper risk management.

</details>

<details>

<summary><strong>What is the best grid mode - Neutral, Long, or Short?</strong></summary>

It depends on your market outlook. Neutral is the most balanced — no initial position, minimal directional risk. Long is best when you're bullish and want to accumulate while profiting from dips. Short is best when you're bearish or want to gradually exit a position. If you're unsure, Neutral is the safest starting point.

</details>

<details>

<summary><strong>What is the difference between arithmetic and log grid levels distribution?</strong></summary>

Arithmetic distribution spaces levels with equal dollar intervals (e.g. every $1,000). Log (geometric) distribution spaces them with equal percentage intervals (e.g. every 1.2%). Log gives a consistent percentage return per level and is generally preferred for crypto — where price moves in percentage terms — especially for wide ranges and volatile assets.

</details>

<details>

<summary><strong>How many grid levels should I use?</strong></summary>

There's no single correct answer — it depends on your range width, order size, and how frequently you want trades to execute. More levels mean more frequent but smaller trades; fewer levels mean less frequent but larger trades. Start with a moderate number and observe the PnL per level shown in the interface. If it's very thin after fees, consider fewer levels or a tighter range.

</details>

<details>

<summary><strong>Does funding affect grid PnL on perpetual futures?</strong></summary>

Yes, but it's not shown in the grid's PnL tracking. Funding payments are settled directly by the exchange and affect your actual account balance. For long-running grids with persistent positions, cumulative funding can meaningfully impact your real returns. Check your exchange's funding history separately.

</details>

<details>

<summary><strong>What happens if the price leaves my grid range?</strong></summary>

No new trades execute beyond the range. You hold whatever position has accumulated from the grid's trading activity, and the unrealized PnL on that position changes with price. If price returns to the range, the grid resumes trading. If it doesn't, you can either wait or stop the grid manually.

</details>

<details>

<summary><strong>Can I get liquidated while running a grid on perps?</strong></summary>

Yes. If your margin falls below the exchange's maintenance requirement — due to the grid's position moving against you, for example — you can be liquidated. The grid detects liquidation (because the exchange cancels its orders) and stops automatically. To minimize this risk, always allocate more margin than the minimum shown in "Initial margin"

</details>

<details>

<summary><strong>What does "Stop in Neutral position" do?</strong></summary>

When enabled, the grid waits until it has zero net position and then stops. This is useful for Long and Short Grids: if price moves through the range in your desired direction, the grid closes the position level by level, and once it's flat, it stops cleanly. When combined with a PnL target, the grid first waits for the profit target to be reached, then continues running until a neutral position is achieved.

</details>

<details>

<summary><strong>Can I run a grid bot on Hyperliquid?</strong></summary>

Yes. goodcryptoX supports grid trading on Hyperliquid for both perpetual futures and spot markets. [Connect](/perp-dexs/hyperliquid/how-to-connect) your Hyperliquid account via API wallet and you have access to the full grid bot functionality — including all three modes, custom stops, activation price, and real-time chart controls. No subscription is required to run grid bots on Hyperliquid through goodcryptoX.

</details>

<details>

<summary><strong>Does grid bot work on perp DEXs and decentralized spot exchanges too?</strong></summary>

Yes. The grid bot in goodcryptoX works identically across all supported exchanges — including Hyperliquid, Binance, OKX, Bybit, Gate, and many others. We are also in the process of bringing the Grid bot to AMM DEX on Solana, BNB Chain, Base and other supported networks. The interface, mechanics, and all features described here apply to both centralized and perp DEXs like Hyperliquid. The only differences are exchange-specific (fee structures, leverage limits, order placement restrictions).

</details>

<details>

<summary><strong>Does the grid bot work on spot exchanges?</strong></summary>

Yes. The goodcryptoX grid bot works on spot markets with the same interface and mechanics as on perpetual futures. The key differences are practical: there is no leverage or liquidation risk on spot, and capital requirements depend on the grid mode — Neutral requires both base and quote currency, Long requires only quote, and Short requires only base. On spot exchanges that charge fees in the base currency, you'll need to maintain extra base balance to cover trading fees. The setup form shows you exactly what's needed and warns you if your balance is insufficient.

</details>

<details>

<summary>Is the goodcryptoX grid bot free?</summary>

On centralized exchanges, a limited number of grid bots is available on the free plan. To increase the number of Grid bots you can run and access advanced Grid functionality, you'd need paid [subscription](/ecosystem/subscription-plans).

On Hyperliquid (and other supported DEXs) you can run grid bots with full functionality with no subscription required. A standard [trading fee](/perp-dexs/hyperliquid/builder-fees) applies on each executed order, and you can reduce it through trading volume, [GOOD token](/good-token/summary) holdings, or subscription tier.&#x20;

</details>


# Infinity Trailing

> *This is not a formal documentation — yet. These are our internal notes and best practices for using Infinity Trailing Algos effectively. Full docs coming soon*

### What is Infinity Trailing bot?

Infinity Trailing (InfTrail) is a powerful bot — deceptively simple, but surprisingly versatile.

At its core, it’s just this:

* A trailing order to enter a position
* Followed by a trailing order to exit that position

That’s it. But depending on how you configure the trailing distances, volatility exposure, and exit logic, you can use InfTrail to:

* Ride big uptrends and lock in profits on the way up
* Catch fast swings in either direction
* Accumulate spot tokens you want to HODL
* Create a pseudo-grid strategy with built-in profit protection

So here’s what we think you should know (besides getting a grip on [Trailing orders](/sex-trading/manual-orders/trailing-stops)) before you launch your first InfTrail:

### ⚠️ Quick start: what NOT to do

* Do NOT run it in falling markets — it will almost certainly lose money.
* Do NOT use it on illiquid tokens — slippage will eat your gains.
* Do NOT expect profits in flat markets — this is not a scalping bot.

This Algo is designed for trends — ideally sharp upswings or strong volatility.

***

### ✅ Quick start: what to do

* Run it in trending or volatile markets (think: breakouts, not chop).
* Pick liquid pairs — especially majors (BTC, ETH, SOL, etc.).
* Use larger trailing distances — this is *crucial*. A too-tight trail will churn and lose money.
* Tune your trailing distances based on the asset’s volatility. A good rule of thumb: blue chips (BTC etc.) – at least 1%+, high-vol meme coins: 3%–10% or even more.
* :exclamation: Be patient — InfTrail will often drip small losses before catching a big move and making it all back (and more).

***

### Choosing your strategy: two InfTrail modes

There are effectively two modes you can run your InfTrail in, based on whether you set the "Only exit position at a profit" toggle ON or OFF:

#### Exit at a loss: allowed (*“only exit at a profit” = OFF)*

This is the default InfTrail mode. It will:

* Enter a position with a trailing buy/sell
* Exit that position with a trailing sell/buy — even if that exit is at a loss

When does this work best?

* When markets are volatile and you expect big moves in either direction
* When you want to catch swings, not hold through them
* When you’re not afraid of small losses in exchange for catching the big ones

#### How to think about it and what to expect?

Let’s say you use 1% trailing for both entry and exit. Then:

* The bot will ignore all moves < 1%
* It will lose money on moves between 1–2%
* It will make money on any move >2%

This is just how trailing orders work. So, here is a key takeaway:

> You want to set trailing distances larger than the normal noise of your pair

**PRO tip:** initially launch multiple InfTrails with different trailing distances (0.5%, 1%, 3%, 5%, 10%) on the same pair. Run them for some, then stop the losers — and let the winners run.

#### Exit at a Loss: NOT allowed (*“only exit at a profit” = ON)*

> aka “HODL Mode”

In this mode:

* The bot will enter normally with a trailing buy/sell
* But it will only exit at a profit.\
  Specifically, it will only activate the exit order (it will start trailing) if price moves in your favor to at least: entry price + exit trailing distance.&#x20;

This ensures that in the worst case scenario (the price moving against you right after the exit order start trailing), the exit order will be sent to the excange at your entry price. This can actually result in small loss (consider trading fees + slippage) - but you'll exit around the entry price anyway.

:exclamation:You have to understand, that in this mode, if the price improves, the bot might be left holding the position forever. If you trade with leverage - it might lead to liquidation.

When does this make sense?

* When you’re trading spot, not derivatives
* When you’re comfortable holding the asset for longer

### ⚠️ Important caveats

* This mode does not have a Stop Loss yet — we plan to add one in a future update.
* Do NOT run “only exit at profit” ON with derivatives. You’ll get liquidated if price drops and the bot never exits.

#### **Base currency fees on spot**

> **⚠️ Spot trading: watch out for trading fees taken in the base coin**
>
> On most spot exchanges (e.g. Binance by default), the trading fee is taken directly out of the coin you just bought. So if your bot's order size is 1 BTC, a buy fills you with \~0.999 BTC — the missing 0.001 BTC is the fee. When the bot later tries to sell exactly 1 BTC, it fails: you only have 0.999, and the order is rejected as "insufficient funds."
>
> Two ways to handle it:
>
> * **Keep a small extra balance of the base coin** in your account, above what the bot strictly needs.
> * **Or enable native-token fee payment** on your exchange (e.g. hold some BNB on Binance and turn on "Pay fees in BNB"). Fees then come out of that token, leaving your traded coins whole. Note: confirm your exchange supports this for API orders specifically — for example, Bybit currently allows it only for orders placed via the exchange's own interface.
>
> This only applies to **spot**. On perpetual futures, fees are paid in the settlement currency (e.g. USDT) and don't affect order sizes.

***

### 🧪 InfTrail in practice: what worked for us

Here are some real setups our team has run when we first launched the bot:

* SHIB/USDT — May 2021 — top of the bull market & SHIB = main memecoin
  * Trailing Distance: 10%
  * Market was crazy — 20–30% daily swings
  * Huge profits
* BTC/USDT — 2021 bull run (May -> November)
  * Trailing Distance: 1%
  * Ran profitably for 6+ months
* BTC/ETH with “only exit at profit” ON (2023–2025)
  * As we have no opinion on whether BTC or ETH wins in the long run and HODL both
  * Treating InfTrail like a HODL bot that sells at highs and rebuys after pullbacks

***

### 💡 Pro Tips

* 🧠 Trail distance = your filter for market noise. Set it too low and the bot will get whipsawed.
* 🧪 Try different distances on the same asset — and stop the ones that underperform.
* ⛽ Account for fees and slippage — you still pay them even if the bot avoids closing at a loss.
* 🐌 Don’t expect instant results — it often loses small before it wins big.


# Webhooks

goodcryptoX allows you to automate trading actions via TradingView webhooks — a powerful mechanism for triggering orders and bot actions directly from your signals.

Unlike some implementations that treat webhooks like a programmable API (where you send parameterized commands like "buy 3 BTC"), goodcryptoX currently supports a trigger-based model. Each webhook simply activates a predefined action on a specific order or bot — no parameters or commands are interpreted.

> In the near future, we will launch a new [TradingView Strategy bot](/perp-dexs/upcoming-functionality/tradingview-strategy-bot) that supports full strategy instructions via webhooks, including dynamic symbol selection, quantities, order types, and multi-symbol logic — effectively acting as an API layer. Stay tuned

### Security and access

* Webhooks are only accepted from TradingView servers for now — no custom IPs or external sources.
* If you need to use a custom webhook source, contact us at <support@goodcrypto.app> to request access.
* Webhooks are available only for users with an active PRO [plan](/ecosystem/subscription-plans) or higher.

### How webhooks work in goodcryptoX

* Every order or bot **action** has its own dedicated webhook URL
* You must create the order or bot first to get the URL (they will appear in the **Webhooks** section of the order or bot's **Details**)
* Sending **any** webhook payload to that URL will trigger the action

> Webhook URLs are action-specific, not user-specific. You must create one webhook per action, e.g. one for entry, one for take profit, one for stop loss, etc. for every bot or order

### Supported order and bot actions

If you want your order or bot to be **triggered by a webhook**, you must select webhook as the **trigger condition during setup**. This applies to:

* Stop-market / stop-limit orders trigger
* Trailing orders activation (trailing start)
* Take-profit and stop-loss triggers&#x20;
* DCA bots entry condition

<figure><img src="/files/jObwqe4rCZIAf6piZqsQ" alt="" width="563"><figcaption></figcaption></figure>

<figure><img src="/files/ZcSJ8FZyq4aHUtD2IGgv" alt="" width="563"><figcaption></figcaption></figure>

After creation, you’ll find all available webhook URLs in the **Details** of your order or bot:

<figure><img src="/files/FmqLx0L0WSyFsRJU5hEk" alt="" width="563"><figcaption></figcaption></figure>

<figure><img src="/files/7UUyrPG8oY71Am7ICMKM" alt="" width="563"><figcaption></figcaption></figure>

> **Cancel** webhook — always available in all orders and bots
>
> **Close position** webhook — always available in DCA bot details

To sum up:

| Action                          | Supported? | Notes                                             |
| ------------------------------- | ---------- | ------------------------------------------------- |
| Cancel order                    | ✅          | Always shown in details                           |
| Trigger Stop order              | ✅          | Must select webhook at setup                      |
| Activate Trailing order         | ✅          | Trailing start = webhook                          |
| Trigger take profit / stop loss | ✅          | Optionally webhook-triggered                      |
| DCA bot - entry                 | ✅          | Entry buy/sell via webhook (must be set at setup) |
| DCA bot - exit                  | ✅          | Close position via webhook (always available)     |
| Grid bot - entry                | 🚫         | Not yet supported                                 |

{% hint style="info" %}
**Multiple take-profit targets with webhooks**

If you set up a take-profit group using webhook as the trigger method, they will all share the same webhook URL. Each time the webhook is triggered, the next TP order in the sequence will execute — one by one.
{% endhint %}

### How to set up alerts in TradingView

Once you’ve created your order or bot in goodcryptoX and copied the webhook URL for a specific action, here’s how to link it to your TradingView alerts:

1. Go to your chart in TradingView
2. Create a new alert based on your strategy, indicator, or condition
3. In the **alert settings**, enable the checkbox **“Webhook URL”**
4. Paste in the specific webhook URL from the goodcryptoX Webhooks section
5. Leave the **message field** as-is (any content is fine — goodcryptoX ignores the payload for now)
6. Save the alert

### Repeating strategies (via DCA bot)

A webhook-triggered order (e.g. stop-market with TP and SL) is a **one-time setup**. Once the order executes and the linked TP or SL fires, the entire trade is complete. If you want this structure to **repeat automatically**, that’s not possible with orders — but it is achievable now using the DCA bot.

We will soon introduce a dedicated [TradingView strategy bot](/sex-trading/upcoming-functionality/tradingview-strategy-bot) to support repeating multi-action trades, but in the meantime, DCA bot provides a flexible way to repeat your webhook-driven strategy.

#### Pure webhook loop

To set up a bot that enters a position on a webhook, exits on a webhook, and then repeats:

1. Set **entry condition** = webhook
2. Set **averaging orders** = 0 (disable averaging)
3. Disable both **take**-**profit** and **stop-loss**
4. Enable **"Repeat on close position"**&#x20;

<figure><img src="/files/fPhyYX3S4imdApacvhUK" alt="" width="375"><figcaption></figcaption></figure>

Once the bot is launched, you’ll see the following webhook URLs under the bot's **Details → Webhooks** section:

* **Enter Buy** — opens a Long position
* **Enter Sell** — opens a Short position
* **Close position** — closes the active position (long or short)
* **Cancel** — stops the bot

**Execution logic**

* When the bot receives **Enter Buy**, it opens a long position.
* When it receives **Enter Sell**, it opens a short position.
* The bot will **only respond to the first entry webhook** it receives while idle.
* While a position is open:
  * Any further entry signals are **ignored**
  * The bot will not increase or reverse the current position on Entry signals
  * The only accepted signals are **close position** or a triggered TP/SL (if configured)
* Once the position is closed (manually, by webhook, or by SL/TP), the bot resets and waits for the next Entry webhook.

This loop continues as long as the bot remains active, allowing you to repeat a complete entry → exit → reset cycle indefinitely.

#### Pure webhook mode vs hybrid setups

The DCA bot supports multiple control layers that can be combined to build flexible strategies:

* **Entry**: via webhook, signal, or asap
* **Exit**: via webhook, or built-in price-based TP/SL
* **Averaging**: optional; can be disabled

You can:

* Run a bot entirely via webhook signals (entry and exit)
* Add price-based TP/SL as fallbacks, even if you use webhook exits
* Add averaging orders for additional protection

This makes it possible to design:

* Fully automated loop strategies (pure webhook)
* Signal-driven bots with manual failovers
* Hybrid setups with multi-layer exits

### Practical webhook strategy examples

#### Example 1: One-off order + multiple take profits (Bollinger Band bounce)

**Goal:** Buy when price breaches lower Bollinger Band, sell progressively as it climbs.

**Setup in goodcryptoX**

* Create a stop-market order with trigger condition = webhook
* Add three take-profit targets. TP trigger = webhook

<figure><img src="/files/X2jAuM8MVDwt9tMoFkIK" alt="" width="563"><figcaption></figcaption></figure>

**Setup in TradingView**

Create four alerts:

1. Price breaches lower band → send to main order's **Trigger** webhook URL
2. Price returns inside band → send to **Take Profit Trigger** webhook URL
3. Price crosses mid-band → send to **Take Profit Trigger** webhook URL
4. Price breaches upper band → send to **Take Profit Trigger** webhook URL

<figure><img src="/files/kwMzGpNxmpjWHCEswh4y" alt="" width="563"><figcaption></figcaption></figure>

In the **alert settings**, enable the checkbox **“Webhook URL”**

Paste in the specific webhook URL from the goodcryptoX Webhooks section. Leave Message field as is — it is not used.

#### Example 2: Repeating strategy with DCA bot (Golden/Death Cross)

**Goal:** Enter long on Golden Cross, enter short on Death Cross. Exit with a 10% profit or when RSI > 70 and repeat forever.

**Setup in goodcryptoX**

Create DCA bot

* Entry condition = webhook
* Averaging = off (set to 0)
* Take Profit = 10%
* Stop loss = off
* Enable: "Repeat on TP"

**Setup in TradingView**

* Create three alerts on the same chart:
  1. SMA50 crosses above SMA200 → send to **Enter Buy** webhook
  2. SMA50 crosses below SMA200 → send to **Enter Sell** webhook
  3. RSI > 70 → send to **Close position** webhook

{% hint style="info" %}
DCA bot holds only one position at a time. While in position, it ignores new entry webhooks until position is closed.

If you want to be able to enter Long and Short positions on the same instrument in parallel - create two separate bots and send Enter Buy to one and Enter Sell to the other
{% endhint %}

### Summary

| Concept            | Description                                                    |
| ------------------ | -------------------------------------------------------------- |
| Trigger model      | Each action has its own webhook URL                            |
| Setup flow         | Create order → copy webhook URL → paste into TradingView alert |
| Repeating strategy | Use DCA bot with repeat enabled                                |
| Access             | Requires PRO plan or higher                                    |

### Video tutorials

#### **Intro to webhook trading**

{% embed url="<https://youtu.be/JDkJFOwjjzk?si=m0GBGwTt6GTau-9X>" %}

#### **Using DCA bot with webhooks**

{% embed url="<https://youtu.be/gHXB2S6qdXU?si=i9ZobjRsxFAe7zcJ>" %}

#### **Multiple take-profits with webhooks**

{% embed url="<https://youtu.be/xF-O7ZDoDtU?si=apfiF8uyTn-p4Vh4>" %}


# Charts

*documentation* *coming soon...*


# Alerts

*documentation* *coming soon...*


# Upcoming functionality

The features described below are on our immediate development roadmap. The only reason they are not live yet is the team's finite throughput. Rest assured, we are doing our best to deliver them asap.


# TradingView strategy bot

*coming soon...*


---

[Next Page](/llms-full.txt/1)